
This post may contain affiliate links, which means that I may receive a commission if you make a purchase using these links, with NO additional cost to you.
Friend, can I share something with you?
Last year, I stood in my kitchen at 6 AM, staring at another failed loaf of what was supposed to be gluten-free sourdough bread. It looked more like a brick than breakfast. My husband needed to be at work, the kids were asking for cereal we didn’t have, and I felt like I was failing at the one thing I thought I could control—feeding my family well on our tight budget.
Maybe you’ve been there too. You want to make nourishing bread for your family, but gluten-free baking feels like a mystery wrapped in expensive flour blends that don’t always work.
Here’s what I’ve learned after countless loaves (and yes, some failures): making gluten-free sourdough isn’t just possible—it’s actually simpler than you think once you understand the basics.
Why Gluten Free Sourdough is Worth the Learning Curve
When you’re managing a tight farm budget, every grocery dollar matters. A good loaf of gluten-free bread at the store can cost $6-8. This recipe uses simple pantry staples you probably already buy in bulk—even whole grains you can mill yourself—and it tastes better than anything you’ll find on the shelf.
Plus, there’s something deeply satisfying about pulling a golden, crusty loaf from your own oven. It’s one of those small victories that can brighten even the toughest farm day.
The Secret to Gluten Free Sourdough Success
Here’s the thing most recipes don’t tell you: gluten-free sourdough behaves differently than regular sourdough. It won’t double in size like wheat dough, and it needs a little extra help to get that perfect texture.
The game-changer? Psyllium husk. It acts like the glue that wheat gluten would normally provide, giving your bread structure without the gumminess that plagues many gluten-free loaves.
My Go-To Gluten Free Sourdough Recipe
This is the recipe I’ve refined over months of trial and error. It’s forgiving, works with ingredients you can actually find, and produces a loaf that even my wheat-eating neighbors ask for.
What You’ll Need:
- 320g warm filtered water
- 10g psyllium husk powder (this is your secret weapon)
- 15g maple syrup or honey (what you have on hand works fine)
- 150g active gluten-free sourdough starter
- 310g gluten-free flour blend (1:1 baking blend works great, OR use 206g fresh ground grains + 103g starch such as potato starch)
- 9g sea salt
Farm wife tip: If you mill your own grains like I do (oats and brown rice work beautifully), use a ratio of 2/3 milled grain to 1/3 starch. For this recipe, that’s 206g milled grain + 103g potato starch.
Step-by-Step Instructions:
- Create Your Gel (5 minutes) Mix the warm water, psyllium husk, and maple syrup in a measuring cup. Let it sit while you measure everything else—it’ll turn into a gel that gives your bread amazing texture.
- Mix Your Dough (10 minutes)
- Combine flour and salt in a large bowl
- Add your psyllium mixture, then fold in your active starter
- Mix until it comes together (I use a wooden spoon or spatula, but a dough whisk also works)
- If it’s still sticky, add flour 1 tablespoon at a time
- Shape and Proof (3-6 hours, mostly hands-off)
- Form into a round on a lightly floured surface
- Place smooth-side down in a banneton or towel-lined bowl
- Cover and let rise 2½-3 hours at room temperature
Busy day hack: Start this after breakfast, and it’ll be ready to bake when you come in for lunch. For overnight rising, place formed dough in the fridge and bake first thing in the morning.
- Bake to Golden Perfection (1½ hours)
- Preheat your Dutch oven to 425°F
- Turn dough onto parchment or dough sling, score the top
- Bake covered 45-50 minutes, then uncovered at 400°F for 35-50 minutes until golden
The hardest part? Waiting for it to cool completely before slicing. Trust me on this—it’s worth the wait for that perfect texture.
What to Expect (and What Not to Worry About)
Your gluten-free dough won’t look like wheat dough, and that’s okay. It won’t double in size, and the texture will be different before baking. These are normal signs you’re doing it right, not wrong.
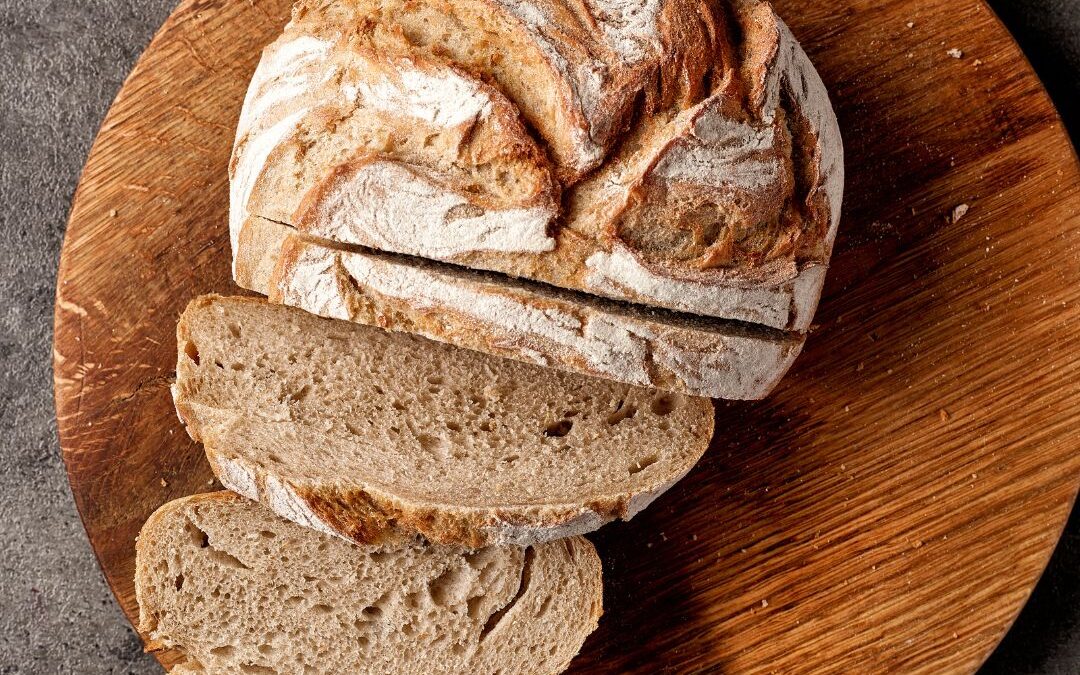
The finished loaf should have a golden crust and a tender, slightly dense crumb—perfect for morning toast with farm-fresh butter or hearty sandwiches for field work.
Making This Work for Your Family
Storage: Wrap in a tea towel and keep on the counter for 2-3 days, or slice and freeze for quick breakfast toast.
Budget tip: Buy psyllium husk and flour in bulk if possible. I get mine from Azure Standard along with other pantry staples—it makes a real difference in the cost per loaf.
Time-saving trick: Make two loaves at once and freeze one. Future you will thank present you.
When Things Don’t Go as Planned
If your first loaf isn’t perfect, don’t give up. Even my “failures” made decent breadcrumbs for meatloaf.
The most common issue? Under-proofing. Gluten-free dough needs that full minimum 2½-3 hours to develop properly, even if it doesn’t look dramatically different.
Final Thoughts
Friend, I know how overwhelming it can feel to add one more thing to your already full plate. But this bread—once you get the hang of it—becomes one of those simple rhythms that actually brings peace to your week.
There’s something grounding about working with your hands, creating something nourishing for the people you love, and knowing you’re stretching those grocery dollars a little further.
You’ve got this. And if you try this recipe, I’d love to hear how it turns out for you.
What’s your biggest challenge with gluten-free baking? Drop a comment below—I read every one.
P.S. If you’re looking for the best home flour mill, I recommend the KoMo mills for consistent results every time.
As I’ve grown as an entrepreneur, mom, gardener, and livestock owner, I struggled to find a planner that met my needs and kept me organized. So, I MADE MY OWN. You can look at it on the link below and buy it on Amazon.
Don’t want the whole calendar part? I got you! I pulled the gardening and animal care pages out and put them in a book all their own.
Wanting a community to lean into? Join the FREE Thriving Through Farm Life: Wife’s Support Network! In our community, we embrace the challenges of farm life and provide a supportive space for wives facing the complexities of managing a family farm. Whether you’re navigating financial pressures, day-to-day operations, or seeking ways to create a thriving home, we’re here for you. Explore garden and preservation tips for cultivating your oasis, share insights on animal care, and discover practical family budgeting strategies. Together, let’s grow through challenges, flourish authentically, and sow the seeds for a resilient and thriving farm life. Join us on this journey of resilience and abundance!
Starting a garden doesn’t have to be hard! I gathered all the tips I’ve learned over my gardening seasons and made them into a simple course to jump-start your gardening life.