
This post may contain affiliate links, which means that I may receive a commission if you make a purchase using these links, with NO additional cost to you.
Friend, I know you’re juggling a million things right now. Between the farm, the kids, and stretching every dollar, adding homemade bread to your routine might feel impossible. But here’s the truth I’ve learned: a thriving sourdough starter is like having a faithful farm hand—once established, it works for you, not against you.
Starting with a dried sourdough starter gives you a head start, like planting with good seed instead of hoping something takes root. This simple 5-day process will have you baking nourishing, gluten-free bread that saves money and feeds your family well.
What You’ll Need (Simple Pantry Staples)
- Dried gluten-free sourdough starter (10g packet)
- Brown rice flour (I grind my own from Azure Standard grains)
- Gluten-free oat flour (fresh ground works best)
- Filtered water (lukewarm)
- Basic kitchen scale (essential for consistency)
- Clean mason jar with loose lid
- Rubber spatula
- Optional: Cheesecloth and rubber band
Pro tip: I keep my brown rice and oats pre-mixed 50/50 and grind them fresh. It’s one less decision to make on busy mornings.
Your 5-Day Starter Journey
Day 1: Gentle Rehydration
Your packet contains 10 grams of starter—enough to share or save half for later. Start with 5g in a clean pint-sized mason jar.
Add 25g lukewarm filtered water and let it sit for 5 minutes. This gentle rehydration is like giving a thirsty plant its first drink.
Stir in 10g brown rice flour and 10g oat flour until well combined. Scrape down the sides (this becomes habit). Cover with cheesecloth or a loose lid.
Fun touch: Give your starter a name. Mine’s called “Gertrude”—a good strong old name, like the sourdough tradition.
Day 2-4: Building Strength
Your starter will look smooth with few bubbles—this is perfectly normal. Like a newborn, it’s gathering strength.
No need to discard yet. Simply add:
- 12.5g brown rice flour
- 12.5g oat flour
- 25-30g lukewarm water
Stir well and scrape sides. You want pancake batter consistency. By Day 4, mark your starter’s level with a rubber band—watching it rise becomes the highlight of your day.
Day 5: The Big Feed (Your Starter is Growing Up!)
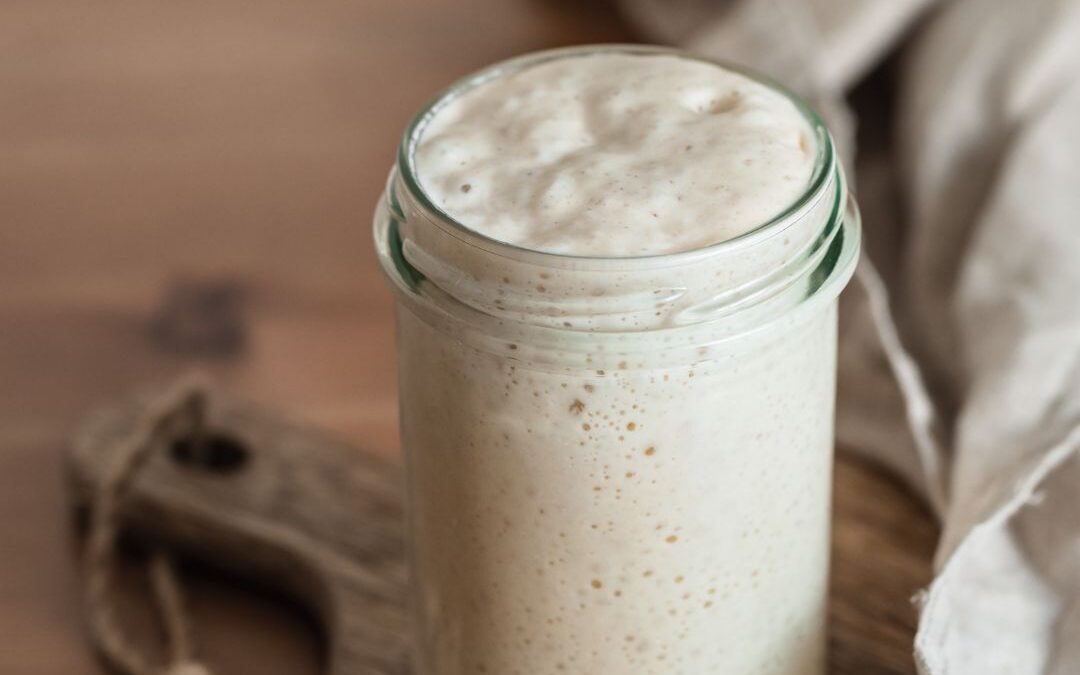
This is where the magic happens. Your starter should smell like a bakery—yeasty and wonderful. She’s ready for more responsibility.
Time to discard: Remove all but 50g of starter (save the discard for pancakes or crackers—waste not, want not).
Add:
- 25g brown rice flour
- 25g oat flour
- 50g lukewarm water
Troubleshooting tip: If your starter seems too liquidy and won’t rise well, reduce water by 5-10g. Different flours behave differently, just like different soil holds water differently.
Maintaining Your Sourdough Starter Long-Term
Once established, your starter becomes incredibly forgiving:
- Daily feeding: For active bread making (ideal ratio: 1:1:2 starter:flour:water)
- Weekly maintenance: Keep in fridge, feed when you remember
- Seasonal adjustments: Summer starters are more active; winter ones need extra warmth
When is your starter ready for bread? When it doubles in size consistently. This usually happens between days 5-14. Speed things up by placing it in the oven with just the light on.
Building Levain for Bread Making
Before baking, feed your starter 1-2 times in 24 hours. For most recipes requiring 150g active starter:
In a separate container, combine:
- 50g active starter
- 50g gluten-free flour blend
- 50g warm water
Let it double before using in your recipe.
This levain method gives you the best bread results, but let’s be real—some days you just need bread on the table. You can absolutely feed your starter and use it the same day. It will be just fine, and your family will still think you’re amazing.
Why This Matters for Your Family
Every loaf you bake is money saved and health invested. When grocery budgets are tight, knowing you can create nourishing bread from simple ingredients brings such peace. Your children will remember the smell of fresh bread cooling on the counter—that’s wealth money can’t buy.
Your sourdough starter isn’t just about bread. It’s about resilience, tradition, and the satisfaction of creating something beautiful with your own hands.
Ready to start? Trust the process, give yourself grace, and remember—even if it doesn’t work perfectly the first time, you’re learning a skill that will serve your family for generations.
What questions do you have about starting your gluten-free sourdough journey? I’d love to hear from you in the comments below.
As I’ve grown as an entrepreneur, mom, gardener, and livestock owner, I struggled to find a planner that met my needs and kept me organized. So, I MADE MY OWN. You can look at it on the link below and buy it on Amazon.
Don’t want the whole calendar part? I got you! I pulled the gardening and animal care pages out and put them in a book all their own.
Wanting a community to lean into? Join the FREE Thriving Through Farm Life: Wife’s Support Network! In our community, we embrace the challenges of farm life and provide a supportive space for wives facing the complexities of managing a family farm. Whether you’re navigating financial pressures, day-to-day operations, or seeking ways to create a thriving home, we’re here for you. Explore garden and preservation tips for cultivating your oasis, share insights on animal care, and discover practical family budgeting strategies. Together, let’s grow through challenges, flourish authentically, and sow the seeds for a resilient and thriving farm life. Join us on this journey of resilience and abundance!
Starting a garden doesn’t have to be hard! I gathered all the tips I’ve learned over my gardening seasons and made them into a simple course to jump-start your gardening life.
Grab the Gardening Basics Course