This post may contain affiliate links, which means that I may receive a commission if you make a purchase using these links, with NO additional cost to you.
Winter can feel like a strange season on the farm. After the non-stop hustle of summer planting and fall harvests, suddenly, the pace changes. The shorter days and bitter cold force us inside, stripping away the tasks that filled every waking moment. It’s easy to feel restless—like we should do something, keep moving, stay productive. But what if winter wasn’t just a pause? What if it was an invitation to rest and rebuild?
The truth is, farming is exhausting. It pulls at every corner of your life—your time, your emotions, your energy. And when you layer that with the heavy weight of finances, kids, and the constant unknowns, it’s no wonder farm life can feel overwhelming. What if you stopped fighting the season and embraced its slower rhythm instead? What if you carved out space for rest and created habits of renewal that could carry you into the spring full of energy and perspective?
Why Rest Matters for You (and Your Farm)
For farm wives like us, rest often feels like a luxury. How can we pause when there’s always something to worry about, plan for, or do? But here’s what I've learned—rest is essential. When we take time to recharge, we’re not only better for ourselves, but also for the things and people that matter most—our kids, our husbands, and even the farm itself.
Winter rest isn’t just about sleeping more (though that’s important too!). It’s about creating intentional spaces where you can breathe, think, and feel replenished. Choosing rest allows your mind and body to reset—and that enables you to tackle the demands of the farm and home with strength and clarity.
But this kind of rest doesn’t just happen. It takes intention, and yes, sometimes it feels counterintuitive. But trust me, it’s worth it.
3 Simple Strategies to Find Rest This Winter
Here are a few ways you can pause, breathe, and find peace this season:
1. Designate Time for Rest Every Day
Your days may still be full of tasks, even in the winter, but finding moments just for you is key. Choose a time each day, even if it’s just 15 or 20 minutes, and dedicate it to rest. Do something you love—read a few pages of a book, sip your coffee while it's still hot, or even just sit in silence. These moments can become a recharging ritual that reminds you to slow down and tune into yourself.
If you’re worried about “wasting time,” remember this isn’t selfish. Resting makes you a better mom, wife, and farmer. By giving a little time back to yourself, you’re investing in your ability to show up fully for everything else.
2. Do Something Fun (Just for You!)
When was the last time you enjoyed something? Winter is the perfect time to rediscover that joy. Maybe it’s baking a new recipe, working on a puzzle, dusting off a craft project, or even organizing that one drawer you know will make you feel accomplished once it's done. Choose something small but meaningful—something that reminds you, life isn’t just about getting things done, but also about finding moments of simple pleasure.
And if you feel guilty about spending time on yourself, ask yourself this: What kind of example do you want to set for your kids? Showing them that it’s okay to take time to breathe and enjoy life teaches them an invaluable lesson about balance.
3. Reconnect with Your Purpose
Winter gives us something summer rarely does—space to reflect. Use this quiet time to reconnect with what matters most in your life. Pray, journal, or just sit with your thoughts about the year behind you and the one ahead. What are the things you're most grateful for? What challenges taught you the most? And what do you want to focus on moving forward?
This kind of reflection nourishes your spirit. It reminds you of everything you’ve already accomplished, even when life feels overwhelming. It’s also an opportunity to dream—because even on the hard days, you’re building something beautiful for your family.
A Gentle Reminder
I know life as a farm wife often feels heavy. The debts, the uncertainty, and the sheer amount of work can feel like too much. But friend, you don’t have to carry it all alone. And you don’t have to have it all together all the time. Winter is whispering for you to pause, to rest, and to trust in the rhythm that God has given us—a rhythm that includes seasons of both work and restoration.
You are doing an incredible job. Even when it feels like nothing is going right, you’re showing up for your family, your farm, and your faith. And that matters.
So this winter, instead of resisting the slow, lean into it. Give yourself permission to rest—not just for a day, but as a regular habit. Because when spring comes (and it always does), you’ll be ready. And not just to keep going, but to thrive.
Start Your Rest Routine Today
Are you ready to try this? This week, pick one small habit to incorporate into your day—whether that’s 15 minutes of quiet in the morning, a fun craft project in the afternoon, or a reflective journal session in the evening.
You are worth this time, and so is your family. Trust me—rest isn’t just good for you, it’s necessary to create the thriving home and farm you dream of.
You’ve got this, friend, and I’m cheering for you every step of the way.
As I've grown in my journey as an entrepreneur, mom, gardener, and livestock owner, I struggled to find a planner that met my needs and kept me organized. So, I MADE MY OWN. You can look at it on the link below and buy it on amazon below.
Don't want the whole calendar part? I got you! I pulled the gardening and animal care pages out and put them in a book all their own.
Wanting a community to lean into? Join the FREE Thriving Through Farm Life: Wife’s Support Network! In our community, we embrace the challenges of farm life and provide a supportive space for wives facing the complexities of managing a family farm. Whether you're navigating financial pressures, day-to-day operations, or seeking ways to create a thriving home, we're here for you. Explore gardening and preserving tips for cultivating your own oasis, share insights on animal care, and discover practical family budgeting strategies. Together, let's grow through challenges, flourish authentically, and sow the seeds for a resilient and thriving farm life. Join us on this journey of resilience and abundance!
Starting to garden doesn't have to be hard! I gathered all the tips I've learned over my gardening learning curve and made them into a simple course to jump start your gardening your life.
I've had 3 very different pregnancies. After the first traumatic birth, I learned better and how to care for my body naturally and prevent common pregnancy and birth problems before they arise. This quick course will get you the tools you need to have a naturally healthy pregnancy, labor, and delivery. My first pregnancy I had a normal western medicine all the things pregnancy. My second? I flipped to completely natural, no medicine. Bonus: Preventing Preeclampsia Without the Aspirin & Healing from Birth Trauma
This post may contain affiliate links, which means that I may receive a commission if you make a purchase using these links, with NO additional cost to you.
Winter can be a challenging time for farm wives. With kids stuck inside, more messes to manage, less sunshine, and the added weight of farm responsibilities, it can feel overwhelming. However, there are ways to find peace and create a nurturing environment for yourself and your family during these colder months.
Understanding the Challenges
Being a passionate and busy farm wife, encounters numerous challenges in winter:
- Children Indoors: Kids are used to playing outside but are now confined indoors, leading to more cleanup and clutter.
- Laundry Piles: More layers mean more laundry, and mud seems to sneak in despite everyone’s best efforts.
- Less Sunlight: With less sunshine comes reduced Vitamin D, affecting mood and energy levels.
- Dietary Changes: Holiday parties often lead to more sugary treats, which can impact everyone's mood and health.
Practical Tips for Cultivating Peace
1. Maintain a Daily Cleanup Routine
Choose your spaces wisely. Prioritize tidiness in areas where you spend the most time, like your bedroom and kitchen. A clean retreat can work wonders for your peace of mind.
2. Designate Space for Play
Organize a specific area for toys and activities. This minimizes clutter and creates a designated "messy zone," allowing other areas in the home to stay tidy and welcoming.
3. Seek Sunlight and Fresh Air
Bundle up and make the effort to get outside, even if it's only for a few minutes each day. Natural sunlight and fresh air can do wonders for your mood.
4. Supplement with Vitamin D
Don't hesitate to take Vitamin D supplements if you're feeling the lack of sunlight. This simple addition can be a great boost to your energy and overall mood.
5. Simplify Your Meal Planning
Plan your meals to include easy, nutritious options. Utilize leftovers to reduce waste and labor. Start your day with a healthy breakfast to fuel yourself properly.
6. Use the 30/30/30 Rule
When you're in a slump, try the 30/30/30 routine. Consume 30 grams of protein within 30 minutes of waking up, followed by 30 minutes of exercise. It’s a simple yet effective way to boost your energy and mood. For example, I start the day with 2 eggs and a half of my morning coffee as milk, then doing my morning animal chores.
Finding Hope and Encouragement
It’s important to remember that while you face unique challenges, you’re not alone. Every small step you take contributes to a more peaceful and loving home environment. Seek guidance and lean into your community for support.
Keep an anchor in God’s word and even amidst financial constraints and the frustrations of farm life, you have the strength to create a nurturing and welcoming home. Allow yourself grace and recognize that progress may be slow but is indeed achievable.
Finally, consider connecting with groups or online communities of other farm wives who share your experiences. Sharing stories and tips can offer invaluable insight and camaraderie.
You have the potential to transform not only your home but also the lives of those in it. Remember, every season has its challenges and its beauty. With resilience and resourcefulness, winter can be a time of growth and togetherness in your home
As I've grown in my journey as an entrepreneur, mom, gardener, and livestock owner, I struggled to find a planner that met my needs and kept me organized. So, I MADE MY OWN. You can look at it on the link below and buy it on amazon below.
Don't want the whole calendar part? I got you! I pulled the gardening and animal care pages out and put them in a book all their own.
Wanting a community to lean into? Join the FREE Thriving Through Farm Life: Wife’s Support Network! In our community, we embrace the challenges of farm life and provide a supportive space for wives facing the complexities of managing a family farm. Whether you're navigating financial pressures, day-to-day operations, or seeking ways to create a thriving home, we're here for you. Explore gardening and preserving tips for cultivating your own oasis, share insights on animal care, and discover practical family budgeting strategies. Together, let's grow through challenges, flourish authentically, and sow the seeds for a resilient and thriving farm life. Join us on this journey of resilience and abundance!
Starting to garden doesn't have to be hard! I gathered all the tips I've learned over my gardening learning curve and made them into a simple course to jump start your gardening your life.
I've had 3 very different pregnancies. After the first traumatic birth, I learned better and how to care for my body naturally and prevent common pregnancy and birth problems before they arise. This quick course will get you the tools you need to have a naturally healthy pregnancy, labor, and delivery. My first pregnancy I had a normal western medicine all the things pregnancy. My second? I flipped to completely natural, no medicine. Bonus: Preventing Preeclampsia Without the Aspirin & Healing from Birth Trauma

This post may contain affiliate links, which means that I may receive a commission if you make a purchase using these links, with NO additional cost to you.
I see you, fellow farm wife. I understand the relentless schedule, the unexpected interruptions from kids and livestock, and the stress of equipment breaking down when you least expect it. You’re juggling family dynamics, overpacked schedules, and the pressure to keep everything running smoothly on the farm. It’s no wonder you feel overwhelmed at times.
But take heart—there is hope for building a daily practice of calm that can transform your life on the farm.
Begin with a Moment of Pause and Prayer
In the chaos of farm life, taking a moment to pause and pray can be a powerful tool. Even a few minutes in the morning can reset your mind and spirit, grounding you in gratitude and strength from God. You might find that this simple practice starts your day on a more peaceful note, equipping you to handle whatever comes your way with grace that can only come from God.
Schedule Time for Yourself
I know it seems impossible to carve out time just for you, especially with so many demands on your shoulders. But even a 30-minute window to enjoy a book or simply sit in silence can rejuvenate you. Schedule this time as you would an important meeting—because it is. It’s a meeting with yourself that nurtures your wellbeing, allowing you to continue to pour into your family and farm from a full cup instead of empty. Train your children to also have a quiet time at the same time helping everyone reset for the rest of the day.
Simplify and Prioritize
In the face of a packed schedule and endless commitments, it’s crucial to prioritize your tasks and simplify where possible. Ask yourself what truly matters today. Is it more important to check off every task on your list, or to be present with your family? Give yourself permission to say no to commitments that don’t serve your immediate needs, freeing up space for what truly counts.
Acknowledge Your Achievements
At the end of each day, take a moment to reflect on what you’ve accomplished. It’s easy to get lost in what remains undone, but acknowledging your achievements, no matter how small, builds a sense of progress and positivity. Whether it’s a successful harvest, a meaningful conversation with your spouse, or simply getting through the day, celebrate those victories.
Join a Community of Support
Remember, you are not alone on this journey. Reach out and connect with other farm wives who understand your challenges. Sharing experiences, advice, and encouragement can provide a sense of community and shared strength. Together, you can uplift each other, finding comfort in the knowledge that you’re all navigating similar paths. The Thriving Through Farm Life Support Network on Facebook is a good place to start.
Finding calm in the whirlwind of farm life isn’t easy, but it is possible. By incorporating these practices into your daily routine, you can begin to experience a shift towards a more peaceful, fulfilled life. Remember, dear farm wife, you are resilient and capable. With each step, you’re not just surviving—you’re working towards a thriving life for yourself and your family.
Take a deep breath, and know that you’re doing an incredible job. Here’s to finding calm on your farm.
Wanting a community to lean into? Join the FREE Thriving Through Farm Life: Wife’s Support Network! In our community, we embrace the challenges of farm life and provide a supportive space for wives facing the complexities of managing a family farm. Whether you're navigating financial pressures, day-to-day operations, or seeking ways to create a thriving home, we're here for you. Explore gardening and preserving tips for cultivating your own oasis, share insights on animal care, and discover practical family budgeting strategies. Together, let's grow through challenges, flourish authentically, and sow the seeds for a resilient and thriving farm life. Join us on this journey of resilience and abundance!
As I've grown in my journey as an entrepreneur, mom, gardener, and livestock owner, I struggled to find a planner that met my needs and kept me organized. So, I MADE MY OWN. You can look at it on the link below and buy it on amazon below.
Don't want the whole calendar part? I got you! I pulled the gardening and animal care pages out and put them in a book all their own.
Starting to garden doesn't have to be hard! I gathered all the tips I've learned over my gardening learning curve and made them into a simple course to jump start your gardening your life.
I've had 3 very different pregnancies. After the first traumatic birth, I learned better and how to care for my body naturally and prevent common pregnancy and birth problems before they arise. This quick course will get you the tools you need to have a naturally healthy pregnancy, labor, and delivery. My first pregnancy I had a normal western medicine all the things pregnancy. My second? I flipped to completely natural, no medicine. Bonus: Preventing Preeclampsia Without the Aspirin & Healing from Birth Trauma

This post may contain affiliate links, which means that I may receive a commission if you make a purchase using these links, with NO additional cost to you.
The holiday season is upon us, bringing with it the joy of celebrations and the warmth of family gatherings. But for many farm wives, this time of year also comes with its own set of challenges. The weather swings unpredictably, garden cleanup becomes urgent, and the extra cooking and parties pile on. While the farm’s workload may slow, the holiday hustle doesn't. And amidst all this, finding a moment to breathe can seem impossible.
If you're feeling overwhelmed by the season's demands, remember—you are not alone. Let's explore some easy and simple self-care tips to help you find moments of peace and recharge during this bustling time.
Prioritize Devotional Time
In the midst of managing a farm and a household, it can be easy to lose sight of what truly grounds us. Carving out time for devotion and prayer can be a powerful way to reconnect with your faith and center yourself. Try setting aside even just 10 minutes each morning for reading and prayer. Use this time to express gratitude for the blessings in your life and seek strength for the challenges ahead.
Engage in Relaxation Activities
Taking time to relax is not a luxury—it’s a necessity. Find activities that help you unwind and incorporate them into your routine. Whether it's enjoying a warm bath after a long day, listening to your favorite music while preparing meals, or curling up with a good book once the kids are asleep, these moments are vital for your well-being. Remember, relaxation doesn’t have to be time-consuming to be effective.
Reset Your Nervous System
With the constant busyness of the holiday season, your body and mind might be in overdrive. Taking intentional steps to reset your nervous system can help alleviate stress and bring you back to a state of calm. Consider practicing deep breathing exercises, stretching, or yoga. Even a quick dance party with your kids can work wonders in clearing your mind and soothing your spirit.
Create a Flexible Schedule
Flexibility can be your best friend during the holidays. With everything on your to-do list, try creating a schedule that allows room for spontaneity and change. Prioritize tasks but leave gaps for unexpected needs or opportunities to rest. This way, you maintain control over your time without feeling boxed in by a rigid plan.
Foster a Loving Environment
Your home is a haven for you and your family. Creating an inviting atmosphere doesn’t have to come with a hefty price tag. Simple touches like homemade decorations, family movie nights, or baking cookies with the kids can fill your home with warmth and togetherness, emphasizing love and connection over perfection and expense.
Connect with Your Community
Remember, you’re part of a larger community of farm wives who share similar experiences and challenges. Reach out to friends or family members for support, or join local groups where you can share stories, advice, and encouragement. Sometimes, just knowing others understand can relieve stress and foster a sense of belonging.
Looking Ahead with Hope
The holiday season can be a wonderful time of celebration, but it’s important to take care of yourself amidst the whirlwind. By incorporating these self-care practices into your routine, you can find moments of peace and recharge, allowing you to enjoy the holidays with a renewed sense of joy and strength.
Remember, self-care is not selfish—it's essential. By taking care of yourself, you’re better equipped to love and support those around you, including your husband, children, and the farm. Here’s to a holiday season filled with peace, love, and endless possibilities for growth and transformation. You’ve got this.
Wanting a community to lean into? Join the FREE Thriving Through Farm Life: Wife’s Support Network! In our community, we embrace the challenges of farm life and provide a supportive space for wives facing the complexities of managing a family farm. Whether you're navigating financial pressures, day-to-day operations, or seeking ways to create a thriving home, we're here for you. Explore gardening and preserving tips for cultivating your own oasis, share insights on animal care, and discover practical family budgeting strategies. Together, let's grow through challenges, flourish authentically, and sow the seeds for a resilient and thriving farm life. Join us on this journey of resilience and abundance!
As I've grown in my journey as an entrepreneur, mom, gardener, and livestock owner, I struggled to find a planner that met my needs and kept me organized. So, I MADE MY OWN. You can look at it on the link below and buy it on amazon below.
Don't want the whole calendar part? I got you! I pulled the gardening and animal care pages out and put them in a book all their own.
Starting to garden doesn't have to be hard! I gathered all the tips I've learned over my gardening learning curve and made them into a simple course to jump start your gardening your life.
I've had 3 very different pregnancies. After the first traumatic birth, I learned better and how to care for my body naturally and prevent common pregnancy and birth problems before they arise. This quick course will get you the tools you need to have a naturally healthy pregnancy, labor, and delivery. My first pregnancy I had a normal western medicine all the things pregnancy. My second? I flipped to completely natural, no medicine. Bonus: Preventing Preeclampsia Without the Aspirin & Healing from Birth Trauma

This post may contain affiliate links, which means that I may receive a commission if you make a purchase using these links, with NO additional cost to you.
Life on the farm can feel like riding a rollercoaster—thrilling at times, but often overwhelming and unsteady. For many farm wives, the chaos becomes a constant companion. Juggling the business side of farming, family responsibilities, and financial insecurity can leave you feeling exhausted and defeated. Yet, amidst the storm, there is a beacon of hope and peace that can guide you through—your faith.
The Power of Faith in Turbulent Times
Recently, our local church has been sharing a sermon series on peace, which couldn't have come at a better time for me personally. We’re navigating major life changes, from restructuring farming operations to launching new ventures, all while trying to maintain balance and structure at home. Here's an insight into how faith can anchor you during these turbulent times, summarized through the acronym PEACE:
P - Prayer
God knows your storm is coming before you get to it. Just as the disciples set out on the lake before the storm, Jesus is there with you. Peace is not an escape from the storm, but being with God in the storm. Peace comes from God. Prayer is talking with him. It helps us identify our needs and see where God meets us.
E - Evangel You
The world is full of noise, but whose voice are you listening to? Remind yourself of what God has said and done in your life. Reflect on the Good News and the blessings that have come your way. These reflections can be your source of strength and positivity, helping you counter the negativity around you.
A – Abide
Avail, to take advantage of what has been offered. Remember the story of Peter walking on water—fear overtook him despite Jesus being right there. Choosing to avail yourself means actively seeking and accepting God’s help, even when fear threatens to drown you.
C - Co-Journeyers
This is the one I have felt the most in the past year. The point of the church is not to tell you how to live for Jesus. You have the Bible for that. The church community is there to encourage each other. To praise when you can't, to pray when you can't find the words. We gather even when we have nothing to give, so those that do, can point us back to God and reconnect. We journey with others in community, to encourage one another and point them back to God.
Yes, there have been Sundays I simply stood there and listened to the songs. I didn't have the voice to sing praise. You know what happened? By the end of the service, I had reconnected with God. God reminded me who He is and what he has done.
E - Expanding the Kingdom
True peace comes when we shift focus from ourselves to the work God created us to do. Invest in those around you—your family, friends, and community. Remember, the only treasures you take to heaven are the people you've touched and brought to faith along the way.
Trusting God’s Timing
It’s okay to question and wonder why you face certain struggles; even the Bible is full of such stories (check out Job and Habakkuk). Acknowledge your questions and be open to God’s answers, trusting that He knows and is in charge of the timeline better than we can imagine
You may face financial insecurities and feel overwhelmed, but remember, peace is possible. Apply these principles of PEACE to live authentically and resiliently. Prioritize prayer, seek supportive communities, and continually remind yourself of God's presence and promises.
Will you trust God's timing? Even though I have nothing, I will rejoice in the LORD. Habakkuk 3:17-18 paraphrased.
You can thrive instead of just surviving. Create a home filled with love and comfort—a safe haven for your family amidst life's storms. With faith as your anchor, peace is within reach.
Wanting a community to lean into? Join the FREE Thriving Through Farm Life: Wife’s Support Network! In our community, we embrace the challenges of farm life and provide a supportive space for wives facing the complexities of managing a family farm. Whether you're navigating financial pressures, day-to-day operations, or seeking ways to create a thriving home, we're here for you. Explore gardening and preserving tips for cultivating your own oasis, share insights on animal care, and discover practical family budgeting strategies. Together, let's grow through challenges, flourish authentically, and sow the seeds for a resilient and thriving farm life. Join us on this journey of resilience and abundance!
As I've grown in my journey as an entrepreneur, mom, gardener, and livestock owner, I struggled to find a planner that met my needs and kept me organized. So, I MADE MY OWN. You can look at it on the link below and buy it on amazon below.
Don't want the whole calendar part? I got you! I pulled the gardening and animal care pages out and put them in a book all their own.
Starting to garden doesn't have to be hard! I gathered all the tips I've learned over my gardening learning curve and made them into a simple course to jump start your gardening your life.
Supporting Your Family Naturally from the Inside Out community!! This community is for Mommas, looking to Support Your Family from Nature for Wellness. Tips range from nutrition, herbals, detoxing, natural cleaning, and essential oils. Basically, all the things I’ve learned slowly over the past 5+ years of my journey. We have moved off Facebook, to better serve our community and be able to discuss openly options for providing for your family in the best way possible.
Join the FREE Community
Join the FREE Community
I've had 3 very different pregnancies. After the first traumatic birth, I learned better and how to care for my body naturally and prevent common pregnancy and birth problems before they arise. This quick course will get you the tools you need to have a naturally healthy pregnancy, labor, and delivery. My first pregnancy I had a normal western medicine all the things pregnancy. My second? I flipped to completely natural, no medicine. Bonus: Preventing Preeclampsia Without the Aspirin & Healing from Birth Trauma

This post may contain affiliate links, which means that I may receive a commission if you make a purchase using these links, with NO additional cost to you.
Winter mornings on the farm can be brisk, especially when you're out feeding the animals. After a particularly blustery morning, I found myself longing for some hot chocolate to warm up my soul. My little ones were all too eager to join in this cozy treat. However, there's a twist—at the time both my toddler and I need to avoid dairy.
A Simple Solution for Dairy-Free Comfort
In the past, my mom would make a big batch of hot chocolate on the stove, but with just the three of us, that seemed excessive. I rummaged through my recipe box, hoping to find something adaptable, and luckily, I found two gems—a hot chocolate mix and a stovetop recipe. The mix was too dairy-heavy, but the stovetop recipe? Perfectly adaptable!
Crafting the Perfect Dairy-Free Mix
Here's how I created a delightful dairy-free hot chocolate mix, just the right size for our little family:
Ingredients for the Mix
- 6 parts sugar (coconut sugar works great if you're looking for a healthier option)
- 1 part cocoa powder
- A dash of cinnamon and nutmeg for added warmth and flavor
Instructions
- Layer the ingredients in an airtight container, starting with sugar, followed by cocoa, and then the spices. Fill until the container is about ¾ full.
- Secure the lid and give it a good shake to mix everything together.
This is excellent to keep on hand for my oldest to grab and make for herself or her siblings now if I'm busy.
Making the Hot Chocolate
Now, for the magic part—turning this mix into a comforting cup of hot chocolate:
Ingredients for One steaming Cup (split in half for small kids)
- ½ cup water (for a richer flavor skip the water and just use milk)
- ½ cup of your favorite milk alternative (I used almond milk)
- 1 teaspoon vanilla extract
- 1 tablespoon of the hot chocolate mix
Instructions
- Heat the milk alternative and vanilla in a pan on the stove while bringing water to a boil. In hindsight, you can combine these steps to save time.
- Ensure the milk is hot but not boiling, stirring frequently to prevent scalding.
- Place 1 tablespoon of the mix into the pan and mix in.
- Fill the mugs with the hot milk mixture.
- Sip and enjoy!
A Cozy Treat for the Family
We still enjoy this recipe four years later. The only thing I have changed is we now use raw A2/A2 milk from our family milk cow instead of milk alternatives. I will bribe the kids to help me finish something outside in exchange for a cup of hot chocolate when we are done.
Creating moments like these is what makes the hard work on the farm worthwhile. It’s about finding small pleasures and adapting to our needs, without letting constraints hold us back.
If you're navigating similar challenges, know that you're not alone. Together, we can find warmth and comfort in the little things, even on tight budgets and busy schedules. Here's to sweet, nurturing moments with our loved ones.
Join the Thriving Through Life group on Facebook linked below for likeminded community support and encouragement.
Wanting a community to lean into? Join the FREE Thriving Through Farm Life: Wife’s Support Network! In our community, we embrace the challenges of farm life and provide a supportive space for wives facing the complexities of managing a family farm. Whether you're navigating financial pressures, day-to-day operations, or seeking ways to create a thriving home, we're here for you. Explore gardening and preserving tips for cultivating your own oasis, share insights on animal care, and discover practical family budgeting strategies. Together, let's grow through challenges, flourish authentically, and sow the seeds for a resilient and thriving farm life. Join us on this journey of resilience and abundance!
As I've grown in my journey as an entrepreneur, mom, gardener, and livestock owner, I struggled to find a planner that met my needs and kept me organized. So, I MADE MY OWN. You can look at it on the link below and buy it on amazon below.
Don't want the whole calendar part? I got you! I pulled the gardening and animal care pages out and put them in a book all their own.
Starting to garden doesn't have to be hard! I gathered all the tips I've learned over my gardening learning curve and made them into a simple course to jump start your gardening your life.
Supporting Your Family Naturally from the Inside Out community!! This community is for Mommas, looking to Support Your Family from Nature for Wellness. Tips range from nutrition, herbals, detoxing, natural cleaning, and essential oils. Basically, all the things I’ve learned slowly over the past 5+ years of my journey. We have moved off Facebook, to better serve our community and be able to discuss openly options for providing for your family in the best way possible.
Join the FREE Community
Join the FREE Community
I've had 3 very different pregnancies. After the first traumatic birth, I learned better and how to care for my body naturally and prevent common pregnancy and birth problems before they arise. This quick course will get you the tools you need to have a naturally healthy pregnancy, labor, and delivery. My first pregnancy I had a normal western medicine all the things pregnancy. My second? I flipped to completely natural, no medicine. Bonus: Preventing Preeclampsia Without the Aspirin & Healing from Birth Trauma
This post may contain affiliate links, which means that I may receive a commission if you make a purchase using these links, with NO additional cost to you.
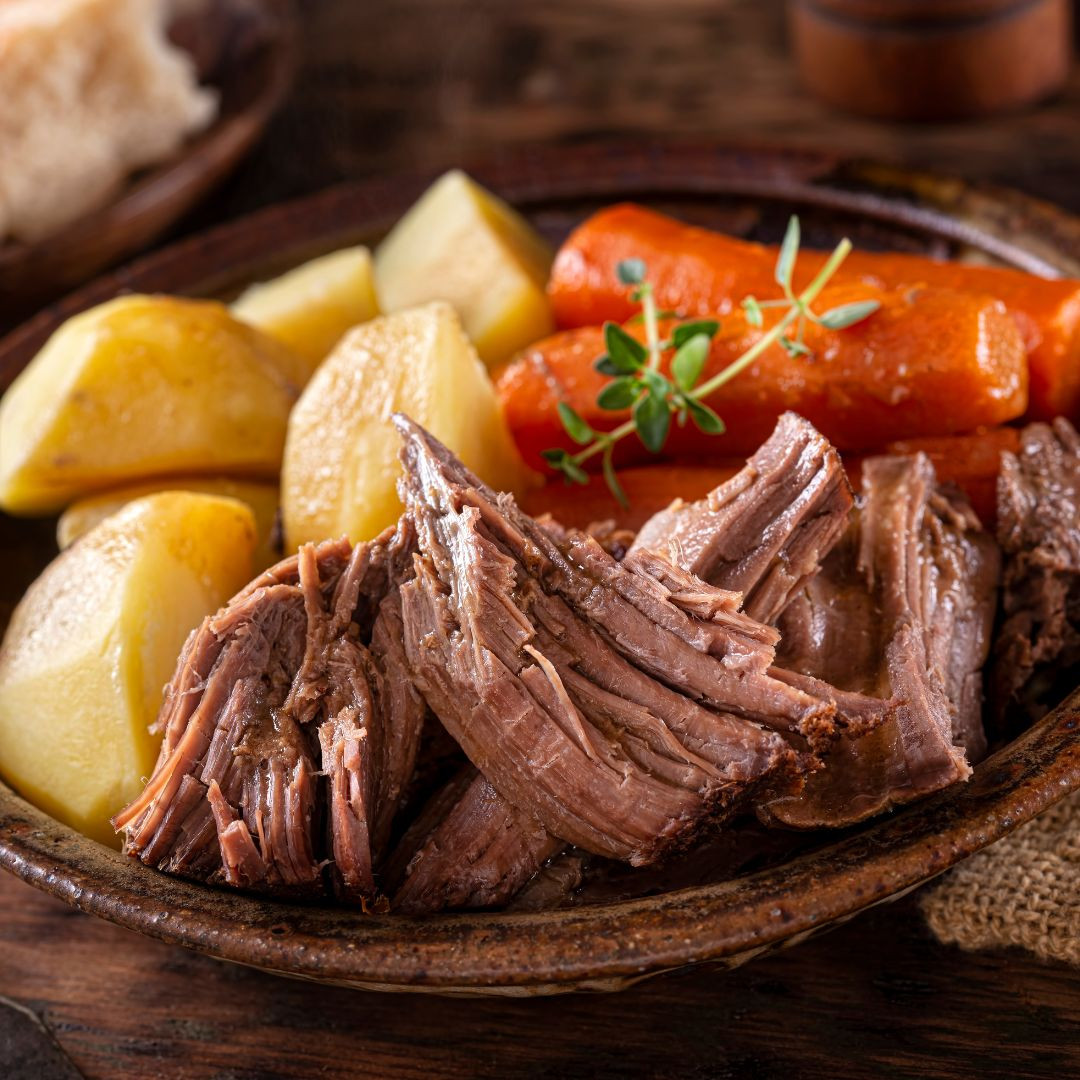
Hello, busy momma! I see you, juggling a thousand things at once—managing the household, tending to the farm, and nurturing your precious family. Amidst all this, finding time for meals shouldn't feel like one more mountain to climb. That's why I'm excited to share a recipe that's as comforting as it is convenient—our Everyday Beef Pot Roast.
Imagine the joy of coming home to a warm, delicious meal that's practically cooked itself in the crock pot. This recipe is not only quick to prepare but also versatile enough to use for meals later in the week, making it a lifesaver for those frantic weeks.
What You'll Need
Here's what you'll need to whip up this easy, heartwarming dish:
- 3-4 pound beef roast: You can use chuck, tip, sirloin, arm, or rump. You can buy from my favorite brand here.
- ¼ cup coffee: Yes, just a bit from your morning pot!
- ½ teaspoon onion powder
- ½ teaspoon basil
- ½ teaspoon oregano
- ¼ teaspoon rosemary
A Complete Meal
To make it a full meal, consider adding a fresh salad, some corn, potatoes, or carrots. For an all-in-one crock pot delight, toss in the carrots and/or potatoes during the last 1-2 hours of cooking.
A Note on Roasts
While most roasts will do—chuck, tip, sirloin, arm, rump—I'd steer clear of prime rib or strip steak roasts for this recipe, as they're tender enough already and don't require the "low and slow" cooking method we love for our everyday roast.
Simple Steps to a Tasty Meal
Here's how you can create this comforting dish with minimal fuss:
- Place your roast into the slow cooker. (I often do this straight from the freezer!)
- Pour the coffee over the roast.
- Sprinkle the spices evenly on top.
- Set your slow cooker to low and cook for 8-10 hours.
- Just before serving, shred or slice the meat—it'll be so tender it practically falls apart.
Serving Suggestions
You can serve this savory roast as the main dish with mashed potatoes, rice, or noodles. It also makes excellent sandwich meat when served on buns. Or, enjoy it as a complete crock pot meal with roast, carrots, and potatoes.
A Little Extra Love
I know times can be tough, and every dollar counts. That's why this recipe is designed to stretch—providing nourishing, comforting meals for your family throughout the week.
Remember, even when life feels overwhelming, you have the strength and resilience to create a loving, thriving home. Each small step forward, like preparing a meal that brings smiles to your loved ones' faces, is a victory in itself.
Take care and happy cooking. For more support join the Thriving Through Farm Life Facebook group linked below.
Wanting a community to lean into? Join the FREE Thriving Through Farm Life: Wife’s Support Network! In our community, we embrace the challenges of farm life and provide a supportive space for wives facing the complexities of managing a family farm. Whether you're navigating financial pressures, day-to-day operations, or seeking ways to create a thriving home, we're here for you. Explore gardening and preserving tips for cultivating your own oasis, share insights on animal care, and discover practical family budgeting strategies. Together, let's grow through challenges, flourish authentically, and sow the seeds for a resilient and thriving farm life. Join us on this journey of resilience and abundance!
As I've grown in my journey as an entrepreneur, mom, gardener, and livestock owner, I struggled to find a planner that met my needs and kept me organized. So, I MADE MY OWN. You can look at it on the link below and buy it on amazon below.
Don't want the whole calendar part? I got you! I pulled the gardening and animal care pages out and put them in a book all their own.
Starting to garden doesn't have to be hard! I gathered all the tips I've learned over my gardening learning curve and made them into a simple course to jump start your gardening your life.
Supporting Your Family Naturally from the Inside Out community!! This community is for Mommas, looking to Support Your Family from Nature for Wellness. Tips range from nutrition, herbals, detoxing, natural cleaning, and essential oils. Basically, all the things I’ve learned slowly over the past 5+ years of my journey. We have moved off Facebook, to better serve our community and be able to discuss openly options for providing for your family in the best way possible.
Join the FREE Community
Join the FREE Community
I've had 3 very different pregnancies. After the first traumatic birth, I learned better and how to care for my body naturally and prevent common pregnancy and birth problems before they arise. This quick course will get you the tools you need to have a naturally healthy pregnancy, labor, and delivery. My first pregnancy I had a normal western medicine all the things pregnancy. My second? I flipped to completely natural, no medicine. Bonus: Preventing Preeclampsia Without the Aspirin & Healing from Birth Trauma
This post may contain affiliate links, which means that I may receive a commission if you make a purchase using these links, with NO additional cost to you.
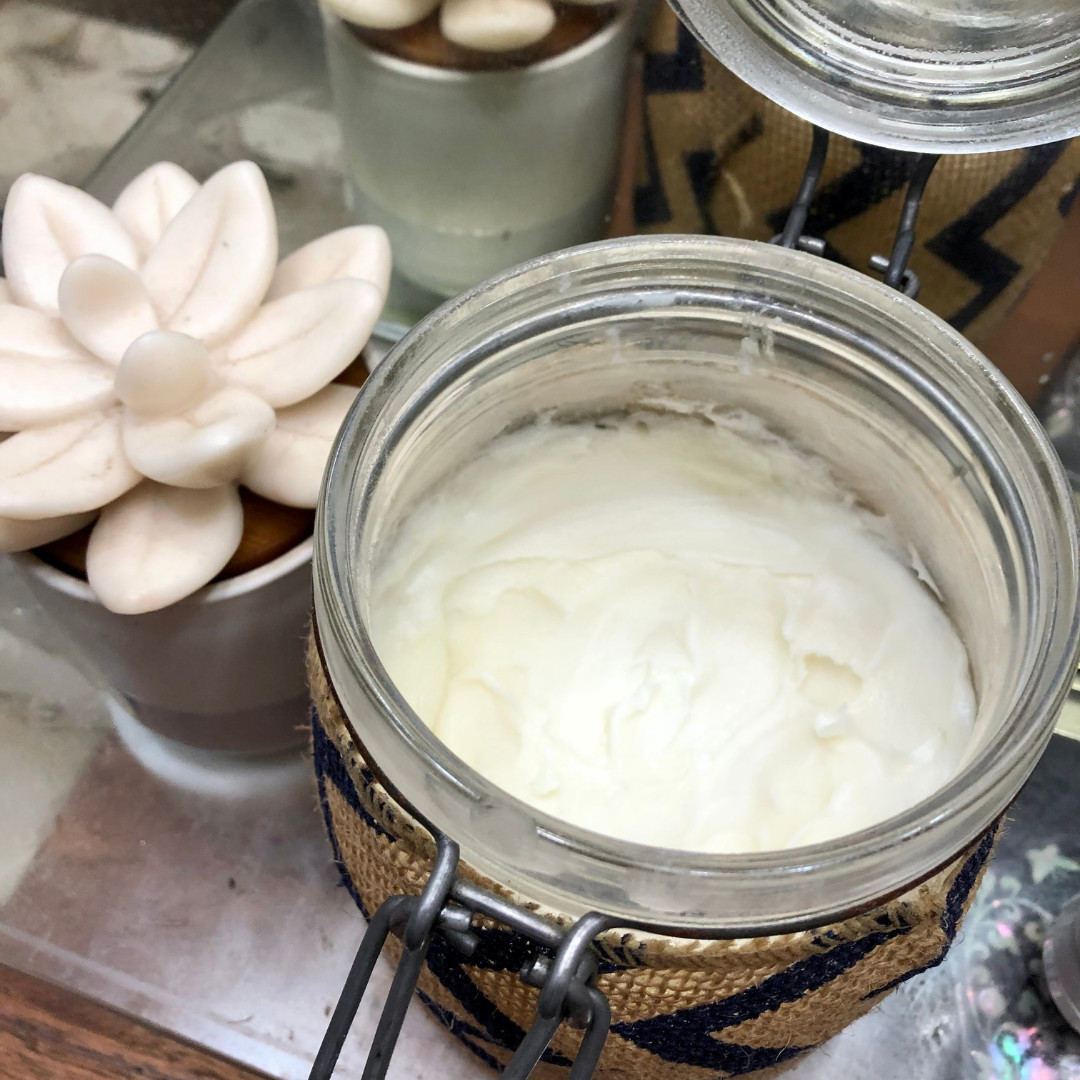
Did you know that your skin is the largest organ of your body? It's not just a protective barrier but also a gateway that absorbs what you apply to it. That’s why using homemade lotion as part of your natural skin care routine is more than just a luxury—it's a necessity.
Why Choose Natural Skin Care?
In our fast-paced lives, filled with financial and family challenges, it's easy to overlook the impact everyday products have on our health. Commercial lotions often contain harmful ingredients that can disrupt your body's delicate balance. Let's take a look:
- Sodium Laureth Sulfate in soaps is used industrially to remove grease and can damage your skin and disrupt immune and hormonal health.
- Phthalates are present in shampoos despite being banned from children's toys due to their endocrine disruption potential.
- Many household items like candles and air fresheners contain formaldehyde, a leading carcinogen. And fragrance which is a catch all for chemical scents and not required to disclose.
Switching to a homemade lotion can be a simple yet powerful way to protect your health and well-being. This is especially important for those seeking to nourish their families through natural living.
Benefits of Homemade Tallow Lotion
Creating your own tallow lotion has numerous benefits:
- Simplicity: Only a few natural ingredients are needed.
- Safety: You're in control of what's touching your skin.
- Cost-Effective: Perfect for tight budgets, offering more value than store-bought alternatives.
How to Make Homemade Tallow Lotion
Here's a simple recipe for homemade lotion that even Alice can fit into her busy farm life:
Ingredients
- 16 oz Rendered Tallow (a traditional, nourishing fat)
- 4 TBSP Olive Oil (for moisture and richness)
- 5 ml Essential Oil (optional, for fragrance; ensure purity, click here for my favorite brand)
- 2 tsp Starch (optional, reduces the oily feel)
Instructions
- Melt and Combine
Heat the tallow in a saucepan until liquid. Stir gently to speed up the process.
- Cool and Mix
Allow the liquid to cool to room temperature. Add the olive oil and stir until combined.
- Solidify and Whip
Place the mixture in the refrigerator to solidify. Then, allow it to warm slightly for easier whipping.
- Incorporate Extras
Using a hand mixer, whip until fluffy. Add starch and essential oil, whipping until fully incorporated.
This homemade lotion is perfect for those who desire a simple, nurturing solution to skin health, without the expense and risk of commercial products.
By choosing homemade lotion and natural skin care products, you're taking a step toward a healthier, more sustainable lifestyle. This change might seem small, but it's a powerful act of self-care and protection for you and your loved ones.
If you're feeling overwhelmed, remember that every small step counts. Join the Thriving Through Farm Life group on Facebook for more support and encouragement.
Wanting a community to lean into? Join the FREE Thriving Through Farm Life: Wife’s Support Network! In our community, we embrace the challenges of farm life and provide a supportive space for wives facing the complexities of managing a family farm. Whether you're navigating financial pressures, day-to-day operations, or seeking ways to create a thriving home, we're here for you. Explore gardening and preserving tips for cultivating your own oasis, share insights on animal care, and discover practical family budgeting strategies. Together, let's grow through challenges, flourish authentically, and sow the seeds for a resilient and thriving farm life. Join us on this journey of resilience and abundance!
As I've grown in my journey as an entrepreneur, mom, gardener, and livestock owner, I struggled to find a planner that met my needs and kept me organized. So, I MADE MY OWN. You can look at it on the link below and buy it on amazon below.
Don't want the whole calendar part? I got you! I pulled the gardening and animal care pages out and put them in a book all their own.
Starting to garden doesn't have to be hard! I gathered all the tips I've learned over my gardening learning curve and made them into a simple course to jump start your gardening your life.
Supporting Your Family Naturally from the Inside Out community!! This community is for Mommas, looking to Support Your Family from Nature for Wellness. Tips range from nutrition, herbals, detoxing, natural cleaning, and essential oils. Basically, all the things I’ve learned slowly over the past 5+ years of my journey. We have moved off Facebook, to better serve our community and be able to discuss openly options for providing for your family in the best way possible.
Join the FREE Community
Join the FREE Community
I've had 3 very different pregnancies. After the first traumatic birth, I learned better and how to care for my body naturally and prevent common pregnancy and birth problems before they arise. This quick course will get you the tools you need to have a naturally healthy pregnancy, labor, and delivery. My first pregnancy I had a normal western medicine all the things pregnancy. My second? I flipped to completely natural, no medicine. Bonus: Preventing Preeclampsia Without the Aspirin & Healing from Birth Trauma
This post may contain affiliate links, which means that I may receive a commission if you make a purchase using these links, with NO additional cost to you.
Hey there! If you're like me, juggling farm life, kids, and trying to stretch every dollar, planting fall bulbs can be a game-changer. Not only do they add beautiful color to your garden early in the spring, but some of them—like garlic and onions—can help you save on groceries come spring. Let's dig into how to make your garden flourish with minimal effort this fall.
Why Plant Bulbs in the Fall?
First off, fall is the perfect time to plant bulbs. Many bulbs need a cold period to bloom or develop properly. Plus, with the fall rains and cooler temperatures, bulbs get the chance to establish strong roots before winter sets in. Come springtime, they'll grow quickly, giving you a gorgeous, low-maintenance garden.
Once they're planted, bulbs are pretty hands-off. Perfect for those of us with busy schedules and a million other things to worry about, like harvest. It’s like planting a bit of hope for future harvests and blooms.
Best Garden Bulbs to Plant in the Fall
Here are some tried-and-true favorites that are both easy and rewarding:
- Tulips: These come in a wide range of colors and add vibrant, early-spring color to any garden. They're like a breath of fresh air after a long winter.
- Daffodils: These cheerful, deer-resistant flowers are hardy and easy to grow. Their yellow or white blooms will brighten up any space.
- Crocuses: Perfect for adding a pop of color to borders or flower beds, even through late winter snow. They’re the little warriors of the garden.
- Hyacinths: Known for their strong fragrance and beautiful clusters of flowers, they’re great for garden beds or containers. Plus, the smell is heavenly!
- Alliums: These tall, spherical flowers make a bold statement, adding height and texture to your garden. They’re a conversation starter for sure.
- Garlic: Super easy to grow and perfect for fall planting. Garlic needs a cold period to develop strong, flavorful bulbs by summer. Plus, you'll save money at the grocery store.
- Onion Sets: Plant these, NOT seeds, in the fall for an early spring harvest. They’ll establish roots over winter, giving you a head start on fresh homegrown onions.
How to Plant Fall Bulbs
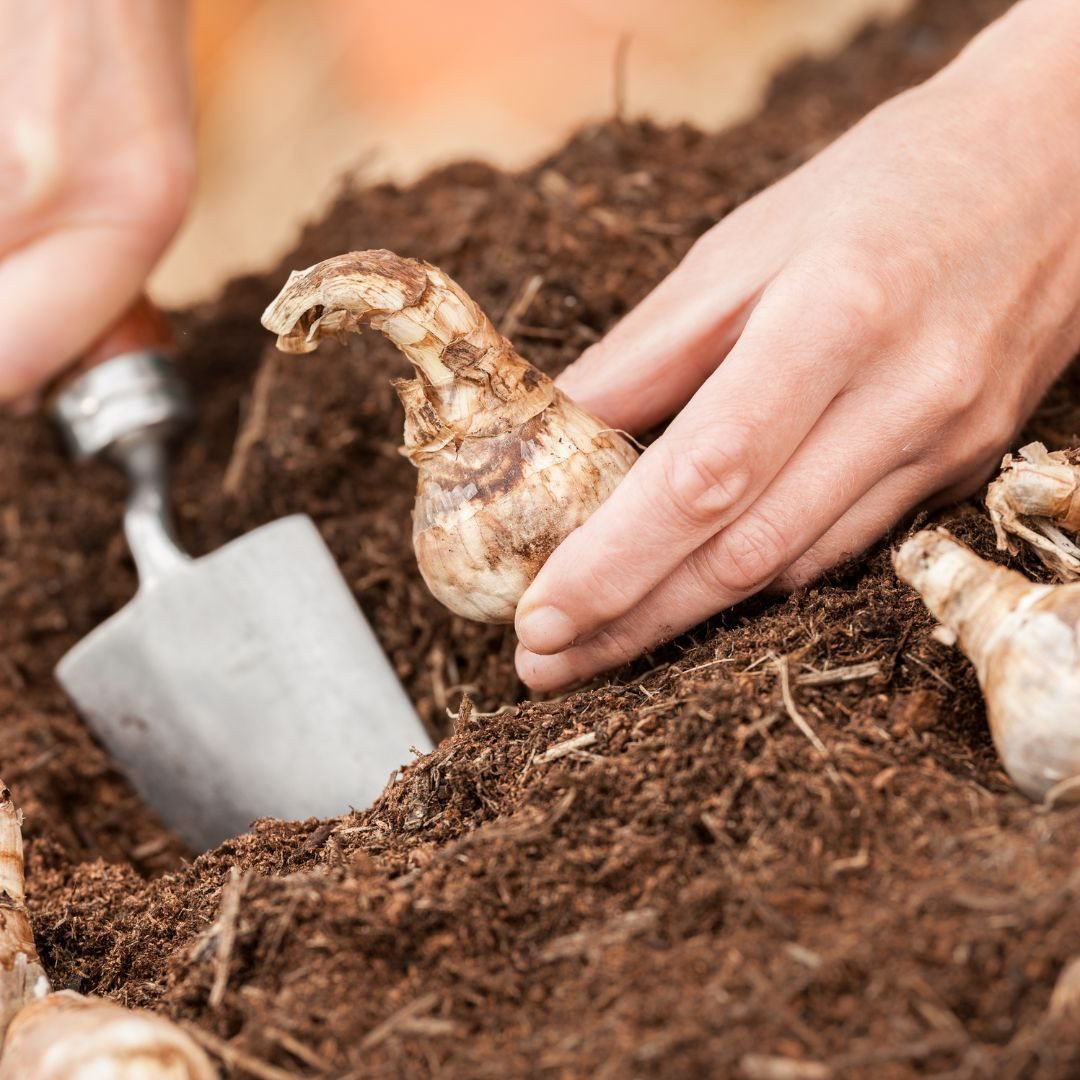
1. Choose a Location
Pick a sunny, well-drained spot for both flowers and vegetables. Garlic and onions, in particular, need full sun and loose soil.
2. Prepare the Soil
Work in compost or organic matter to ensure good drainage. Loose soil helps bulbs develop strong roots. Think of it as giving them a cozy bed to snuggle into for the winter.
3. Planting Depth and Spacing
- Flower Bulbs: Plant them 2-3 times their height deep.
- Garlic Cloves: Should be 2-3 inches deep.
- Onion Sets: Only need about 1 inch deep.
Space them 4-6 inches apart to give them room to grow.
4. Water and Mulch
Water the bulbs after planting to help them settle. Mulch helps retain moisture and protects the bulbs from frost. You’ll need about 4-5 inches of mulch over the garlic and onions to help them overwinter, especially if you’re in zone 5 or colder. If you forget to water them later, don't sweat it. They'll probably be just fine. It's actually easier to overwater these little warriors than under water them.
Caring for Bulbs Over Winter
Once planted, bulbs need minimal care. Protect them from extreme cold with mulch and avoid overwatering in wet winter conditions. Garlic and onions will begin to sprout in early spring, making them some of the first signs of new growth.
By planting bulbs in the fall, you’re setting yourself up for a colorful and productive garden with minimal effort. With flower bulbs to enjoy and garlic and onions to harvest, you can brighten up your space and boost your food security with ease.
Remember, every small step you take in your garden is a step towards a thriving, self-sufficient life. You've got this, and we're here cheering you on every step of the way. Happy planting, and may your garden be as vibrant as your spirit!
Wanting a community to lean into? Join the FREE Thriving Through Farm Life: Wife’s Support Network! In our community, we embrace the challenges of farm life and provide a supportive space for wives facing the complexities of managing a family farm. Whether you're navigating financial pressures, day-to-day operations, or seeking ways to create a thriving home, we're here for you. Explore gardening and preserving tips for cultivating your own oasis, share insights on animal care, and discover practical family budgeting strategies. Together, let's grow through challenges, flourish authentically, and sow the seeds for a resilient and thriving farm life. Join us on this journey of resilience and abundance!
As I've grown in my journey as an entrepreneur, mom, gardener, and livestock owner, I struggled to find a planner that met my needs and kept me organized. So, I MADE MY OWN. You can look at it on the link below and buy it on amazon below.
Don't want the whole calendar part? I got you! I pulled the gardening and animal care pages out and put them in a book all their own.
Starting to garden doesn't have to be hard! I gathered all the tips I've learned over my gardening learning curve and made them into a simple course to jump start your gardening your life.
Supporting Your Family Naturally from the Inside Out community!! This community is for Mommas, looking to Support Your Family from Nature for Wellness. Tips range from nutrition, herbals, detoxing, natural cleaning, and essential oils. Basically, all the things I’ve learned slowly over the past 5+ years of my journey. We have moved off Facebook, to better serve our community and be able to discuss openly options for providing for your family in the best way possible.
Join the FREE Community
Join the FREE Community
I've had 3 very different pregnancies. After the first traumatic birth, I learned better and how to care for my body naturally and prevent common pregnancy and birth problems before they arise. This quick course will get you the tools you need to have a naturally healthy pregnancy, labor, and delivery. My first pregnancy I had a normal western medicine all the things pregnancy. My second? I flipped to completely natural, no medicine. Bonus: Preventing Preeclampsia Without the Aspirin & Healing from Birth Trauma

This post may contain affiliate links, which means that I may receive a commission if you make a purchase using these links, with NO additional cost to you.
Life on the farm is a beautiful mix of hard work, dedication, and the simple joys of nature. But it can also bring its share of financial stress, especially when every dollar counts. If you're juggling the demands of running a farm, supporting your family, and managing a tight household budget, you know how overwhelming it can be to make ends meet.
Below are the tips I have used to help evaluate home expenses, distinguish between what is a need and what’s extra, and manage your income wisely. Let's explore some practical budgeting tips tailored for farm wives.
Keep a "Blow" Budget
It might sound counterintuitive, but setting aside about 10% of your income for fun or "blow" money can actually help you stick to your budget. This small allowance for impulse purchases can prevent feelings of deprivation and reduce the likelihood of overspending elsewhere. In our home the "blow" fund is further divided between 3 ways: myself, my husband, and the whole family (kids). The whole family is usually used for TV subscriptions and eating out.
Action Step:
- Allocate 10% of your monthly income to a separate fun money fund. Use this for little treats or spontaneous buys without guilt.
Assess Your Subscriptions
Subscriptions can be sneaky budget busters. It's easy to lose track of all those monthly charges, but they add up quickly. One we found many of was TV subscriptions. We evaluated which ones we use the most and got rid of the rest. Trick ones are the subscriptions for apps on your phone.
Evaluate Your Subscriptions:
- Forgotten Subscriptions: Go through your bank and credit card statements to identify any subscriptions you might have forgotten about. Then go through your phone to find any reoccurring app charges you may have forgotten about.
- Necessary vs. Unnecessary: Ask yourself if each subscription is something you truly need and use regularly.
Action Step:
- Cancel any subscriptions that you don't use or need. This could save you a significant amount each month.
Build an Emergency Fund
Having a financial cushion for surprise expenses or emergencies is crucial. It provides peace of mind and prevents you from going into debt when unexpected costs arise.
How Much to Save:
- Aim to save a certain percentage of your income each month. Even a small amount adds up over time.
Action Step:
- Set up a separate savings account and automate a monthly transfer to build your emergency fund gradually. We took this a step further and have different saving accounts for different categories: emergency, repairs, and kids education.
Swap for Savings
Take a close look at the products you use around your home. Are there opportunities to swap for less expensive but equally effective alternatives?
Potential Swaps:
- Household cleaners, groceries, and personal care items are often areas where you can find cheaper options without sacrificing quality. In a real pinch, vinegar can make an excellent all purpose cleaner, and tallow soap can wash most things.
Action Step:
- Experiment with lower-cost alternatives for a month and see how they compare. You might be surprised at the savings!
Sell Unused Items
Decluttering can be both therapeutic and profitable. Do you have items lying around that you no longer need? Consider selling them to fill small budget gaps in the short term.
Possible Items to Sell:
- Clothing, toys, farm equipment, or household items that are in good condition but no longer used. Extra garden produce, seedlings, or equipment are also seasonal items that can help fill budget gaps.
Action Step:
- Hold a garage sale or list items on online marketplaces like Facebook Marketplace or eBay.
Reevaluate Insurance
Insurance is essential, but it's also worth checking if you could get better rates elsewhere. Combining policies can also save money with some companies.
What to Look For:
- Compare quotes from different providers to see if you can get the same coverage for less.
Action Step:
- Reach out to multiple insurance companies and request quotes to ensure you're getting the best deal.
Consider Your Vehicle
A newer vehicle with a payment can be a significant financial burden. If feasible, selling it and purchasing a reliable older model without a payment can free up a substantial portion of your budget.
Benefits of an Older Vehicle:
- Lower insurance costs, no monthly payments, and less depreciation. One thing to keep in mind is to have money set aside, more than with a new vehicle, as things will break down or wear out with older vehicles.
Action Step:
- Assess the market value of your current vehicle and explore older, reliable models that fit your needs. Be sure the older model is mechanically sound.
Managing home expenses on a tight budget, especially as a farm wife, is no easy feat. But with careful planning and a few strategic changes, you can create a more stable financial environment for your family and farm. Remember, every small step towards better budgeting helps you move closer to a thriving, peaceful life.
Wanting more? Join the Thriving Through Farm Life group on Facebook. There you will find like minded women who are working towards a more stable, peaceful, and resilient life on the farm.
Wanting a community to lean into? Join the FREE Thriving Through Farm Distress: Wife’s Support Network! In our community, we embrace the challenges of farm life and provide a supportive space for wives facing the complexities of managing a family farm. Whether you're navigating financial pressures, day-to-day operations, or seeking ways to create a thriving home, we're here for you. Explore gardening and preserving tips for cultivating your own oasis, share insights on animal care, and discover practical family budgeting strategies. Together, let's grow through challenges, flourish authentically, and sow the seeds for a resilient and thriving farm life. Join us on this journey of resilience and abundance!
As I've grown in my journey as an entrepreneur, mom, gardener, and livestock owner, I struggled to find a planner that met my needs and kept me organized. So, I MADE MY OWN. You can look at it on the link below and buy it on amazon below.
Don't want the whole calendar part? I got you! I pulled the gardening and animal care pages out and put them in a book all their own.
Starting to garden doesn't have to be hard! I gathered all the tips I've learned over my gardening learning curve and made them into a simple course to jump start your gardening your life.
Supporting Your Family Naturally from the Inside Out community!! This community is for Mommas, looking to Support Your Family from Nature for Wellness. Tips range from nutrition, herbals, detoxing, natural cleaning, and essential oils. Basically, all the things I’ve learned slowly over the past 5+ years of my journey. We have moved off Facebook, to better serve our community and be able to discuss openly options for providing for your family in the best way possible.
Join the FREE Community
Join the FREE Community
I've had 3 very different pregnancies. After the first traumatic birth, I learned better and how to care for my body naturally and prevent common pregnancy and birth problems before they arise. This quick course will get you the tools you need to have a naturally healthy pregnancy, labor, and delivery. My first pregnancy I had a normal western medicine all the things pregnancy. My second? I flipped to completely natural, no medicine. Bonus: Preventing Preeclampsia Without the Aspirin & Healing from Birth Trauma

