This post may contain affiliate links, which means that I may receive a commission if you make a purchase using these links, with NO additional cost to you.
Winter mornings on the farm can be brisk, especially when you're out feeding the animals. After a particularly blustery morning, I found myself longing for some hot chocolate to warm up my soul. My little ones were all too eager to join in this cozy treat. However, there's a twist—at the time both my toddler and I need to avoid dairy.
A Simple Solution for Dairy-Free Comfort
In the past, my mom would make a big batch of hot chocolate on the stove, but with just the three of us, that seemed excessive. I rummaged through my recipe box, hoping to find something adaptable, and luckily, I found two gems—a hot chocolate mix and a stovetop recipe. The mix was too dairy-heavy, but the stovetop recipe? Perfectly adaptable!
Crafting the Perfect Dairy-Free Mix
Here's how I created a delightful dairy-free hot chocolate mix, just the right size for our little family:
Ingredients for the Mix
- 6 parts sugar (coconut sugar works great if you're looking for a healthier option)
- 1 part cocoa powder
- A dash of cinnamon and nutmeg for added warmth and flavor
Instructions
- Layer the ingredients in an airtight container, starting with sugar, followed by cocoa, and then the spices. Fill until the container is about ¾ full.
- Secure the lid and give it a good shake to mix everything together.
This is excellent to keep on hand for my oldest to grab and make for herself or her siblings now if I'm busy.
Making the Hot Chocolate
Now, for the magic part—turning this mix into a comforting cup of hot chocolate:
Ingredients for One steaming Cup (split in half for small kids)
- ½ cup water (for a richer flavor skip the water and just use milk)
- ½ cup of your favorite milk alternative (I used almond milk)
- 1 teaspoon vanilla extract
- 1 tablespoon of the hot chocolate mix
Instructions
- Heat the milk alternative and vanilla in a pan on the stove while bringing water to a boil. In hindsight, you can combine these steps to save time.
- Ensure the milk is hot but not boiling, stirring frequently to prevent scalding.
- Place 1 tablespoon of the mix into the pan and mix in.
- Fill the mugs with the hot milk mixture.
- Sip and enjoy!
A Cozy Treat for the Family
We still enjoy this recipe four years later. The only thing I have changed is we now use raw A2/A2 milk from our family milk cow instead of milk alternatives. I will bribe the kids to help me finish something outside in exchange for a cup of hot chocolate when we are done.
Creating moments like these is what makes the hard work on the farm worthwhile. It’s about finding small pleasures and adapting to our needs, without letting constraints hold us back.
If you're navigating similar challenges, know that you're not alone. Together, we can find warmth and comfort in the little things, even on tight budgets and busy schedules. Here's to sweet, nurturing moments with our loved ones.
Join the Thriving Through Life group on Facebook linked below for likeminded community support and encouragement.
Wanting a community to lean into? Join the FREE Thriving Through Farm Life: Wife’s Support Network! In our community, we embrace the challenges of farm life and provide a supportive space for wives facing the complexities of managing a family farm. Whether you're navigating financial pressures, day-to-day operations, or seeking ways to create a thriving home, we're here for you. Explore gardening and preserving tips for cultivating your own oasis, share insights on animal care, and discover practical family budgeting strategies. Together, let's grow through challenges, flourish authentically, and sow the seeds for a resilient and thriving farm life. Join us on this journey of resilience and abundance!
As I've grown in my journey as an entrepreneur, mom, gardener, and livestock owner, I struggled to find a planner that met my needs and kept me organized. So, I MADE MY OWN. You can look at it on the link below and buy it on amazon below.
Don't want the whole calendar part? I got you! I pulled the gardening and animal care pages out and put them in a book all their own.
Starting to garden doesn't have to be hard! I gathered all the tips I've learned over my gardening learning curve and made them into a simple course to jump start your gardening your life.
Supporting Your Family Naturally from the Inside Out community!! This community is for Mommas, looking to Support Your Family from Nature for Wellness. Tips range from nutrition, herbals, detoxing, natural cleaning, and essential oils. Basically, all the things I’ve learned slowly over the past 5+ years of my journey. We have moved off Facebook, to better serve our community and be able to discuss openly options for providing for your family in the best way possible.
Join the FREE Community
Join the FREE Community
I've had 3 very different pregnancies. After the first traumatic birth, I learned better and how to care for my body naturally and prevent common pregnancy and birth problems before they arise. This quick course will get you the tools you need to have a naturally healthy pregnancy, labor, and delivery. My first pregnancy I had a normal western medicine all the things pregnancy. My second? I flipped to completely natural, no medicine. Bonus: Preventing Preeclampsia Without the Aspirin & Healing from Birth Trauma
This post may contain affiliate links, which means that I may receive a commission if you make a purchase using these links, with NO additional cost to you.
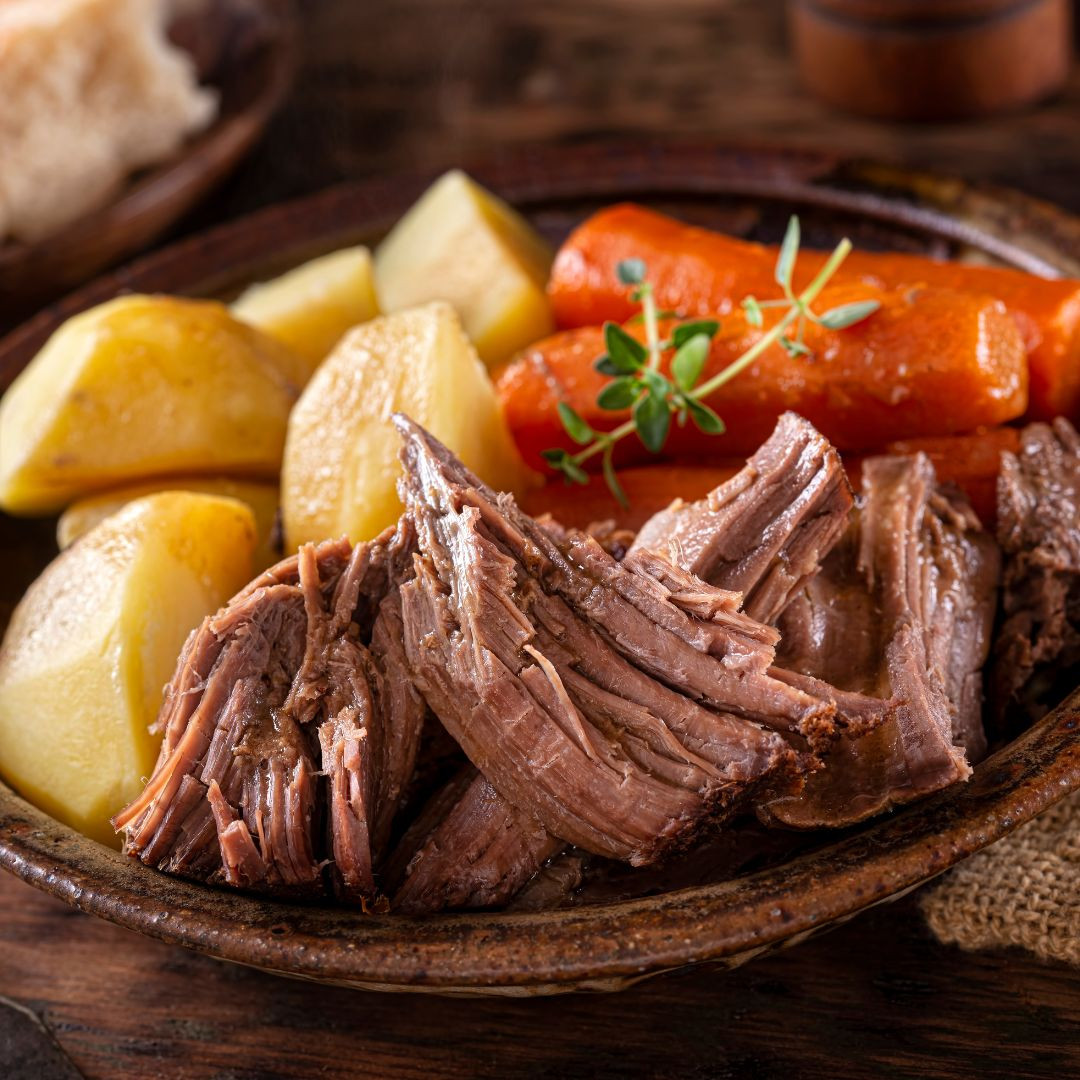
Hello, busy momma! I see you, juggling a thousand things at once—managing the household, tending to the farm, and nurturing your precious family. Amidst all this, finding time for meals shouldn't feel like one more mountain to climb. That's why I'm excited to share a recipe that's as comforting as it is convenient—our Everyday Beef Pot Roast.
Imagine the joy of coming home to a warm, delicious meal that's practically cooked itself in the crock pot. This recipe is not only quick to prepare but also versatile enough to use for meals later in the week, making it a lifesaver for those frantic weeks.
What You'll Need
Here's what you'll need to whip up this easy, heartwarming dish:
- 3-4 pound beef roast: You can use chuck, tip, sirloin, arm, or rump. You can buy from my favorite brand here.
- ¼ cup coffee: Yes, just a bit from your morning pot!
- ½ teaspoon onion powder
- ½ teaspoon basil
- ½ teaspoon oregano
- ¼ teaspoon rosemary
A Complete Meal
To make it a full meal, consider adding a fresh salad, some corn, potatoes, or carrots. For an all-in-one crock pot delight, toss in the carrots and/or potatoes during the last 1-2 hours of cooking.
A Note on Roasts
While most roasts will do—chuck, tip, sirloin, arm, rump—I'd steer clear of prime rib or strip steak roasts for this recipe, as they're tender enough already and don't require the "low and slow" cooking method we love for our everyday roast.
Simple Steps to a Tasty Meal
Here's how you can create this comforting dish with minimal fuss:
- Place your roast into the slow cooker. (I often do this straight from the freezer!)
- Pour the coffee over the roast.
- Sprinkle the spices evenly on top.
- Set your slow cooker to low and cook for 8-10 hours.
- Just before serving, shred or slice the meat—it'll be so tender it practically falls apart.
Serving Suggestions
You can serve this savory roast as the main dish with mashed potatoes, rice, or noodles. It also makes excellent sandwich meat when served on buns. Or, enjoy it as a complete crock pot meal with roast, carrots, and potatoes.
A Little Extra Love
I know times can be tough, and every dollar counts. That's why this recipe is designed to stretch—providing nourishing, comforting meals for your family throughout the week.
Remember, even when life feels overwhelming, you have the strength and resilience to create a loving, thriving home. Each small step forward, like preparing a meal that brings smiles to your loved ones' faces, is a victory in itself.
Take care and happy cooking. For more support join the Thriving Through Farm Life Facebook group linked below.
Wanting a community to lean into? Join the FREE Thriving Through Farm Life: Wife’s Support Network! In our community, we embrace the challenges of farm life and provide a supportive space for wives facing the complexities of managing a family farm. Whether you're navigating financial pressures, day-to-day operations, or seeking ways to create a thriving home, we're here for you. Explore gardening and preserving tips for cultivating your own oasis, share insights on animal care, and discover practical family budgeting strategies. Together, let's grow through challenges, flourish authentically, and sow the seeds for a resilient and thriving farm life. Join us on this journey of resilience and abundance!
As I've grown in my journey as an entrepreneur, mom, gardener, and livestock owner, I struggled to find a planner that met my needs and kept me organized. So, I MADE MY OWN. You can look at it on the link below and buy it on amazon below.
Don't want the whole calendar part? I got you! I pulled the gardening and animal care pages out and put them in a book all their own.
Starting to garden doesn't have to be hard! I gathered all the tips I've learned over my gardening learning curve and made them into a simple course to jump start your gardening your life.
Supporting Your Family Naturally from the Inside Out community!! This community is for Mommas, looking to Support Your Family from Nature for Wellness. Tips range from nutrition, herbals, detoxing, natural cleaning, and essential oils. Basically, all the things I’ve learned slowly over the past 5+ years of my journey. We have moved off Facebook, to better serve our community and be able to discuss openly options for providing for your family in the best way possible.
Join the FREE Community
Join the FREE Community
I've had 3 very different pregnancies. After the first traumatic birth, I learned better and how to care for my body naturally and prevent common pregnancy and birth problems before they arise. This quick course will get you the tools you need to have a naturally healthy pregnancy, labor, and delivery. My first pregnancy I had a normal western medicine all the things pregnancy. My second? I flipped to completely natural, no medicine. Bonus: Preventing Preeclampsia Without the Aspirin & Healing from Birth Trauma

This post may contain affiliate links, which means that I may receive a commission if you make a purchase using these links, with NO additional cost to you.
Discarding from your starter is optional, but it keeps the amount of starter manageable. The more starter you have, the more you need to feed it each time. Fermented bread is easier to digest, helps balance good bacteria in the gut and helps maintain healthy blood sugar levels. So, as you discard, you can reap those benefits in other recipes.
Add 1/8-1/2 cup to your favorite recipes for pancakes, waffles, muffins, quick breads, cookies & pastries. Depending on how “sour” you want it to taste.
Or make simple sourdough crackers:
- 2/4 cup discarded starter
- 2 T butter/coconut oil
- 1/2 t sea salt +1-2t herbs of choice.
Mix dough & roll out thinly on parchment paper or baking stone. Sprinkle with sea salt. Bake at 325 degrees for 10 minutes.
Remove from oven, cut into crackers. Return to oven for 20-40 minutes more depending on how thick your crackers are.
Thicker crackers work well for dipping.
Pizza crust
Sunday night is pizza night at our house. It’s also the one day during the summer Gertrude, my starter, typically gets fed.
Take your starter out of the fridge and allow it to warm up to room temperature. I usually bring her out when we get home from church and set her on the counter.
After lunch I mix her up and feed her equal parts gf flour and filtered water. How much I feed her depends on how many pizzas I need to make. Just keep the ratio 1:1 when adding and check the consistency. It should be cake like, but not as thick as brownies.
When ready to bake. Place skillet or pizza stone in the oven and pre heat to 450. You want the skillet hot! I like to use my biggest cast iron skillet and make a Chicago style crust. If we’re having company and want a variety of pizzas, I’ll bring out the pizza stones.
While the skillet is heating up, get your toppings ready. Hamburger, sausage, and breakfast pizza are all easy to assemble.
Take the hot skillet out of the oven and spread oil on skillet. Carefully pour starter into the skillet. It should start cooking right away. Spread around to form the crust, sprinkle with salt, and spread oil over the top of the crust.
Return to oven and cook for 5-10 minutes until firm, but not cracked.
Take pizza out and add toppings. Then return to oven until cheese is melted.
Cook a few minutes and then cut and serve. Now go have a pizza and move night!
Wanting a community to lean into? Join the FREE Thriving Through Farm Distress: Wife’s Support Network! In our community, we embrace the challenges of farm life and provide a supportive space for wives facing the complexities of managing a family farm. Whether you're navigating financial pressures, day-to-day operations, or seeking ways to create a thriving home, we're here for you. Explore gardening tips for cultivating your own oasis, share insights on animal care, and discover practical family budgeting strategies. Together, let's grow through challenges, flourish authentically, and sow the seeds for a resilient and thriving farm life. Join us on this journey of resilience and abundance!
As I've grown in my journey as an entrepreneur, mom, gardener, and livestock owner, I struggled to find a planner that met my needs and kept me organized. So, I MADE MY OWN. You can look at it on the link below and buy it on amazon below.
Don't want the whole calendar part? I got you! I pulled the gardening and animal care pages out and put them in a book all their own.
Starting to garden doesn't have to be hard! I gathered all the tips I've learned over my gardening learning curve and made them into a simple course to jump start your gardening your life.
Supporting Your Family Naturally from the Inside Out community!! This community is for Mommas, looking to Support Your Family from Nature for Wellness. Tips range from nutrition, herbals, detoxing, natural cleaning, and essential oils. Basically, all the things I’ve learned slowly over the past 5+ years of my journey. We have moved off Facebook, to better serve our community and be able to discuss openly options for providing for your family in the best way possible.
Join the FREE Community
Join the FREE Community
I've had 3 very different pregnancies. After the first traumatic birth, I learned better and how to care for my body naturally and prevent common pregnancy and birth problems before they arise. This quick course will get you the tools you need to have a naturally healthy pregnancy, labor, and delivery. My first pregnancy I had a normal western medicine all the things pregnancy. My second? I flipped to completely natural, no medicine. Bonus: Preventing Preeclampsia Without the Aspirin & Healing from Birth Trauma
This post may contain affiliate links, which means that I may receive a commission if you make a purchase using these links, with NO additional cost to you.
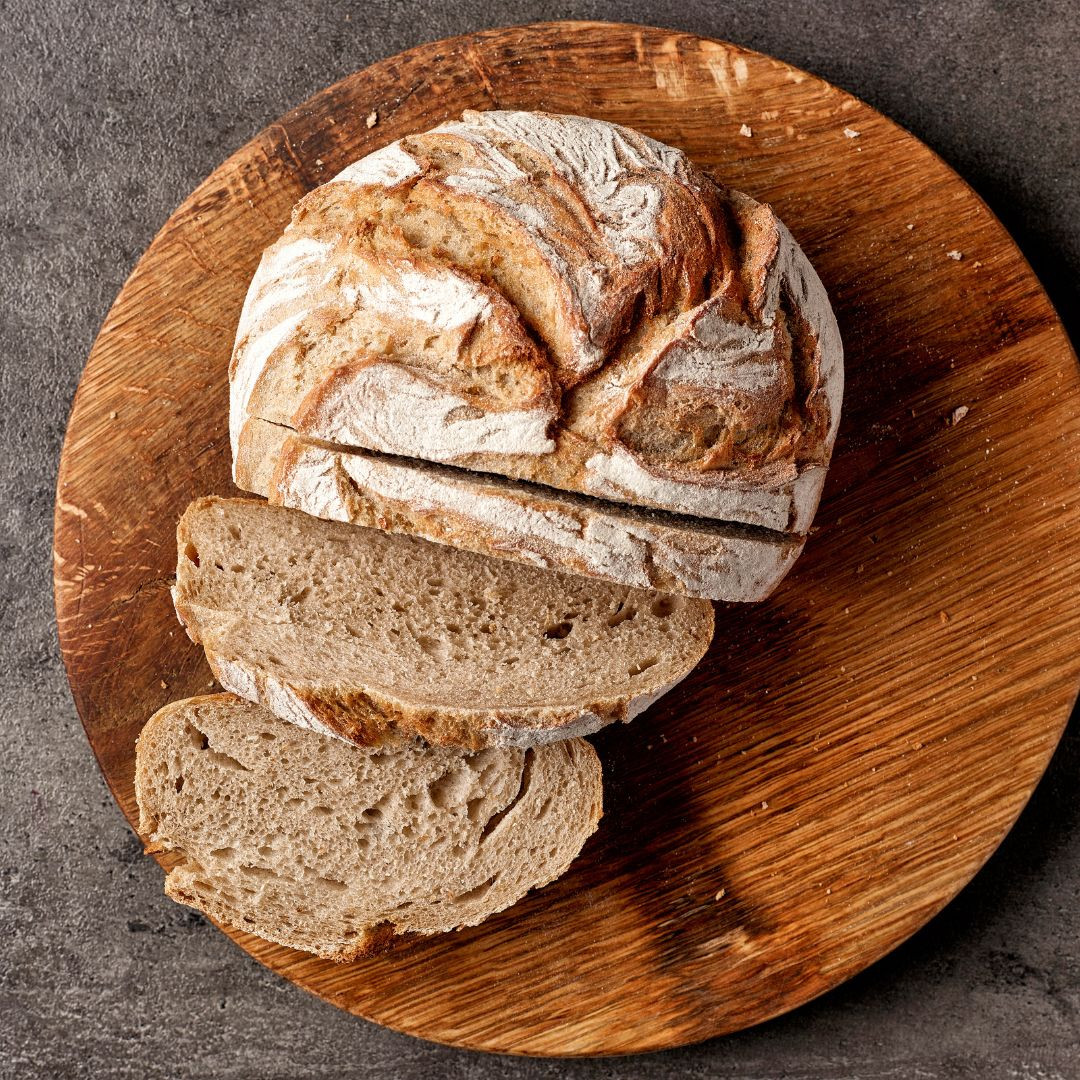
Sourdough is all the rage but making it Gluten free has a special twist. It’s not a one-to-one conversion and takes a little extra care. Below is the classic Gluten Free Sourdough recipe I first learned and then have added modifications to make it work for my home.
Build a levain/preferment. Read two options here, I typically use the jar method.
Ingredients:
- 320g warm filtered water
- 10g psyllium husk
- 15g maple syrup (or honey)
- 150g active gf sourdough starter
- 310g 1:1 gf flour blend
- I use fresh milled flour (oats and brown rice). If doing so, you will need to add starch (like potato starch). The ratio is 1/3 starch, 2/3 grain. For this recipe, it would be 206g milled grain, 103g starch. I buy my grains and starches from Azure Standard.
- 9g sea salt
Prepare your Dough:
- Using a food scale, measure & combine the warm water, psyllium husk & maple syrup in a measuring cup or glass bowl and allow to gel.
- In a large mixing bowl, measure & combine your gluten free flour and sea salt.
- Add your psylium mixture to the flour then mix in your active starter
- Mix dough with a dough whisk, by hand, or in a stand mixer on low until dough comes together. If dough is still wet and sticky, add 1T flour at a time until dough comes together and is smooth.
- Remove dough from bowl and knead on a lightly floured work surface and form into a round or oval shape.
- Lightly flour or line your banneton or proofing bowl with a towel. Transfer your dough to the bowl with the smooth side down and any seams up
- NOTE: If you are using a sandwich loaf pan, place seams down and proof your dough in the pan.
- Cover with a tea towel and proof for 2 1/2 -3 hours at room temperature.
- If your house is cool, place it in the oven with light only on, or on a heating mat on the lowest setting, or a warm vent.
- You can also proof your loaf overnight in the refrigerator, which also helps develop a sourer flavor.
- Check your dough after 2 hours. If your dough has been proofing in the oven, remove it and carefully set aside do not disturb. Allow your dough to continue proofing 30-60 minutes more. Checking every 30 minutes. NOTE: the dough may not “double” while proofing but will.
- WHEN READY TO BAKE Place your dutch oven inside the oven and preheat to 425 degrees (this allows your dutch oven to get up to temperature.
- When your dough is proofed, turn dough out onto a folded section of parchment paper or dough sling from amazon (think of this as a sling that makes it easier to transfer to a hot dutch oven). Score your bread as desired, cutting in at least 1/4-1/2 inch - this allows steam to escape. Without scoring, your loaf will naturally crack.
- Remove hot Dutch oven from oven and carefully lower your dough into the dutch oven, careful not to drop which will deflate your bread and cause gumminess. Replace lid and place in oven.
- Bake for 45-50 minutes. After 45 minutes, remove the lid from the dutch oven Reduce temperature to 400 degrees and continue baking 35-50 minutes until golden brown on top. The exact time will vary depending on your oven and how golden you want your bread. When done, remove Dutch oven from oven and carefully remove loaf, using the sling.
- Allow to cool completely before slicing- this is the hardest part, but worth it for the best texture. After slicing, store in a tea towel, linen bread bag or beeswax wrap on the counter for up to 2 days.
NOTE: you can freeze the loaf whole for later use.
Now enjoy your sourdough bread!
Wanting a community to lean into? Join the FREE Thriving Through Farm Distress: Wife’s Support Network! In our community, we embrace the challenges of farm life and provide a supportive space for wives facing the complexities of managing a family farm. Whether you're navigating financial pressures, day-to-day operations, or seeking ways to create a thriving home, we're here for you. Explore gardening tips for cultivating your own oasis, share insights on animal care, and discover practical family budgeting strategies. Together, let's grow through challenges, flourish authentically, and sow the seeds for a resilient and thriving farm life. Join us on this journey of resilience and abundance!
As I've grown in my journey as an entrepreneur, mom, gardener, and livestock owner, I struggled to find a planner that met my needs and kept me organized. So, I MADE MY OWN. You can look at it on the link below and buy it on amazon below.
Don't want the whole calendar part? I got you! I pulled the gardening and animal care pages out and put them in a book all their own.
Starting to garden doesn't have to be hard! I gathered all the tips I've learned over my gardening learning curve and made them into a simple course to jump start your gardening your life.
Supporting Your Family Naturally from the Inside Out community!! This community is for Mommas, looking to Support Your Family from Nature for Wellness. Tips range from nutrition, herbals, detoxing, natural cleaning, and essential oils. Basically, all the things I’ve learned slowly over the past 5+ years of my journey. We have moved off Facebook, to better serve our community and be able to discuss openly options for providing for your family in the best way possible.
Join the FREE Community
Join the FREE Community
I've had 3 very different pregnancies. After the first traumatic birth, I learned better and how to care for my body naturally and prevent common pregnancy and birth problems before they arise. This quick course will get you the tools you need to have a naturally healthy pregnancy, labor, and delivery. My first pregnancy I had a normal western medicine all the things pregnancy. My second? I flipped to completely natural, no medicine. Bonus: Preventing Preeclampsia Without the Aspirin & Healing from Birth Trauma
This post may contain affiliate links, which means that I may receive a commission if you make a purchase using these links, with NO additional cost to you.
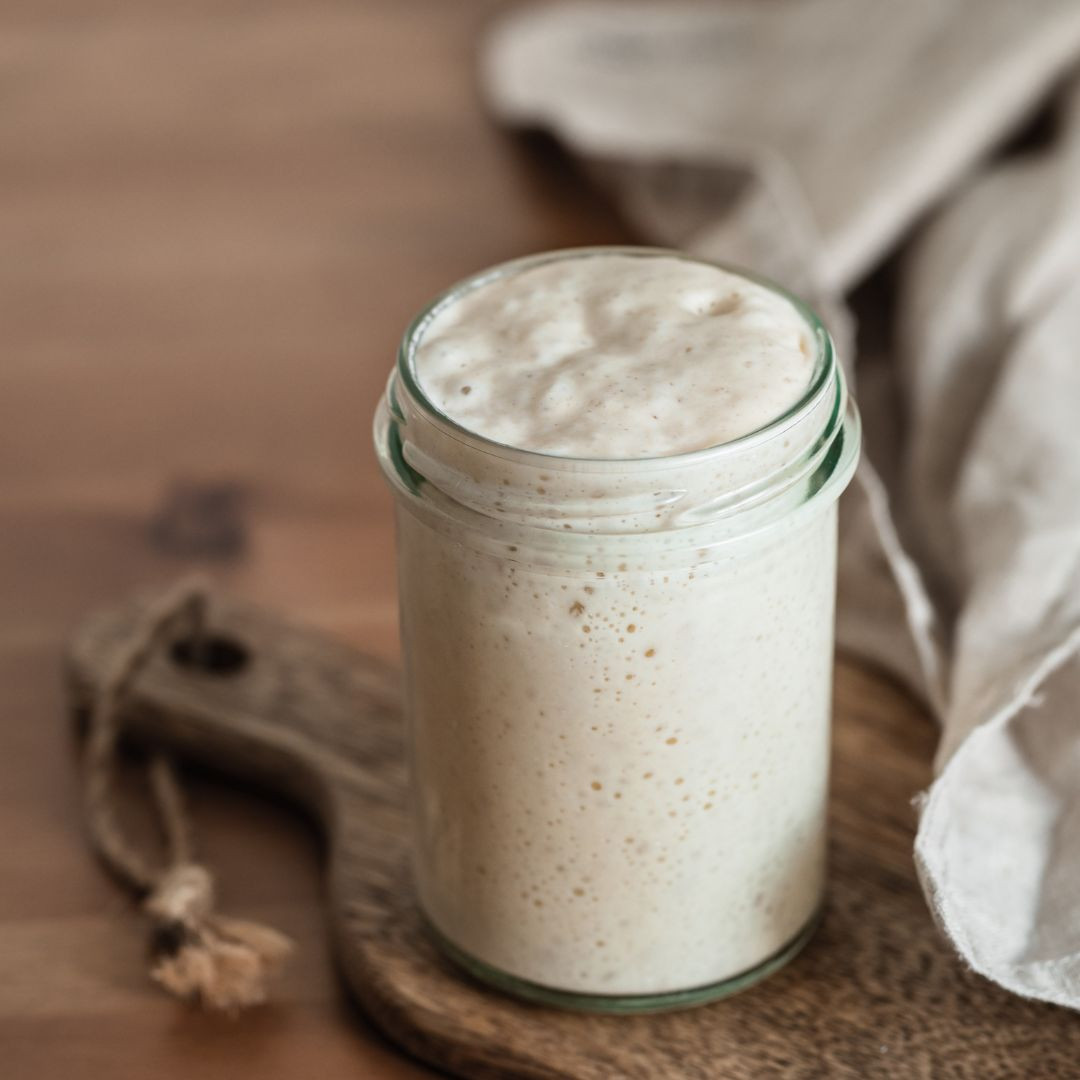
Starting a sourdough starter can be boosted along with a dehydrated starter. This acts as an inoculant to help the correct bacteria and yeasts to develop. Below are the instructions on how to rehydrate, build and grow your dehydrated sourdough starter.
You’ll need:
- Dried Starter
- Brown Rice Flour*
- Gluten-free Oat Flour*
- Filtered Water
- Basic Kitchen Scale
- Spatula
- Mason Jar or glass container with loose lid
- Optional: Cheesecloth + rubber band (lid for jar)
*I use fresh ground brown rice and oats from Azure Standard. I have the grains pre-mixed 50/50 and grind it fresh through my KoMo mill.
Day 1: Rehydrate Your Starter
Your packet contains 10 grams of starter. You can choose to use 5g or 10 g to get started. If using 5g, set aside the remaining 5g in a cool & dry place.
Add 5g of your dried starter to a glass mason jar - pint size works well to start. After your starter is established, you can move to a bigger jar. Mine now lives in a glass crock from my great grandma.
Add 25g of lukewarm filtered water to you starter - let sit to rehydrate.
After 5 minutes, stir in 10g of brown rice flour and 10g of oat flour. Stir with spatula until well mixed. Scrape down the sides of the jar.
Cover with cheesecloth & rubber band. Set aside at room temperature.
Fun thing: Give your starter a name.
Day 2: Feeding your Starter
Your starter will look smooth with minimal or no bubbles the first couple days, this is normal.
No need to discard yet. Add 12.5g brown rice flour, 12.5g oat flour, and 25-30g lukewarm filtered water. Stir with spatula to combine and scrap the sides down. You want the consistency to look more like pancake batter. Cover and set aside at room temperature.
Day 3: Feeding your Starter
You may or may not notice a few bubbles on the surface.
No need to discard yet. Add 12.5g brown rice flour, 12.5g oat flour, and 25-30g lukewarm filtered water. Stir with spatula to combine and scrap the sides down.
Day 4: Feeding your Starter
You may or may not notice a few bubbles on the surface.
No need to discard yet. Add 12.5g brown rice flour, 12.5g oat flour, and 25-30g lukewarm filtered water. Stir with spatula to combine and scrap the sides down.
During the next 24 hours, your starter may start to rise. Just for fun, mark the level of the starter on the side of the jar after mixing and watch how much it rises. Use a washable glass marker or a rubber band around the jar to mark it.
Day 5: Feeding your Starter
Today we’re doing a bigger feed. The growing sourdough starter should smell really nice by now, like sourdough and yeast -similar to a brewery or bakery. That is an excellent sign she is getting stronger and can handle more food.
NOTE: I you didn’t see much rise, consider adjusting the consistency. If it is too runny, it won’t rise well. Different types/brands of flour, humidity levels, etc. can lead to some variation between our starter consistency and your own. For example, sorghum flour is very dense and holds more water. If yours is on the more liquidy side reduce the water by 5-10g to start.
Discard some starter. Remove all but 50g of the starter - you can use the discard in pancakes, muffins or to make crackers
Add 25g brown rice flour, 25g oat flour, and 50g of lukewarm water. stir with spatula to combine. Scrape down sides & cover. Note the level of the starter on the side of the container and set it aside.
Continue with Maintenance Feedings
Moving forward, repeat step 5 and continue with daily feedings for the most active starter. This is best when you are making loaves of bread on a regular basis.
Or you can switch to maintenance feedings 2-4x per week if you’re not using your starter often or going on vacation. Simply store your starter in the refrigerator. When you’re ready to use it again, bring it out to warm up to room temperature and resume feeding.
Once your starter is established, feed her once a week for maintenance and keep her in the fridge between works. Allow the starter to come up to room temperature before discarding and feeding. This is my summer routine.
If you want to change flour, do so over 3-5 feedings, mixing the old and new flour together. Otherwise, the sourdough will fall flat for a while until it rebuilds itself. I accidentally did this when I ran out sorghum flour and had to suddenly switch flours. It took several batches before she was bubbly again.
Ready to Make Bread?
When your starter doubles in volume, you’re ready to make bread.
This may happen between days 5-14. You can speed this along by placing the starter in the oven with only the light on for ambient heat. It may double in 3-4 hours
Feeding for Making Bread:
Prior to making bread, you may want to do 1-2 larger feedings depending on the volume of your starter. You can feed twice in a 12–24-hour period to increase activity if needed.
Add 50g brown rice flour, 50g oat flour, & 100g lukewarm filtered water.
How To Build Levain
First, feed your starter 1-2x in the 24 hours before making this recipe to ensure it’s good and active. You’ll know your starter is ready to use when it doubles in size. You can then do one of two options
- If you want to use the starter right from your jar, do a big feeding of 75g gluten free flour of choice & 75g warm filtered water. This ensures you have at lease 150g of starter available with some left over. Allow to rise/double before making the recipe.
- Or build a levain/preferment: Building a Levain (also called a pre-ferment) helps determine how sour your bread will be, and also makes it easy to have the amount of starter needed for your recipe to add when needed.
-
- The amount needed will vary recipe to recipe, so see how many grams of active starter is needed.
- For the Classic GF Loaf recipe below, you’ll need 150g of active starter.
- In a second jar or bowl, add 50g of the fed & active sourdough starter, 50g GF flour, and 50g warm filtered water. Allow rise /double before using in recipe.
Wanting a community to lean into? Join the FREE Thriving Through Farm Distress: Wife’s Support Network! In our community, we embrace the challenges of farm life and provide a supportive space for wives facing the complexities of managing a family farm. Whether you're navigating financial pressures, day-to-day operations, or seeking ways to create a thriving home, we're here for you. Explore gardening tips for cultivating your own oasis, share insights on animal care, and discover practical family budgeting strategies. Together, let's grow through challenges, flourish authentically, and sow the seeds for a resilient and thriving farm life. Join us on this journey of resilience and abundance!
As I've grown in my journey as an entrepreneur, mom, gardener, and livestock owner, I struggled to find a planner that met my needs and kept me organized. So, I MADE MY OWN. You can look at it on the link below and buy it on amazon below.
Don't want the whole calendar part? I got you! I pulled the gardening and animal care pages out and put them in a book all their own.
Starting to garden doesn't have to be hard! I gathered all the tips I've learned over my gardening learning curve and made them into a simple course to jump start your gardening your life.
Supporting Your Family Naturally from the Inside Out community!! This community is for Mommas, looking to Support Your Family from Nature for Wellness. Tips range from nutrition, herbals, detoxing, natural cleaning, and essential oils. Basically, all the things I’ve learned slowly over the past 5+ years of my journey. We have moved off Facebook, to better serve our community and be able to discuss openly options for providing for your family in the best way possible.
Join the FREE Community
Join the FREE Community
I've had 3 very different pregnancies. After the first traumatic birth, I learned better and how to care for my body naturally and prevent common pregnancy and birth problems before they arise. This quick course will get you the tools you need to have a naturally healthy pregnancy, labor, and delivery. My first pregnancy I had a normal western medicine all the things pregnancy. My second? I flipped to completely natural, no medicine. Bonus: Preventing Preeclampsia Without the Aspirin & Healing from Birth Trauma
This post may contain affiliate links, which means that I may receive a commission if you make a purchase using these links, with NO additional cost to you.
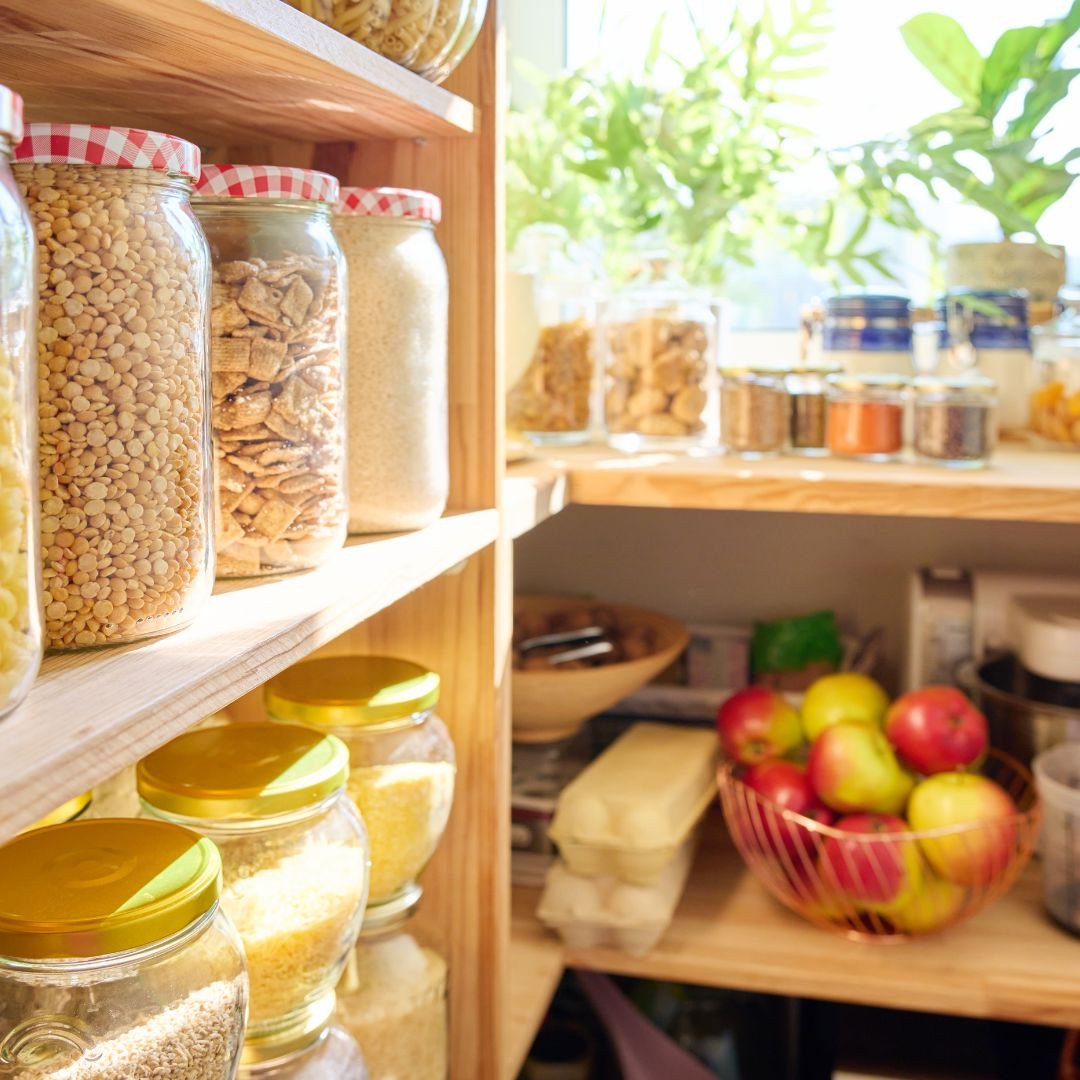
Living in a rural area can be tough at times, especially when it comes to food. While we have access to fresh fruits and vegetables from our gardens, it can be tough to find certain pantry staples at our local grocery store, especially if you have food allergies like corn, soy, or gluten. That’s why I’ve turned to Azure Standard for all my non-perishable needs. Azure Standard is a bulk buying co-op that delivers to a local town and you pick up. It’s easy, affordable, and helps me keep my pantry stocked with all the essentials. Let’s take a closer look at the benefits of using Azure Standard and what items I regularly order for my pantry.
Bulk Buying: Azure Standard is a co-op that allows you to bulk buy items at a discounted rate. As a farm wife, this is ideal for me because I can order large quantities of items that I use frequently, like oats and rice. Not only is it cost-effective to buy in bulk, but it also ensures that I have enough of these essential items to last me for several months.
Variety: Another great benefit of using Azure Standard is the wide variety of items that they offer. From dried fruit to nut butter, they have everything you need to stock your pantry. Plus, they offer a selection of organic and non-GMO items, so you can feel good about the food you’re putting on your family’s table. I regularly order items like pecans, dried pineapple, and potato starch, which are hard to find at my local grocery store.
Convenience: Azure Standard’s ordering process is extremely convenient and flexible. You can place an order whenever you need to, whether that’s monthly, quarterly, or sporadically throughout the year. Plus, they offer a emailing system that alerts you when your order closing date is approaching, and when your delivery is scheduled to arrive, so you know exactly when to expect it. This makes it easy to work around your schedule and ensure that you’re always fully stocked with pantry staples.
Financially-Smart: Finally, using Azure Standard can be financially smart. By purchasing in bulk, you’ll save money in the long run. Plus, you’ll cut down on the time and gas money it takes to drive to the grocery store. This is especially helpful for working moms who want to save money and time while still providing nutritious meals for their families.
Rural living can be challenging at times, especially when it comes to food. However, using Azure Standard has made my life a whole lot easier. I can order all my pantry items in bulk, then pick them up once a month tops, and save money in the process. Plus, their wide variety of items ensures that my pantry is always fully stocked with essentials.
I highly recommend using Azure Standard for anyone who lives in a rural area and wants a simple and affordable way to stock their pantry. You can try it for yourself using the link here.
Wanting a community to lean into? Join the FREE Thriving Through Farm Loss: Wife’s Support Network! In our community, we embrace the challenges of farm life and provide a supportive space for wives facing the complexities of managing a family farm. Whether you're navigating financial pressures, day-to-day operations, or seeking ways to create a thriving home, we're here for you. Explore gardening tips for cultivating your own oasis, share insights on animal care, and discover practical family budgeting strategies. Together, let's grow through challenges, flourish authentically, and sow the seeds for a resilient and thriving farm life. Join us on this journey of resilience and abundance!
As I've grown in my journey as an entrepreneur, mom, gardener, and livestock owner, I struggled to find a planner that met my needs and kept me organized. So, I MADE MY OWN. You can look at it on the link below and buy it on amazon below.
Don't want the whole calendar part? I got you! I pulled the gardening and animal care pages out and put them in a book all their own.
Starting to garden doesn't have to be hard! I gathered all the tips I've learned over my gardening learning curve and made them into a simple course to jump start your gardening your life.
Supporting Your Family Naturally from the Inside Out community!! This community is for Mommas, looking to Support Your Family from Nature for Wellness. Tips range from nutrition, herbals, detoxing, natural cleaning, and essential oils. Basically, all the things I’ve learned slowly over the past 5+ years of my journey. We have moved off Facebook, to better serve our community and be able to discuss openly options for providing for your family in the best way possible.
Join the FREE Community
Join the FREE Community
I've had 3 very different pregnancies. After the first traumatic birth, I learned better and how to care for my body naturally and prevent common pregnancy and birth problems before they arise. This quick course will get you the tools you need to have a naturally healthy pregnancy, labor, and delivery. My first pregnancy I had a normal western medicine all the things pregnancy. My second? I flipped to completely natural, no medicine. Bonus: Preventing Preeclampsia Without the Aspirin & Healing from Birth Trauma
For more on wellness tips click here:
For more on homesteading on your budget click here: