Planting the Garden - Cool and Warm Season Plants

Planting the Garden - Cool and Warm Season Plants

This post may contain affiliate links, which means that I may receive a commission if you make a purchase using these links, with no additional cost to you.

When starting to plant your garden pay attention to the weather and soil temperature. The planting zones are good guidelines to follow, but always pay attention to the long-term forecast. Here we are on the edge of zones 5 & 6. Some years we have an early spring (like this year), some years there’s a late frost (like 2018 & 2019). 

My recommendation is to plant as early as you can, but insulate if you are able. Temporary greenhouses can be made from PVC or other sticks and clear plastic. This gives early plants a bit more humidity, protection, and heat. You can also keep old blankets on hand or buckets and cover the plants in pots or planters when a frost is predicted. 

Common garden plants that like the cooler weather: lettuce, spinach, broccoli, cauliflower, beets, and peas. These were planted in my garden in April (minus the beets and cauliflower – we don’t like to eat those, so we don’t plant them). The lettuce and spinach I reused old water tanks that were either rusted out or broken bottom (thanks to my sister’s horse). 
The broccoli, I attempted a makeshift temporary greenhouse to try and protect it a little, to give it the best chance. The seeds I planted as an experiment are coming up and very few of the plants survived. I struggled to keep the cover up and the soaker hose I was using was not watering as well as I thought it was. I am going to try for a fall crop in the rows that didn’t make it. So be looking out for that coming this fall!

For zones 5 & 6 usually by late May the weather is good and soil temperature warm enough to plant the rest of the garden plants. Ideally you would stagger planting, but by May I’m ready for everything to be in the garden and I just plant the rest of the plants within a few days. Make sure you have something to mark your rows and plants. I use metal stakes and flags that I can stick through the seed packet. For marking varieties, I have used spoons, tongue depressors, or other markers from when I started the seeds inside. However, nothing is safe from the re-labeling of a young child. 
Mapping the garden out ahead of time also helps with staggering the planting (see last week's post). You can plant the different plants in their respective spots without having to plant everything at once. 

Wanting a community to lean into? Join the FREE Courageous + Purposeful Mommas group! This community is for the Mommas, mommas to be, in the midst of raising, and kids grown, looking for tips on building your family up and providing for them through natural methods. Tips include: gardening, bulk buying, caning,/preserving, livestock, homesteading, and home remedies. Your family is precious, and this group is to help you gain the knowledge and tools to keep your family well and not reliant on outside professionals. Remedies and tips are easy and simple for the busy momma, time is precious after all, including pregnancy, birth, young kids, and illness. Trust your Momma gut again! This community offers the resources + community you need to help get started on your journey and prepare for whatever future you envision.

Join the Free Community


Click here to get the stories straight to your email:

Sign up for the Blog


For more on wellness tips click here:

Sign up for Wellness tips


For more on homesteading on your budget click here:

Sign up for Homesteading Tips


For more simple DIY updates click here:

Sign up for easy DIYs 


Hardening Off - the Part I Messed Up

Hardening Off - the Part I Messed Up

This post may contain affiliate links, which means that I may receive a commission if you make a purchase using these links, with NO additional cost to you. 


This is the part I messed up my first year, and by messed up I mean didn't do. Guess what plants that are started inside do NOT take well to just being planted from inside to garden.  You must harden them off slowly. So, what is this? In short it is slowly adjusting the little plants to the outside.

After the seeds are going well in the pods, I move them to a bigger pot. I have a stash of plastic containers that I have purchased plants in and use those. You can also find them on Amazon if you don’t have any handy.  Save them and you can reuse them year after year, until they crack. Many of my herbs I start in these pots to begin with as they will spread anyway. 

After the plants are doing well in the larger pots, I remove the covers and let them remain in the closed greenhouse for a week. Then I open the greenhouse for a week and barricade it so no little ones can crawl in or pull the plants out.  Once the weather is nice, warm, and sunny in the afternoons (about mid-late April), I’ll take the trays of plants outside and set them in a sheltered area that is still in the sun. If you have a large porch that faces west, you could move the whole greenhouse out there and button it back up at night. 

Pay attention to the plants as you take them back in or button the greenhouse up. Are they looking healthy yet? Do some seem to be struggling a bit? If any are starting to struggle with outside, go back a step with those plants, and give them another week to grow. Eventually around the late-April, I’ll start leaving the plants out at night by the house, if the night isn’t going to be cold, or storm. I cannot remember how many times last year I woke up in the middle of the night and ran out to bring plants in because it was thundering. 

Around the first part of May I will start taking the garden plants to the tables by the garden for part of the day. Slowly building up the time they are out there until it is time to plant them. 

Each part of process is adjusted depending on when the plants need to be in the garden, and how each is handling the outside.  The cooler season plants, like broccoli and cabbage, I harden off sooner because they are planted early.  The warmer season plants, like tomatoes and peppers, I take longer with because they don’t like the cool temperature but love the sun. 

Wanting a community to lean into? Join the FREE Courageous + Purposeful Mommas group! This community is for the Mommas, mommas to be, in the midst of raising, and kids grown, looking for tips on building your family up and providing for them through natural methods. Tips include: gardening, bulk buying, caning,/preserving, livestock, homesteading, and home remedies. Your family is precious, and this group is to help you gain the knowledge and tools to keep your family well and not reliant on outside professionals. Remedies and tips are easy and simple for the busy momma, time is precious after all, including pregnancy, birth, young kids, and illness. Trust your Momma gut again! This community offers the resources + community you need to help get started on your journey and prepare for whatever future you envision.

Join the Free Community


Click here to get the stories straight to your email:

Sign up for the Blog


For more on wellness tips click here:

Sign up for Wellness tips


For more on homesteading on your budget click here:

Sign up for Homesteading Tips


For more simple DIY updates click here:

Sign up for easy DIYs 


Starting From Seed

Starting From Seed

This post may contain affiliate links, which means that I may receive a commission if you make a purchase using these links, with NO additional cost to you. 


A few years ago, I decided to try to start my own plants.  I started with just a small greenhouse starter, that could only start 8 plants at a time. It was a huge success! I started my peppers and tomatoes that year. They did not survive the garden transplant however (more on that later). That summer I found a small greenhouse on sale at Tractor Supply. I was thinking about getting a greenhouse anyway, so…I bought it! 

I like to start my plants early, especially if it is a plant I’m trying for the first time. By early I mean January. This way if the first attempt flops, I have time to try again. The trickiest part of starting plants this early is getting enough warmth and light to the seeds. Grow lights are a must in Nebraska to have a chance at getting plants to grow this early. I found mine on Amazon (click the descriptions to follow the links). The two I have in my greenhouse are somewhat adjustable, with 2 lights and auto off. I have a different one I love that comes with a programmable on/off. I used this one in my basement, so I don’t have to remember to constantly turn it on. 

To decide when to start your plants, first decide when you can (because of frost) and want to (because of schedule), then count back. I sort my seeds by the month they will need to be started. The back of the package usually has how many weeks the plants will take to get going.  

I plan to have most of my garden planted by Mid-May, so I started the first of my herbs in January, as they go in pots around the house and can be pulled into the garage if a late freeze happens. These are also herbs that I have had difficult starting in the past, or were first time herbs. February I usually start the rest of the herbs, unless they are a direct sow like cilantro or dill. I also started my peppers in February, as I have difficulty getting them big and strong enough to survive the garden when I start them in March/April. March, I start the tomatoes (so they get bigger), broccoli and other early plant vegetables. Early April I start the cucumbers and other easy start plants.  April is also the last attempt to restart any of the plants that failed earlier.

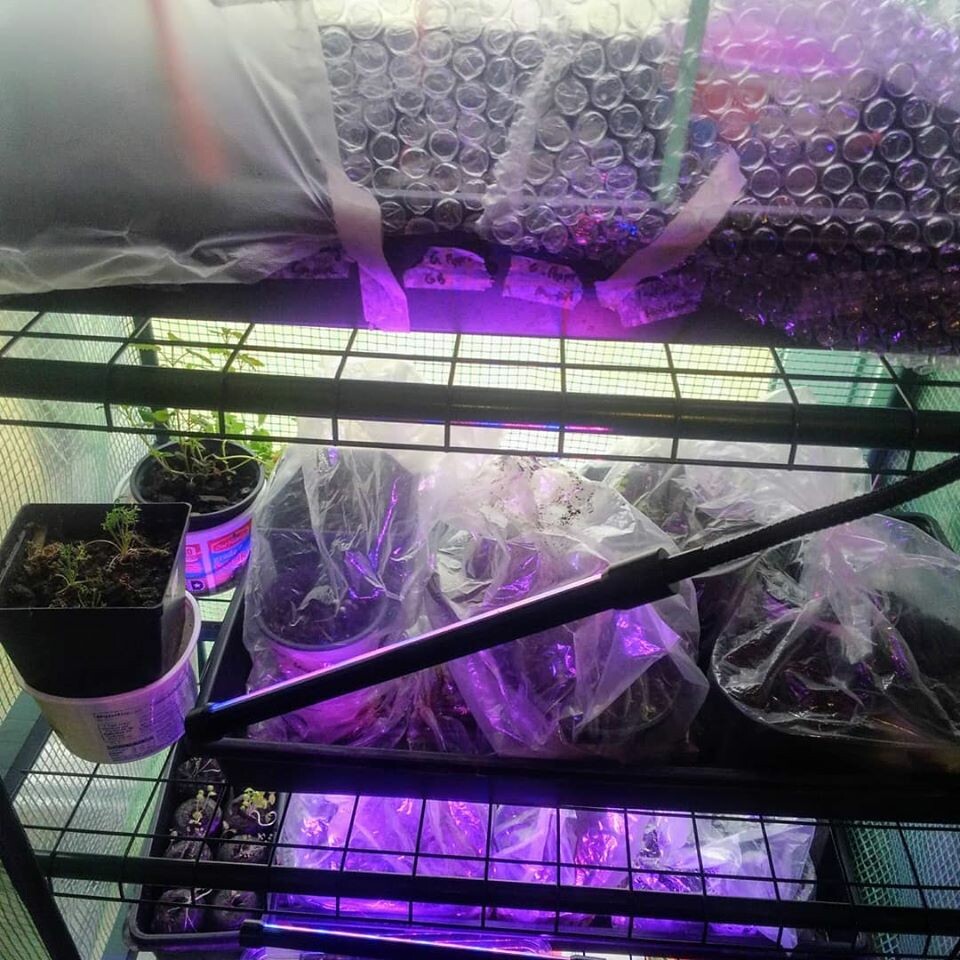
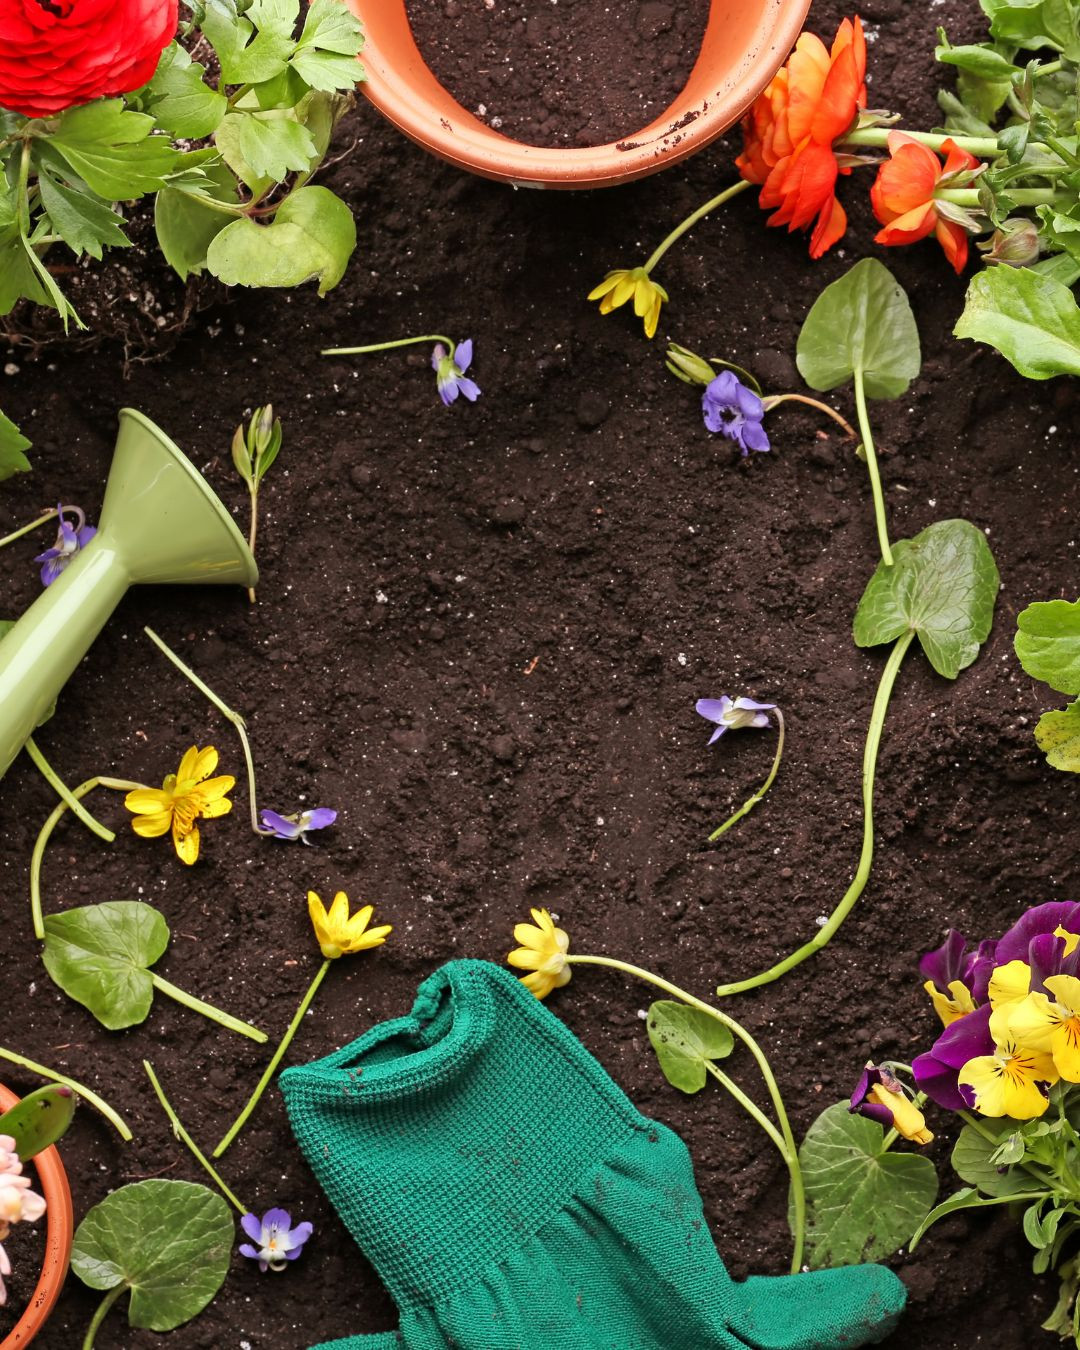
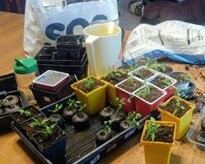
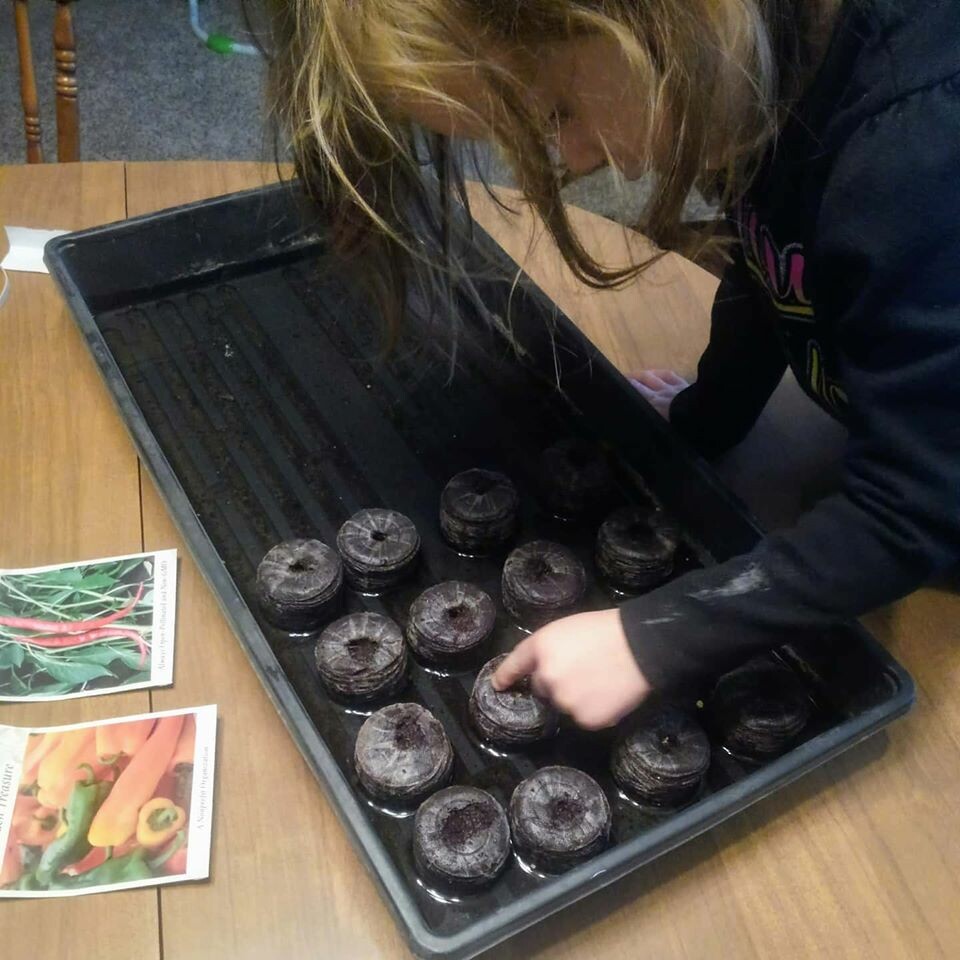
I use these handy seed pods to start my plants and simple grow trays. Just add water over the pods and let them expand, then plant your seeds. I use saran wrap to drape loosely over the tray to keep the humidity up. As the plants grow, I’ll use straws or spoons to prop the cover up for a few weeks before taking it off. This method works well if you don’t have a green house as well, because the plastic acts much like a mini greenhouse. To increase soil temperature early, you can buy a heat mat especially for seeds. I used a heat pad on a timer to experiment with at first, and plan on purchasing a grow mat for next year.  

Iv loves to help me start all the seeds by pushing them into the little pods. As much as I like things tidy, I do believe in teaching my children as I do things, so I deal with her mess as she helps, and we also get a lesson on cleaning up at the end.

Wanting a community to lean into? Join the FREE Courageous + Purposeful Mommas group! This community is for the Mommas, mommas to be, in the midst of raising, and kids grown, looking for tips on building your family up and providing for them through natural methods. Tips include: gardening, bulk buying, caning,/preserving, livestock, homesteading, and home remedies. Your family is precious, and this group is to help you gain the knowledge and tools to keep your family well and not reliant on outside professionals. Remedies and tips are easy and simple for the busy momma, time is precious after all, including pregnancy, birth, young kids, and illness. Trust your Momma gut again! This community offers the resources + community you need to help get started on your journey and prepare for whatever future you envision.

Join the Free Community


Click here to get the stories straight to your email:

Sign up for the Blog


For more on wellness tips click here:

Sign up for Wellness tips


For more on homesteading on your budget click here:

Sign up for Homesteading Tips


For more simple DIY updates click here:

Sign up for easy DIYs 


Plant with Purpose: Home Remedies

Plant with Purpose: Home Remedies

This post may contain affiliate links, which means that I may receive a commission if you make a purchase using these links, with NO additional cost to you. 


A recent interest I have found is using plants for home remedies. The first book I purchased that has been very helpful and remains my favorite is “Medicinal Herbs: A Beginner’s Guide” by Rosemary Gladstar. It lays out how to know the plants, grow them, and use 33 plants. What I discovered is many of the “weeds” were beneficial! All I needed was to be able to identify them and know where they were naturally growing. If I knew that area was not going to be sprayed, I could just harvest them there! Win!! I didn’t have to take care of it! The best part is most of these are easy to grow and maintain once they are established. I like to get any seeds I can from Seed Savers if I cannot find them there, the next place is Amazon.  I try to get heirloom varieties, as they seem to start from seed and grow the best. They also are great for saving seeds for next year. 

This is still a growing area of my yard. I started collecting the information and trying plants when I was pregnant with my second, not thinking about the fact that having a baby in June greatly limits my ability to take care of the new plants. So I am still working on starting that flower bed….

Here’s what I have so far:
Aloe Vera – gel from the leaves soothes burns, wounds, and skin irritations. This one lives in my house and able to survive toddlers!

Calendula – has so many uses! My favorite is for wounds. It has amazing ability to stimulate cell repair and keep infections at bay. It is also a great for yeast overgrowth, it’s astringent and antiseptic which is great for gastrointestinal problems, and great at nourishing and cleansing the lymphatic system. I love this one! Super easy to grow and re-seeds easily. I keep this on in an old tank by the house.  

Dandelion – the leaf is a mild diuretic and can be used for bladder or kidney problems and is high in potassium. The root is a liver tonic and stimulates the production of bile. It does taste very bitter though. The flower can also be eaten.   You can find dandelions everywhere but make sure, wherever you harvest them from, they have not been sprayed!

Lavender – The flower is the mainly used, but the leaf can be as well. It helps to alleviate migraines and headaches, reduce tension, stress and insomnia. This is one I got going good last year from seed and then it was killed on accident…

Lemon Balm – calms nervous and digestive systems. You can add it to chamomile for nervous exhaustion. It is also great as a spice to flavor food! Also, easy to grow and will spread. 

Peppermint – best known for its digestive aid and relieving nausea and gas. It spread to wherever it is allowed, so keep it contained.

Plantain – I didn’t know about this one, but it is everywhere! I don’t plant it because it comes up wherever there is blank dirt. It draws toxicity from the body and has properties that help check bleeding! I mix this one with calendula into a salve and use it on all cuts or rashes. 

Spearmint – milder than peppermint, but just as easy to grow. It is great alternative to peppermint for children and tends to have amphoteric properties (it moves the direction the body needs, stimulating and relaxing).

Yarrow – antiseptic, anti-inflammatory, and astringent properties. It is well known for healing wounds, bruises, and sprains. Make sure you find the wild version not a colorful hybrid. I found this one in my horse pasture!
 
Here’s the list of what I have coming:
Chamomile – anti-inflammatory and anti fever

Echinacea – aids in immune function, has antifungal and antibacterial properties

Elder – Rich in vitamin C! Great immune enhancer

Marsh  Mallow – Great from soothing inflamed and irritated tissues of the respiratory, digestive, and skin systems. 

Mullein – the leaf is antispasmodic and an expectorant (get rid of mucus). 

St. John’s Wort – strong antidepressant, antibacterial, antiviral and anti-inflammatory properties. Made into an oil, it is one of the best herbs for trauma to the skin, relieving pain and promoting tissue repair. 

Valerian – used for stress, tension, insomnia and nervous system disorders. 

Wanting a community to lean into? Join the FREE Courageous + Purposeful Mommas group! This community is for the Mommas, mommas to be, in the midst of raising, and kids grown, looking for tips on building your family up and providing for them through natural methods. Tips include: gardening, bulk buying, caning,/preserving, livestock, homesteading, and home remedies. Your family is precious, and this group is to help you gain the knowledge and tools to keep your family well and not reliant on outside professionals. Remedies and tips are easy and simple for the busy momma, time is precious after all, including pregnancy, birth, young kids, and illness. Trust your Momma gut again! This community offers the resources + community you need to help get started on your journey and prepare for whatever future you envision.

Join the Free Community


Click here to get the stories straight to your email:

Sign up for the Blog


For more on wellness tips click here:

Sign up for Wellness tips


For more on homesteading on your budget click here:

Sign up for Homesteading Tips


For more simple DIY updates click here:

Sign up for easy DIYs 


Plant with purpose: Pest Control

Plant with purpose: Pest Control

This post may contain affiliate links, which means that I may receive a commission if you make a purchase using these links, with NO additional cost to you. 


Anything I plant or attempt to grow must have a purpose, other than looking pretty. As a busy mom of two, and a side of extra farm/cattle hand, I don’t have the time or space to care for things that are just pretty. A good part of homesteading is being purposeful with your resources. Your time, your space, and in some places your water, are all valuable. Make sure you are using them the best you can. 

Is that useful?
Most of my plants and herbs have come from either (a) I sure use a lot of “x” I wonder if I can grow that in Nebraska instead of buying it. Or I heard (b) could be useful for “y” I wonder if I can grow that to have on hand, so I don’t have to rely on (c) when “y” happens. I would then look to see if growing whatever it was, was possible in Nebraska and if it was annual or perennial. Remember the time part? If it can come back year after year or readily reseed itself, I’m in! If it was an annual, can I trick it by bringing it inside, or take a cut of it to start next years plant from, or are the seeds easy to collect and get started? It’s not saving me much $$ if I constantly have to buy a new plant. 

I started with two main types of plants ones my family could eat or ones that repel bugs or snakes (I hate those). We spend a lot of time outside and I disliked putting bug spray on, so what plants do mosquitoes not like. 

Here is what I found for the pests
Citronella – It is related to geraniums, but has a much stronger scent, that is given off whenever the leaves are rustled. I love the smell of it and the misquotes hate it. This is a perennial in tropical regions, but not in Nebraska. If I ever build my greenhouse, I could move the large pots in for the winter and they might overwinter. 
The good news is you can start new plants from cuts. When the plant is in active growing stage take a cut and dip in water for 24 hours then stick in the wet soil. I have not successfully accomplished this though. The batch I had going good, my 2 ½ year old helper decided to pull them all up right before the killing frost. ☹ I will be trying again this year however, as these are the best but not very cheap to buy. 

Geraniums – much softer scent, but still repels mosquitoes. These are easier to bring inside over the winter, but they need warm and plenty of sunlight. 

Cat mint – I love this on and the butterflies do to! This one is super easy to grow and will fill its space. I have mine in an old mineral tub. It can take the full sun and dry of forgetful watering (I have seen the leaves start curling, soaked it and it came back)! The best part is it over winters even in a large pot. 

Lavender – so many uses for this! I have it right by my tack room door, not only for mosquitoes, but also its calming scent for nervous riders. This one is a perennial if you get the correct variety but will not do well in a pot overwinter.

Lemon balm – can be perennial in the warmer regions or if is in the ground. Bonus is you can also cook with this one! Use the leaves for tea or seasonings. 

Lemongrass – I have this one not for mosquitoes, but for snakes! This one is also a perennial in tropical regions. You are supposed to be able to take a part of I the plant root, soak it for 24 hours the plant in soft soil, and it will restart. I did not have luck last year. A few got started with a small root, but never matured enough to plant. 

Peppermint – This one is a must if you want to keep bugs, mice, snakes away from an area. Grow it in a contained area though because it will take over. It will come back year after year or at least reseed itself, even in a large pot or old stock tank, if you can keep the dogs from digging it up or smothering it. We have snakes everywhere at our house and one pot of this and the snakes avoided the front porch. I’m adding 4 pots this year to surround the garage door openings. Plus you have peppermint tea!

Marigolds – Many bugs don’t like the smell of these and will avoid them. I plant them around my garden and have seen a decrease in some of the common garden pests but misquotes don’t seem to care. These also readily re-seed!

Wanting a community to lean into? Join the FREE Courageous + Purposeful Mommas group! This community is for the Mommas, mommas to be, in the midst of raising, and kids grown, looking for tips on building your family up and providing for them through natural methods. Tips include: gardening, bulk buying, caning,/preserving, livestock, homesteading, and home remedies. Your family is precious, and this group is to help you gain the knowledge and tools to keep your family well and not reliant on outside professionals. Remedies and tips are easy and simple for the busy momma, time is precious after all, including pregnancy, birth, young kids, and illness. Trust your Momma gut again! This community offers the resources + community you need to help get started on your journey and prepare for whatever future you envision.

Join the Free Community


Click here to get the stories straight to your email:

Sign up for the Blog


For more on wellness tips click here:

Sign up for Wellness tips


For more on homesteading on your budget click here:

Sign up for Homesteading Tips


For more simple DIY updates click here:

Sign up for easy DIYs