This post may contain affiliate links, which means that I may receive a commission if you make a purchase using these links, with NO additional cost to you.
You want to be self-sufficient. Where do you start?
When I left my job after my son was born, we were faced with the decision on how to feed our family and pay our other expenses on half the income. Granted, we no longer had the large expense of daycare, but we had the added expense of health insurance.
What did we do? No, my husband didn’t pick up a second job, and I didn’t pick up a part time job from home. I tried a few side gigs, but none of them brought in significant income.
The first thing we did was to look closely at our expenses and see where we were spending our money. What were our fixed every month expenses? What were our variable expenses? How could we best manage and keep ourselves on track? We switched to the cash envelope system for our variable expenses, groceries, eating out, etc.
The second thing we did was to see where we could minimize our expenses. We canceled several subscriptions. Evaluated if the services we had was worth the money, and canceled anything that was not, including all TV services. Yes we had antenna, maybe 2 channels if the weather was good.
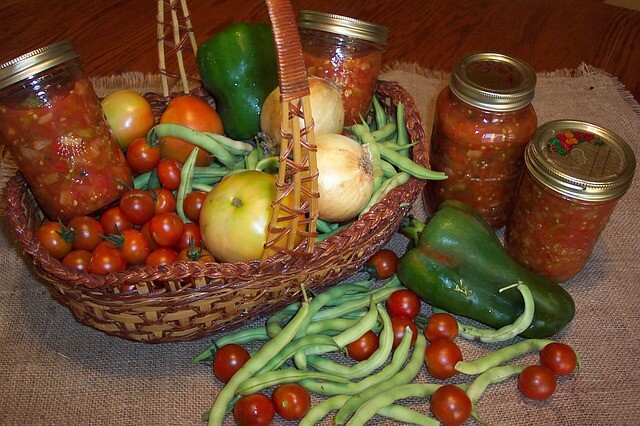
Once we had a good grasp on our expenses, we looked at where the big categories were that we needed to manage better. How could we minimize those? One big one for most people is the grocery category. Food is necessary for life, but how could we continue to have good quality food, while minimizing the cost? Garden!
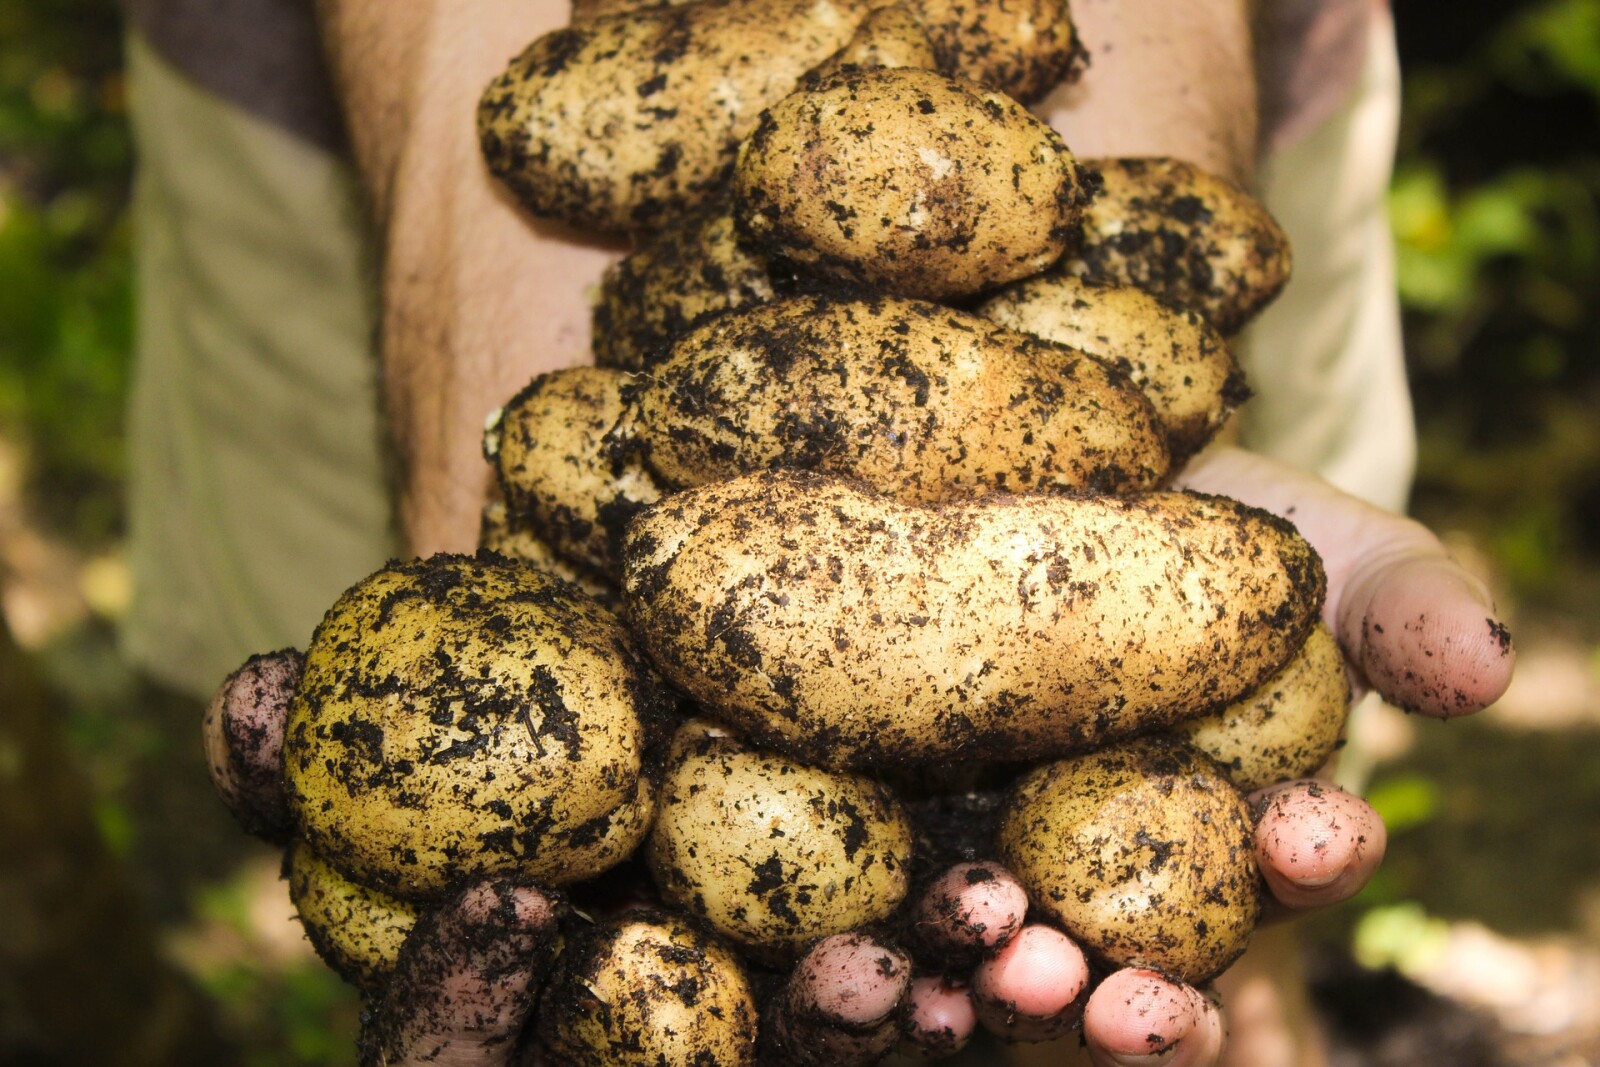
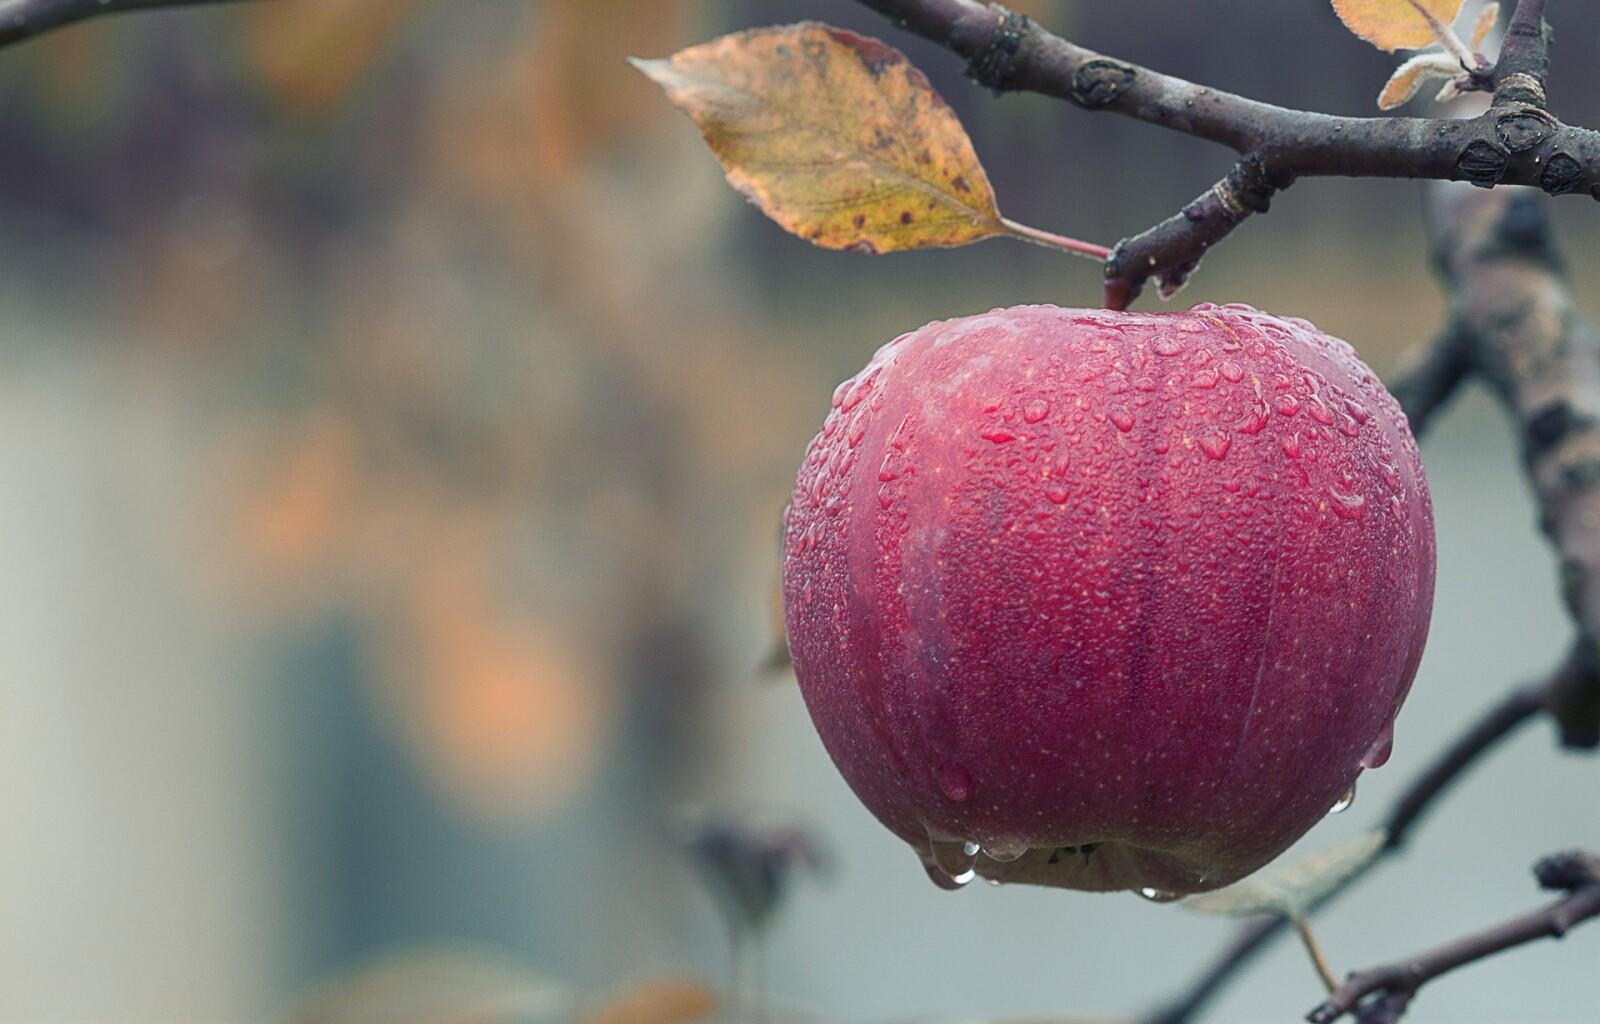
Ever since we were married, we have had a garden of some sorts. However, up until that point, it was more of a small hobby. Now it was a serious source of food. Eventually this garden will supply most of our vegetable and fruits.
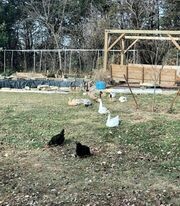
The other component of food necessary is protein. We raised cattle and sheep, so beef and lamb are readily available for us. Most people don’t have the space to raise a steer or lamb. However, chickens do not require much space and produce an excellent protein source. Eggs! Bonus is most towns allow some chickens. Second bonus is they are great bug control and love kitchen scraps.
Where are you to start your journey? Go through the same process and see what comes at the top of your category list. What can you do to bring it down? If you need help figuring it out, reach out! I’m here to help you succeed.
Wanting a community to lean into? Join the FREE Courageous + Purposeful Mommas group! This community is for the Mommas, mommas to be, in the midst of raising, and kids grown, looking for tips on building your family up and providing for them through natural methods. Tips include: gardening, bulk buying, caning,/preserving, livestock, homesteading, and home remedies. Your family is precious, and this group is to help you gain the knowledge and tools to keep your family well and not reliant on outside professionals. Remedies and tips are easy and simple for the busy momma, time is precious after all, including pregnancy, birth, young kids, and illness. Trust your Momma gut again! This community offers the resources + community you need to help get started on your journey and prepare for whatever future you envision.
Click here to get the stories straight to your email:
For more on wellness tips click here:
For more on homesteading on your budget click here:
For more simple DIY updates click here:

Join the FREE Community
Wanting a community to lean into? Join the FREE Courageous + Purposeful Mommas group! This community is for the Mommas, mommas to be, in the midst of raising, and kids grown, looking for tips on building your family up and providing for them through natural methods. Tips include: gardening, bulk buying, caning,/preserving, livestock, homesteading, and home remedies. Your family is precious, and this group is to help you gain the knowledge and tools to keep your family well and not reliant on outside professionals. Remedies and tips are easy and simple for the busy momma, time is precious after all, including pregnancy, birth, young kids, and illness. Trust your Momma gut again! This community offers the resources + community you need to help get started on your journey and prepare for whatever future you envision.
Click here to get the stories straight to your email:
For more on wellness tips click here:
For more on homesteading on your budget click here:
For more simple DIY updates click here:


- Canning jars
- Canning lids
- Canning rings
- Jar Funnel
- Long spatula or knife
- Hot water bath
- Stock pot (I usually have at least 2)
- Colander
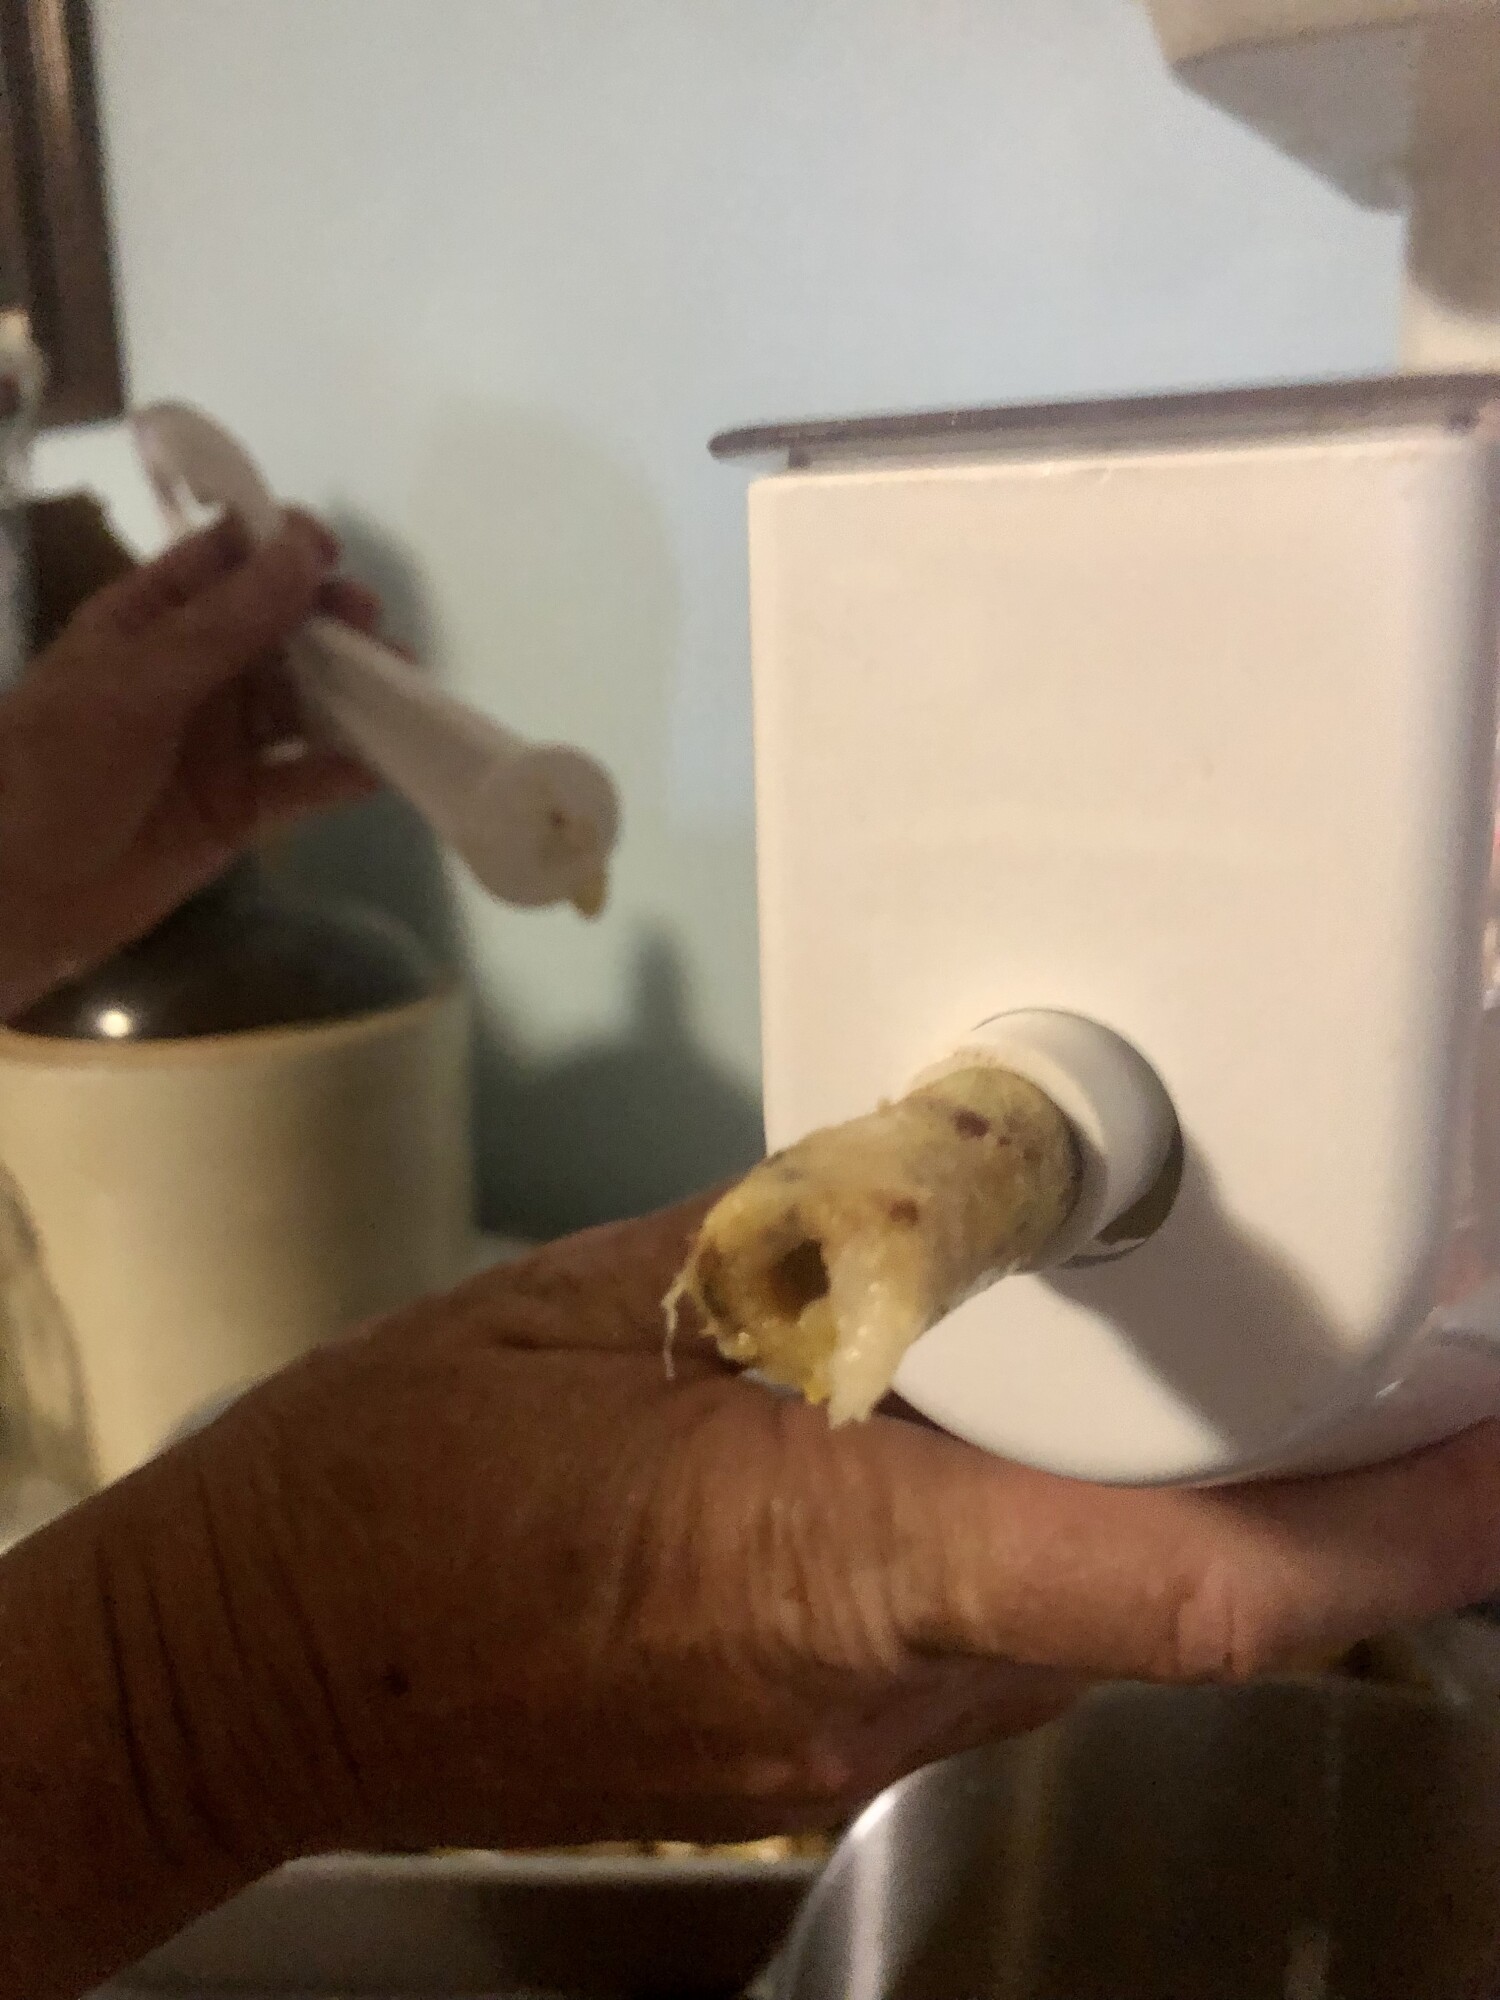
- Sieve/immersion blender/kitchen aid sieve attachment
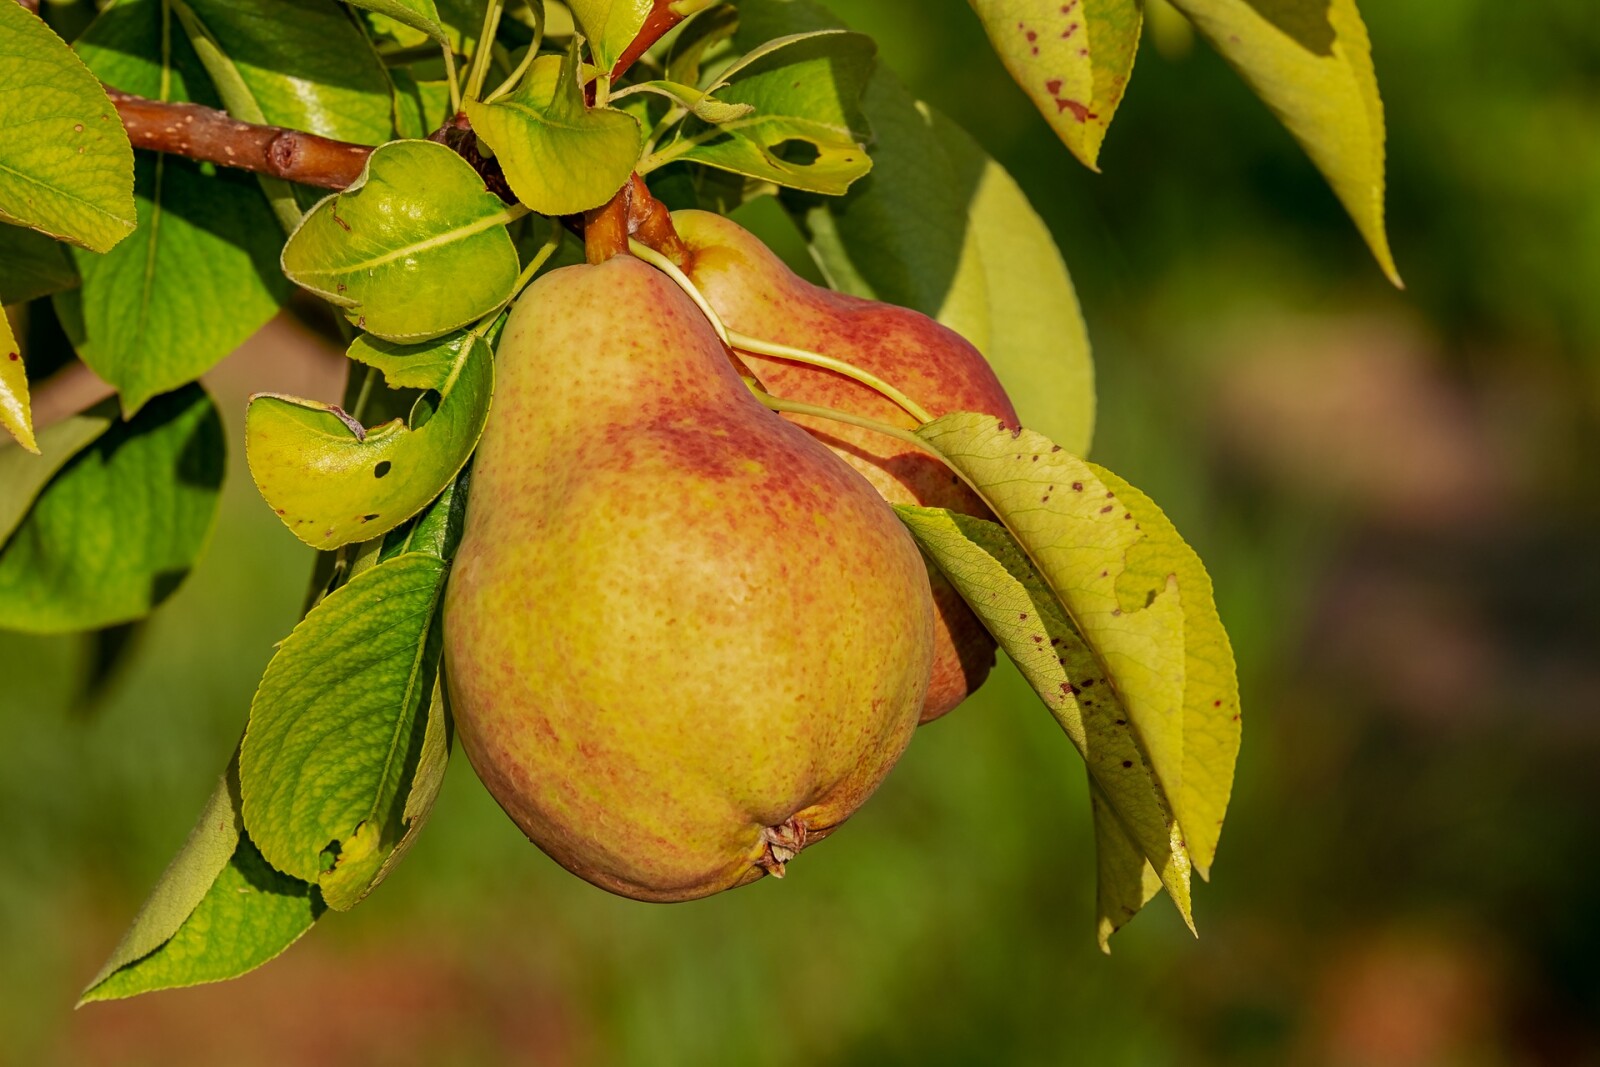
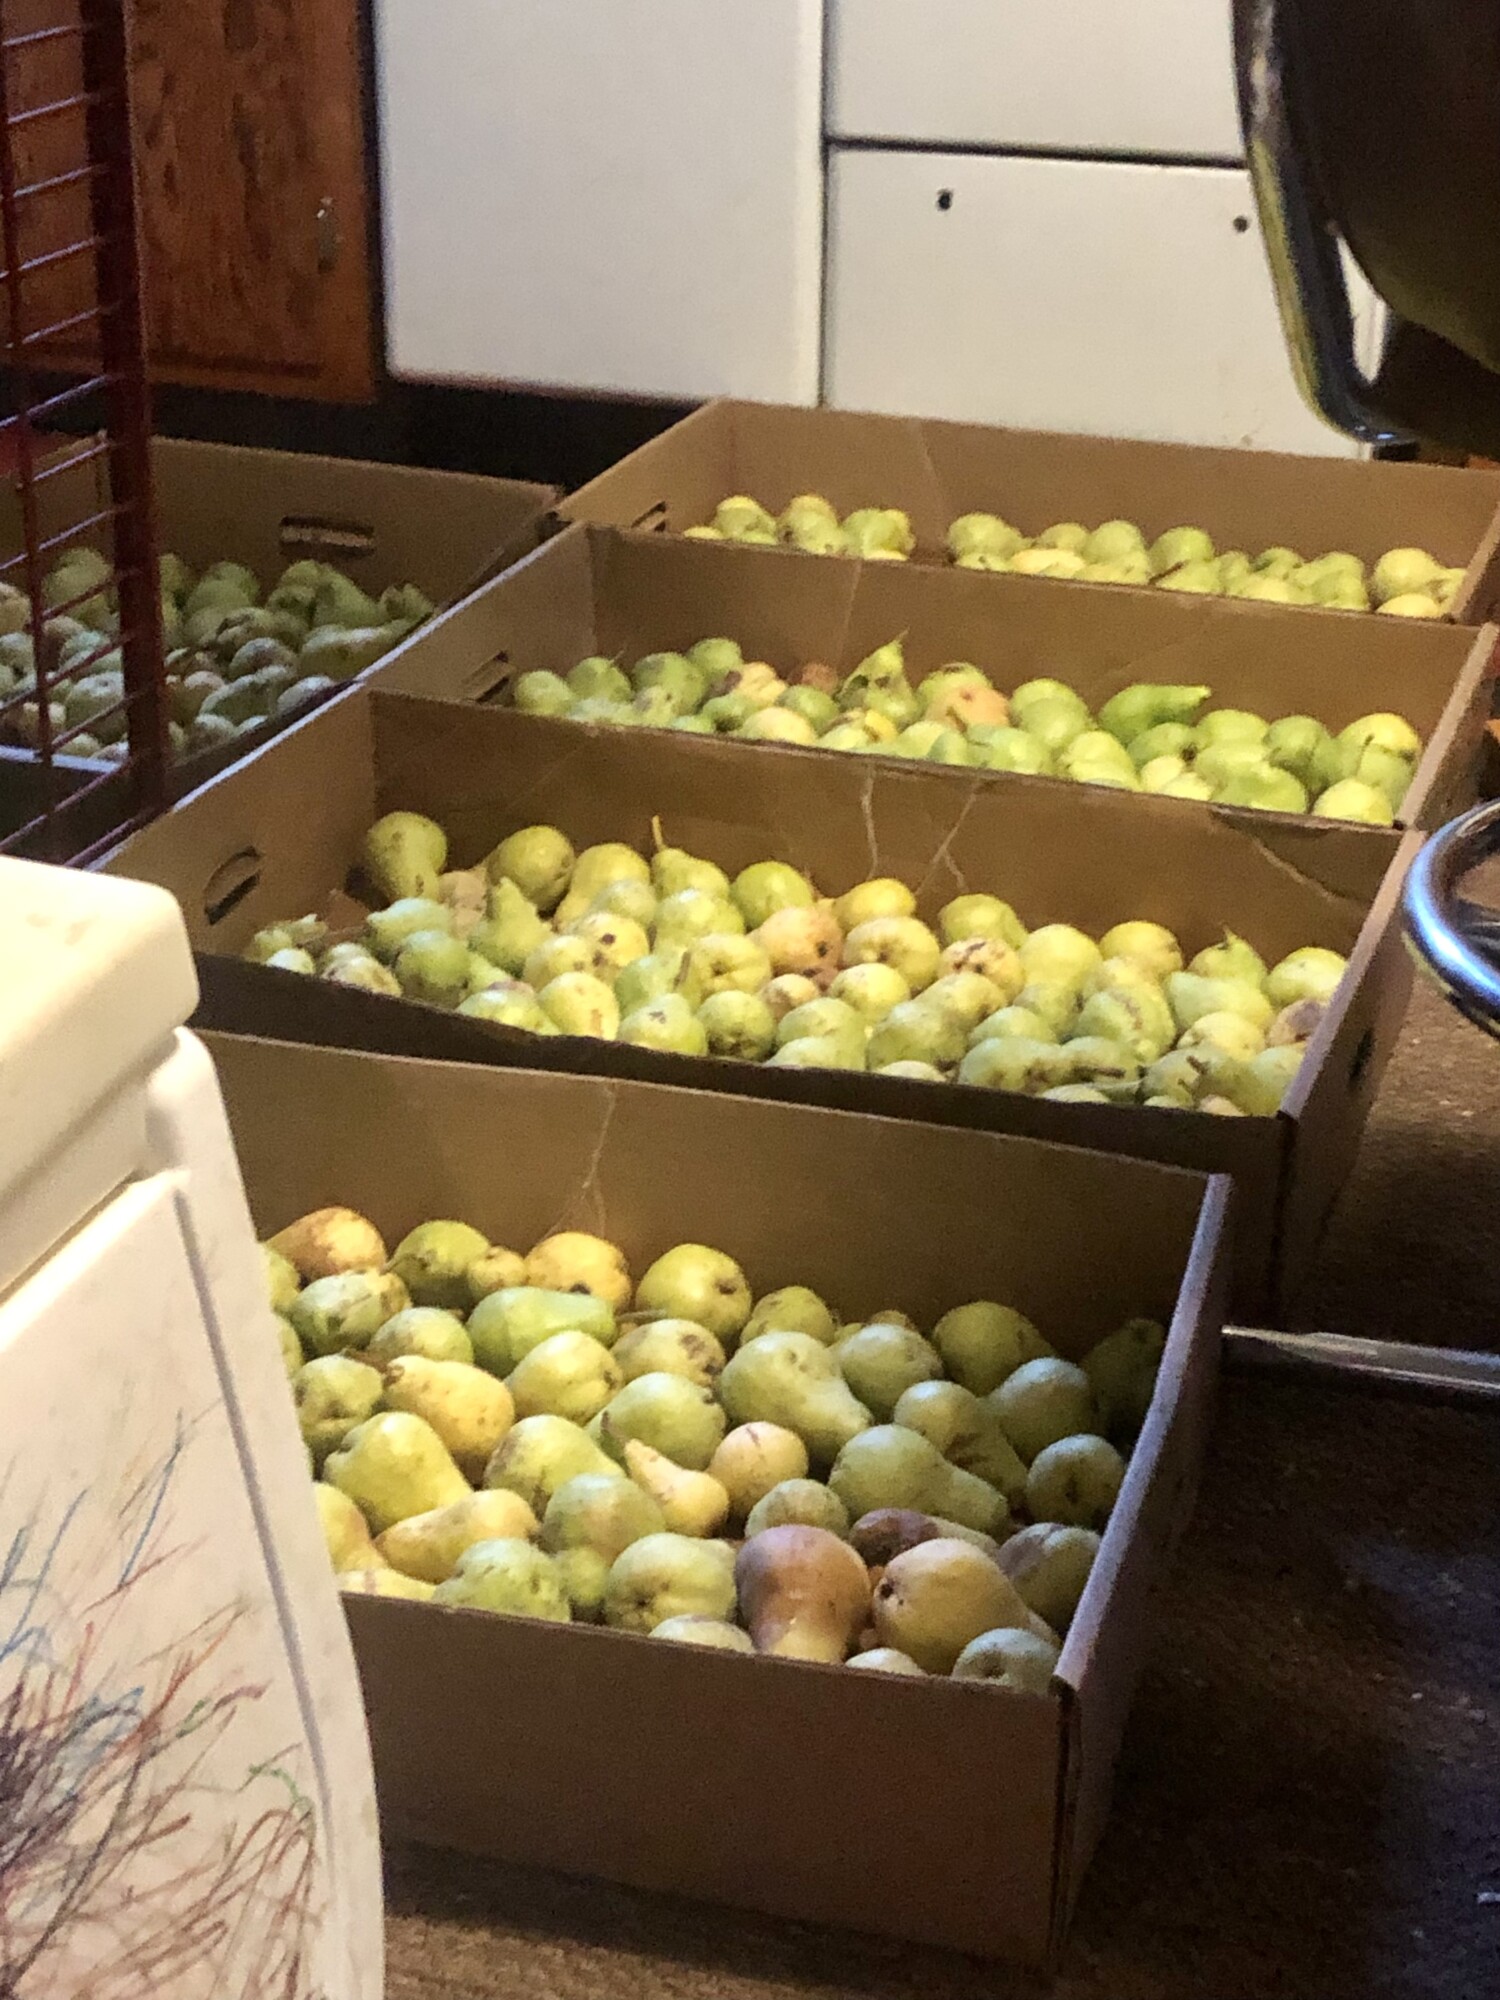
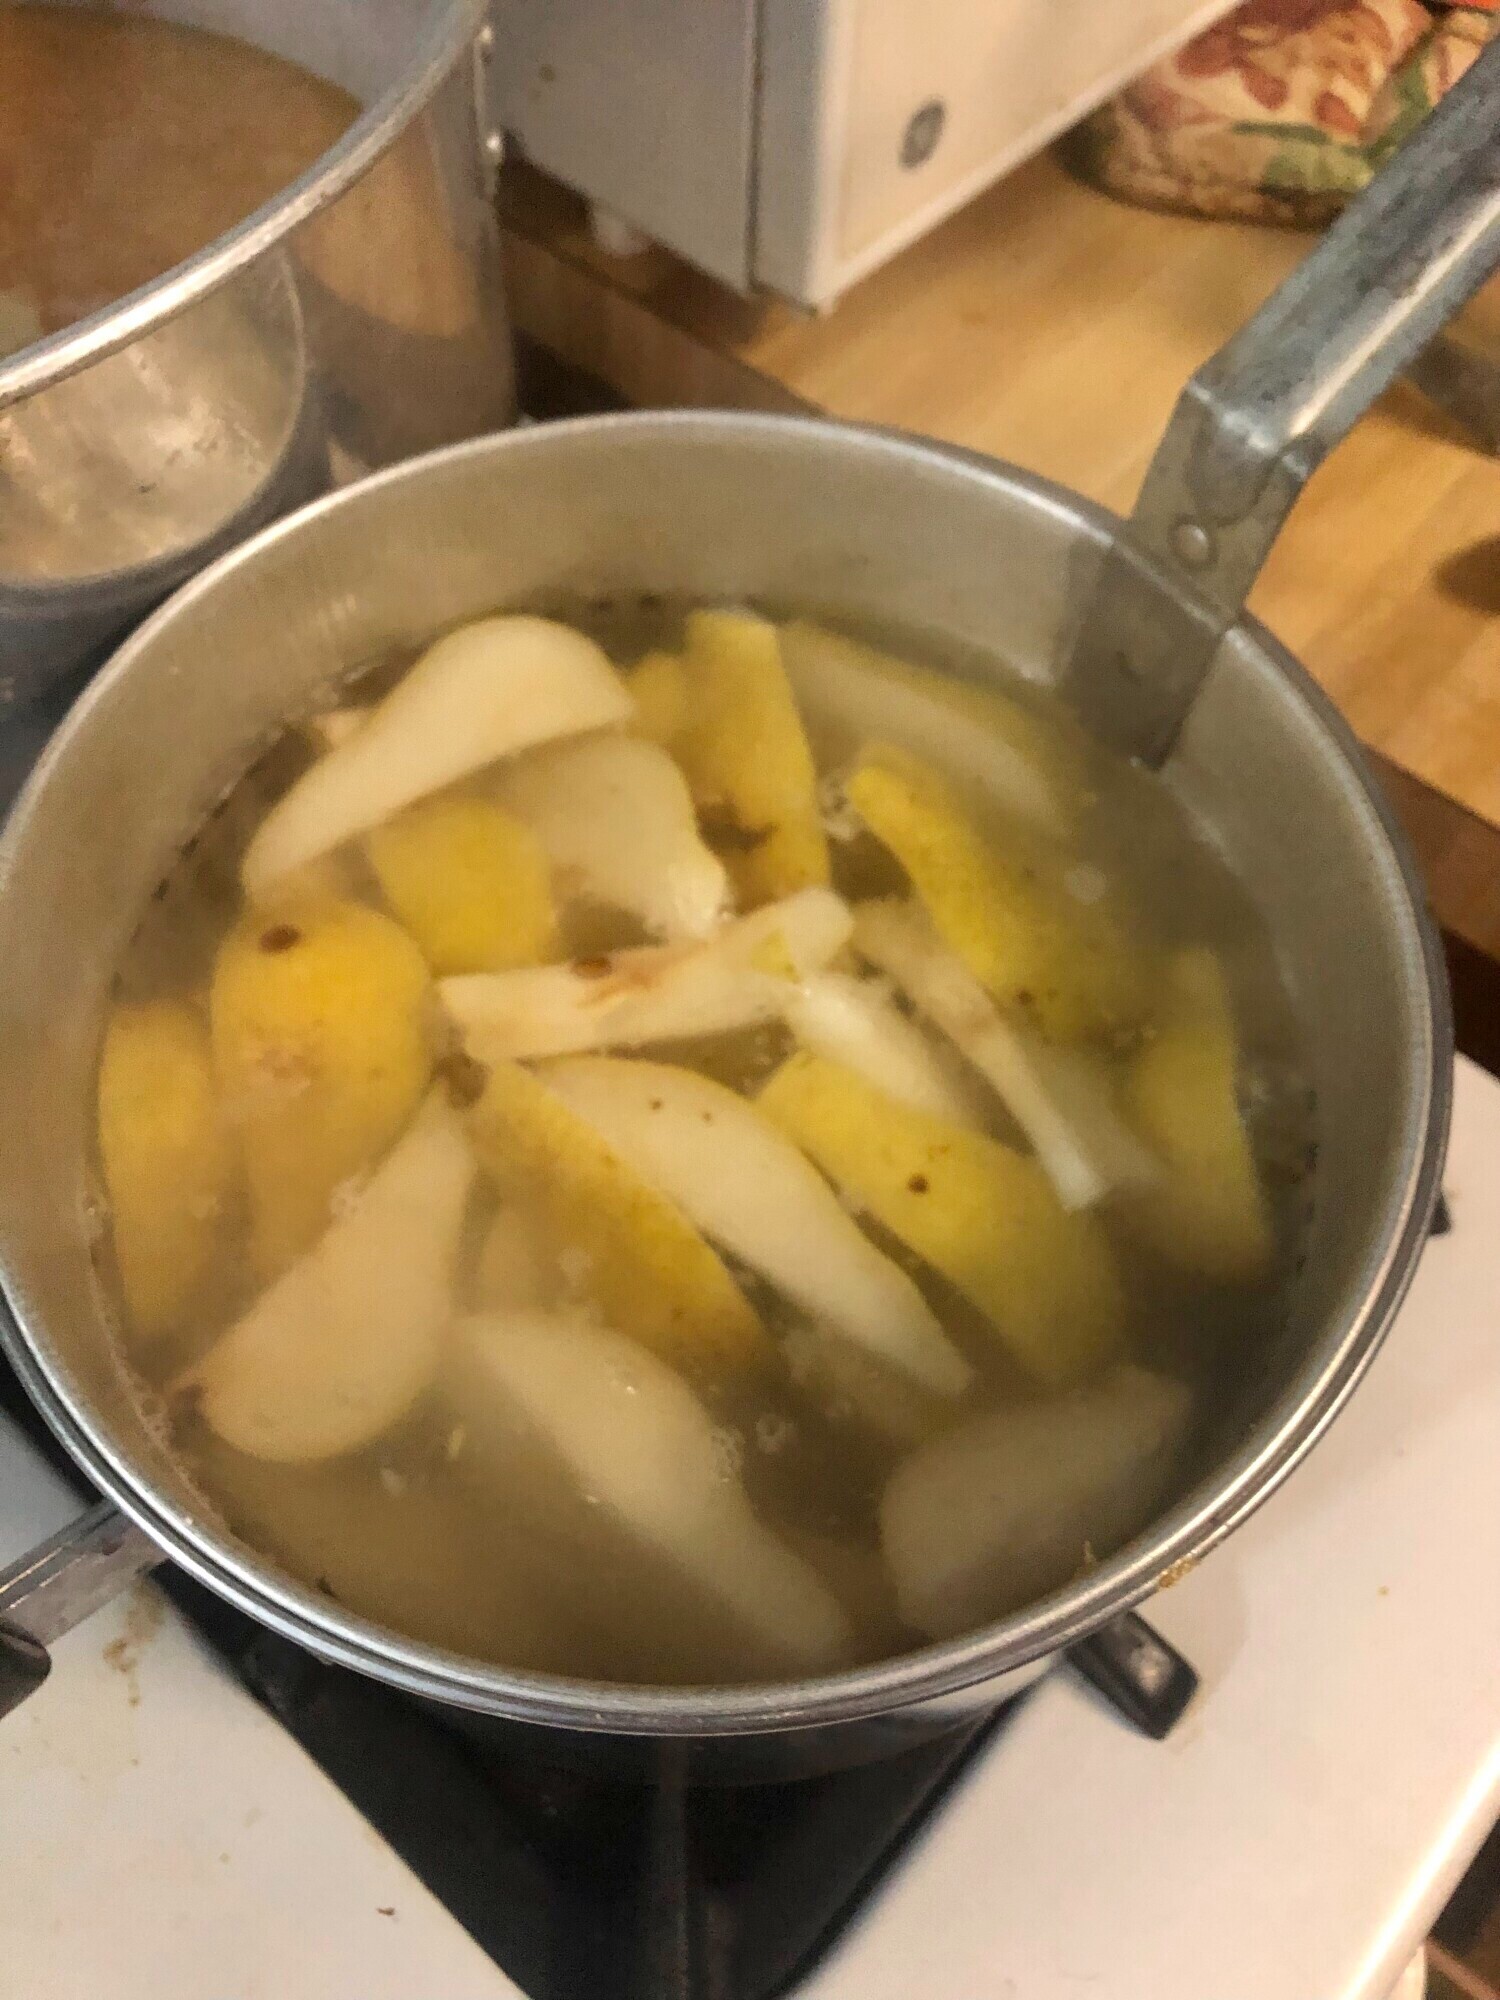
- Pears
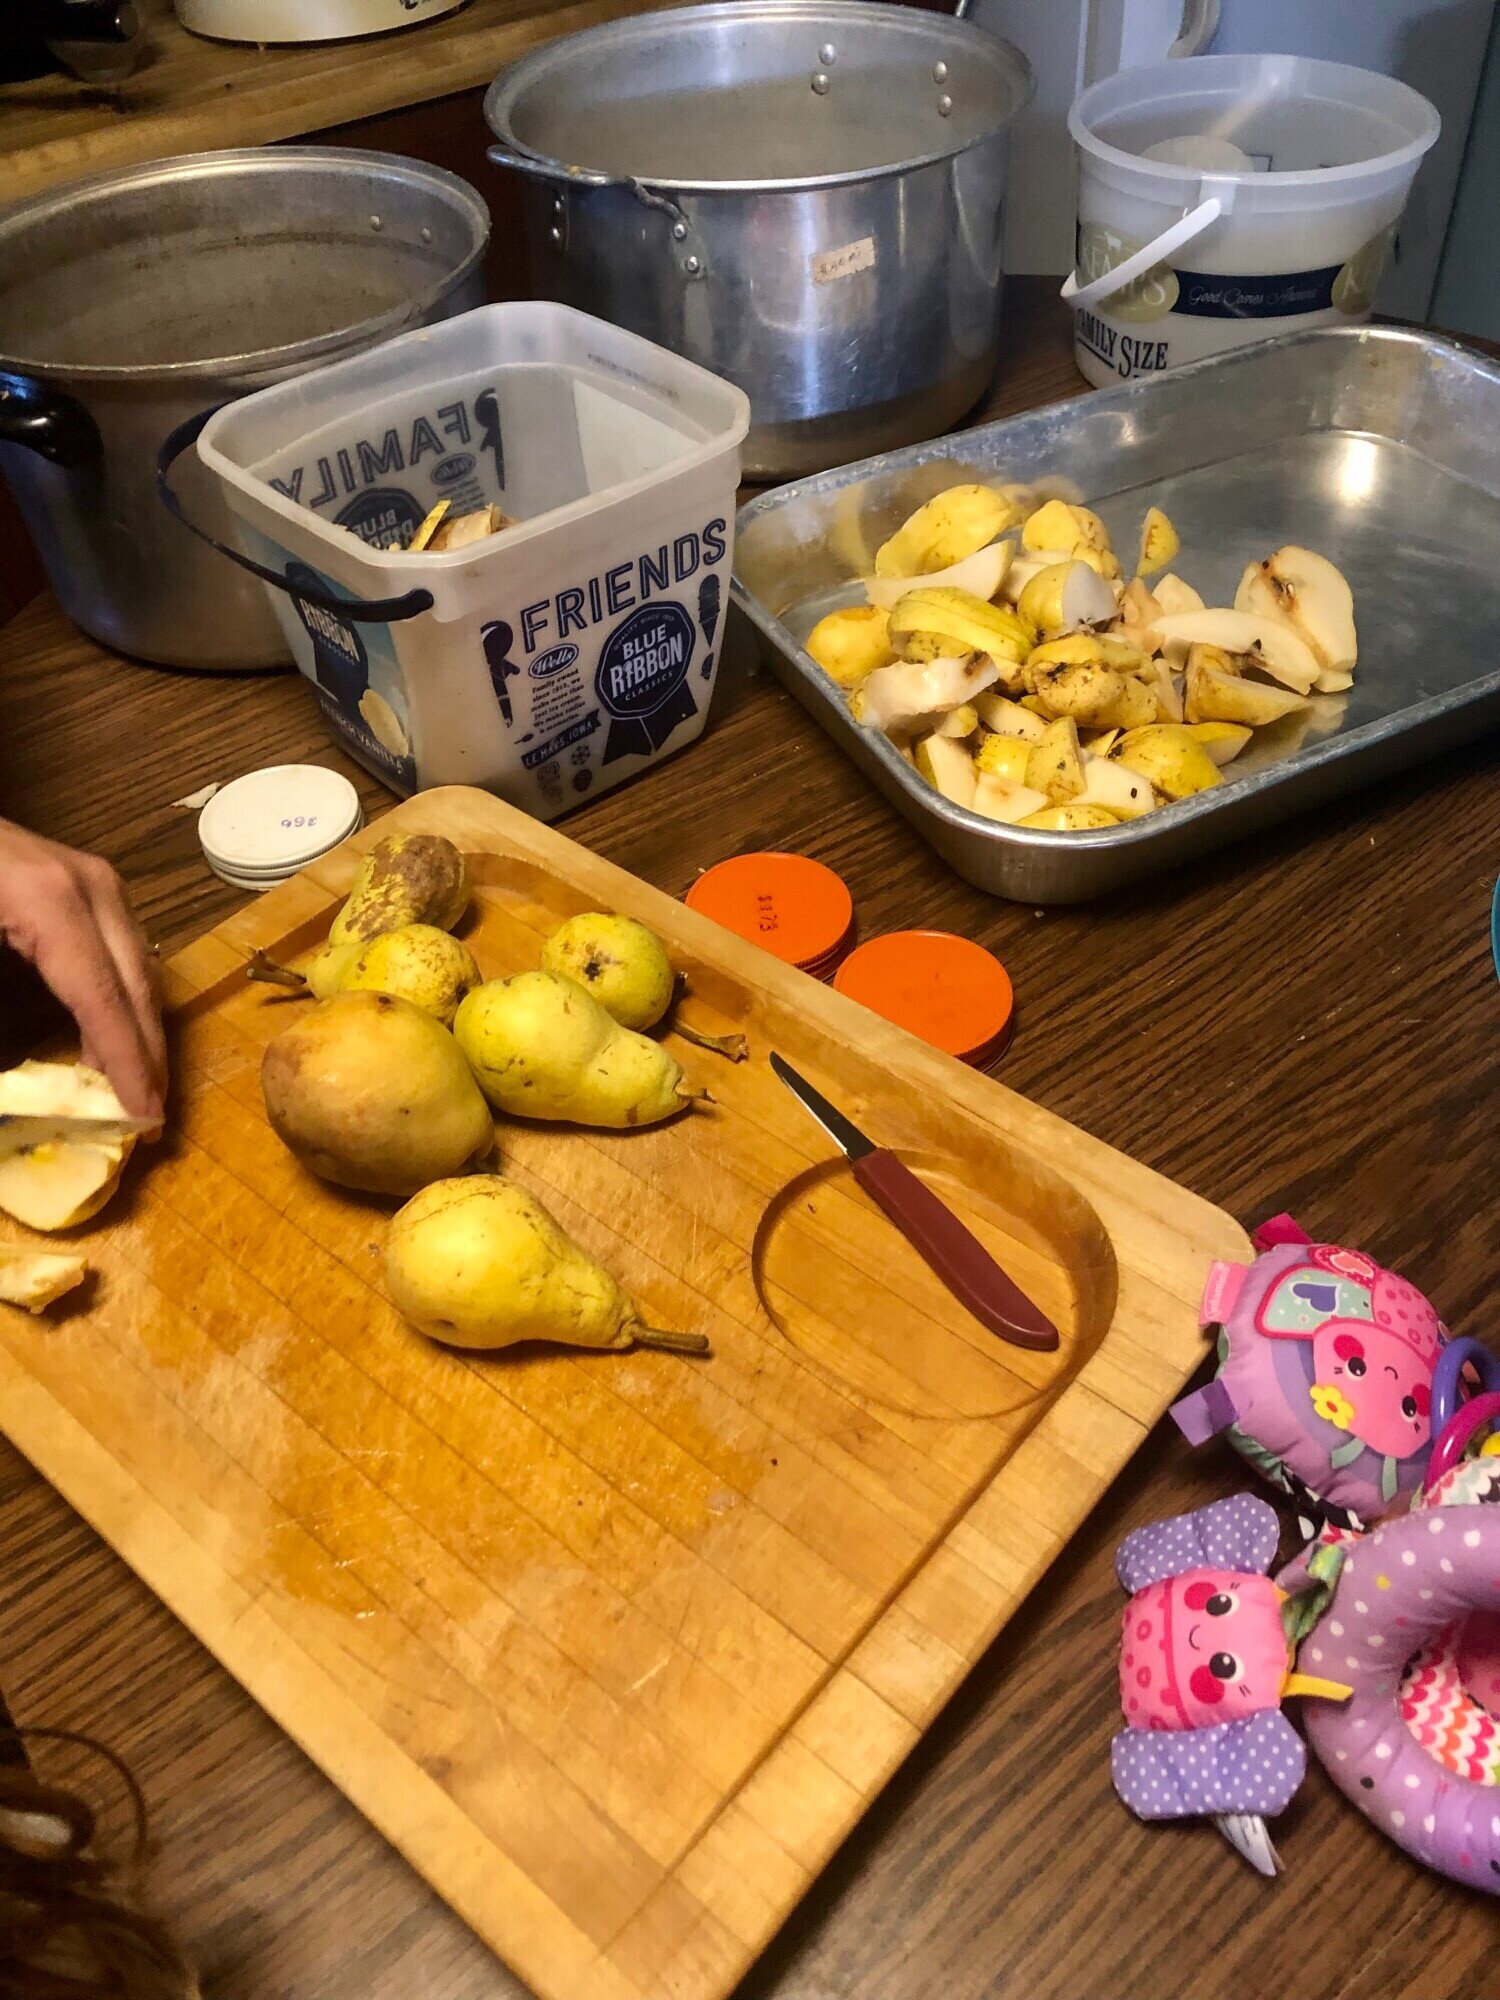
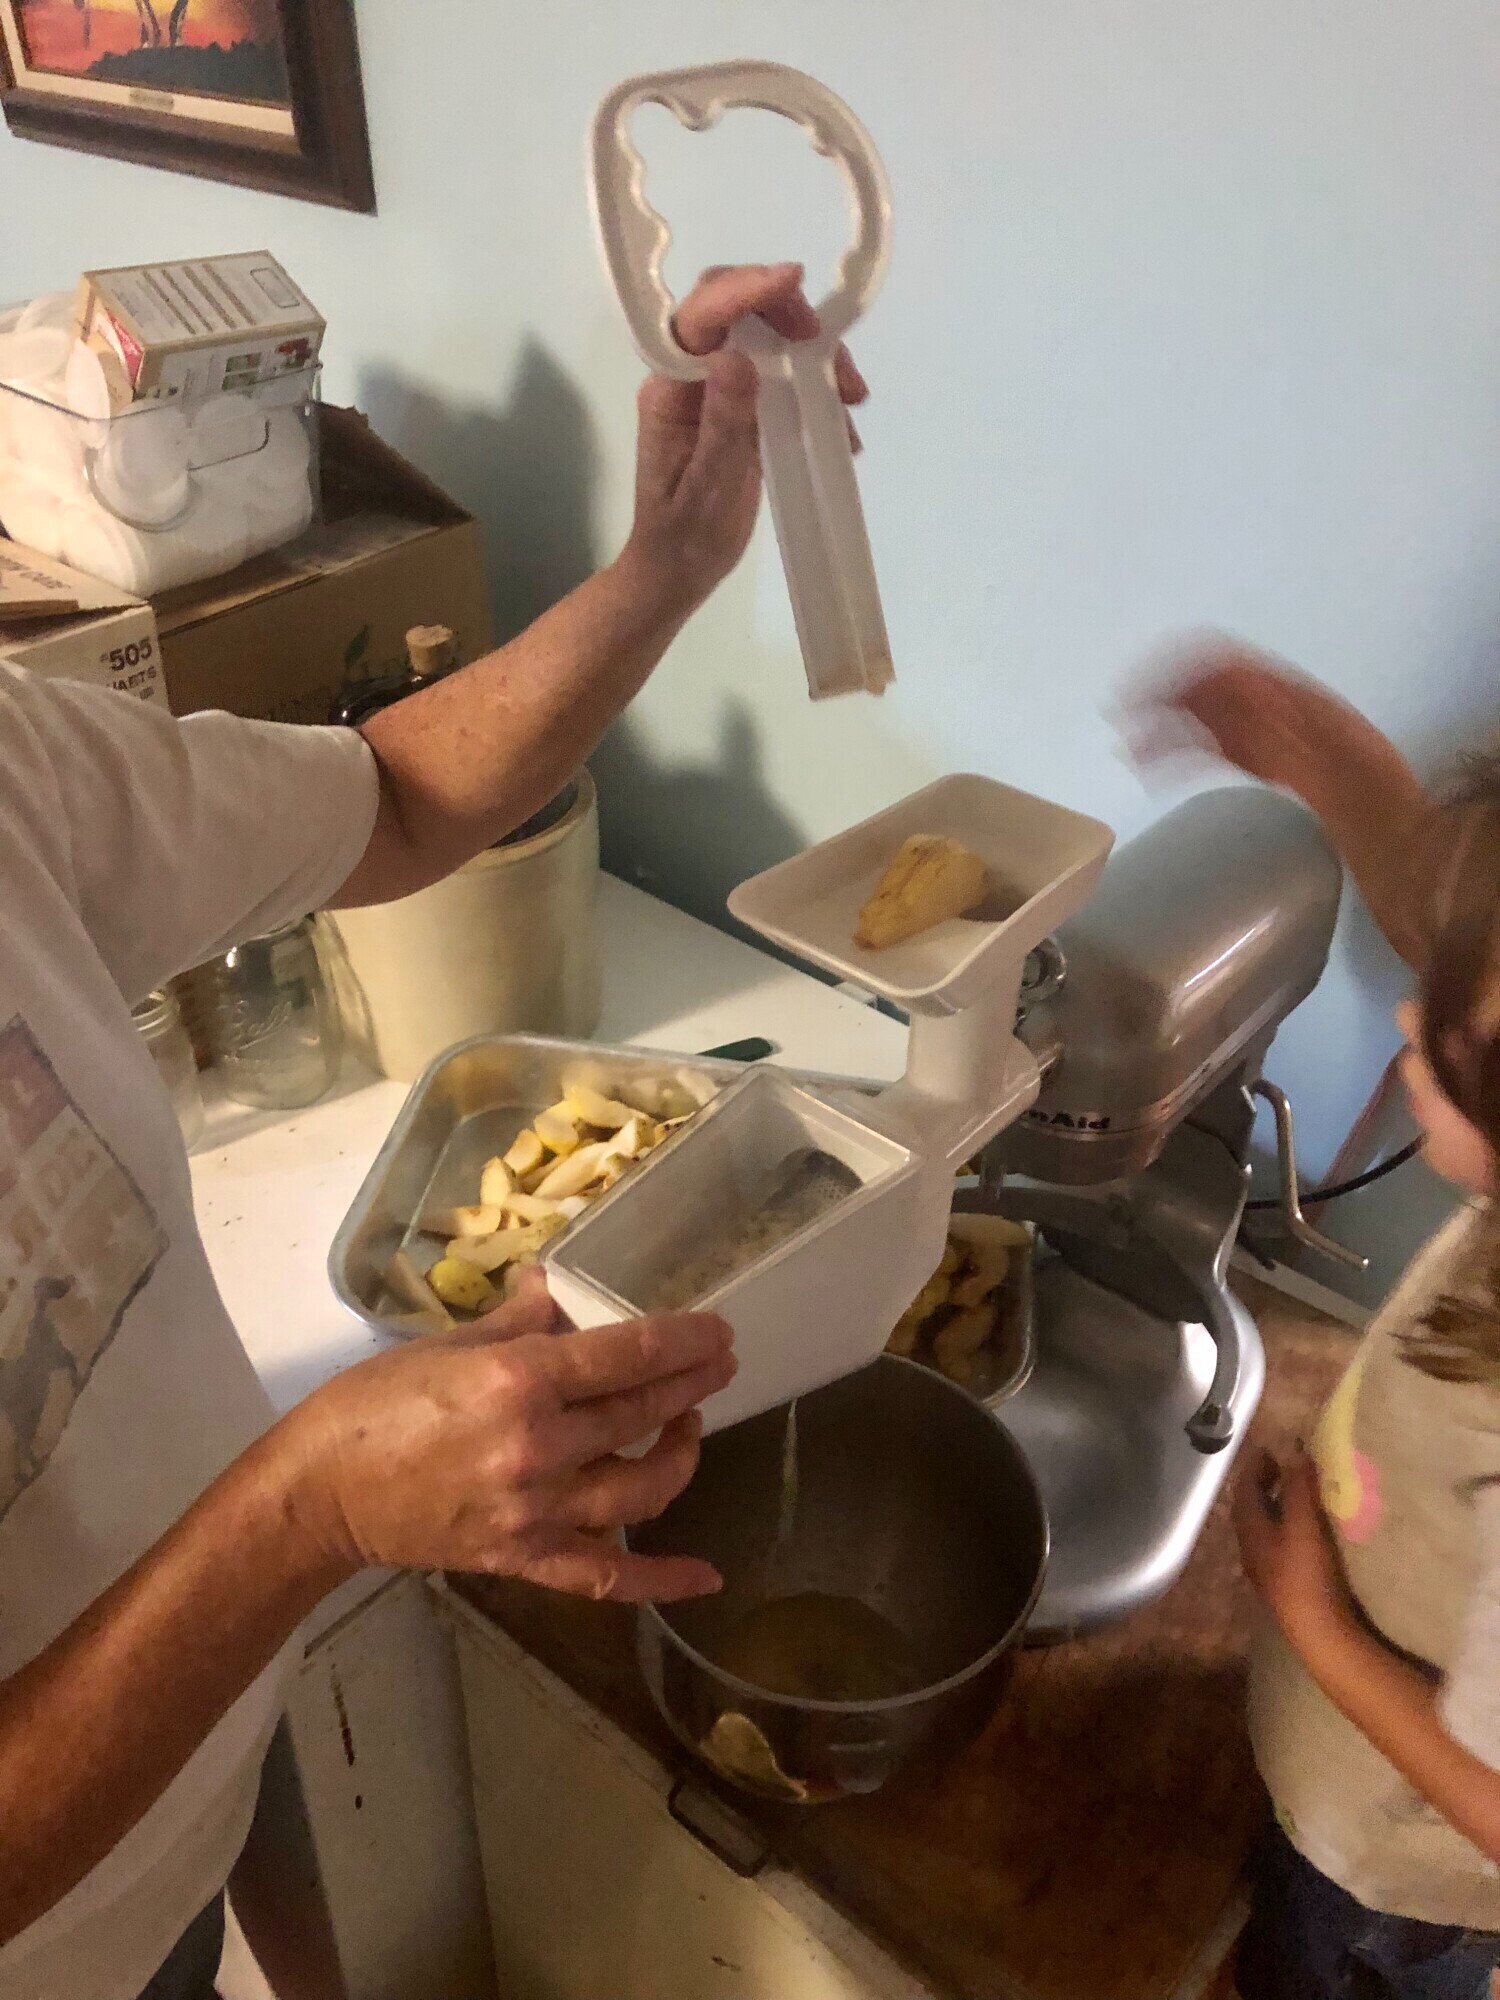
Any more white than this and you are loosing to much of the pear. Cook them a little longer to soften them. Peal and core should be the main thing you see coming out this end.
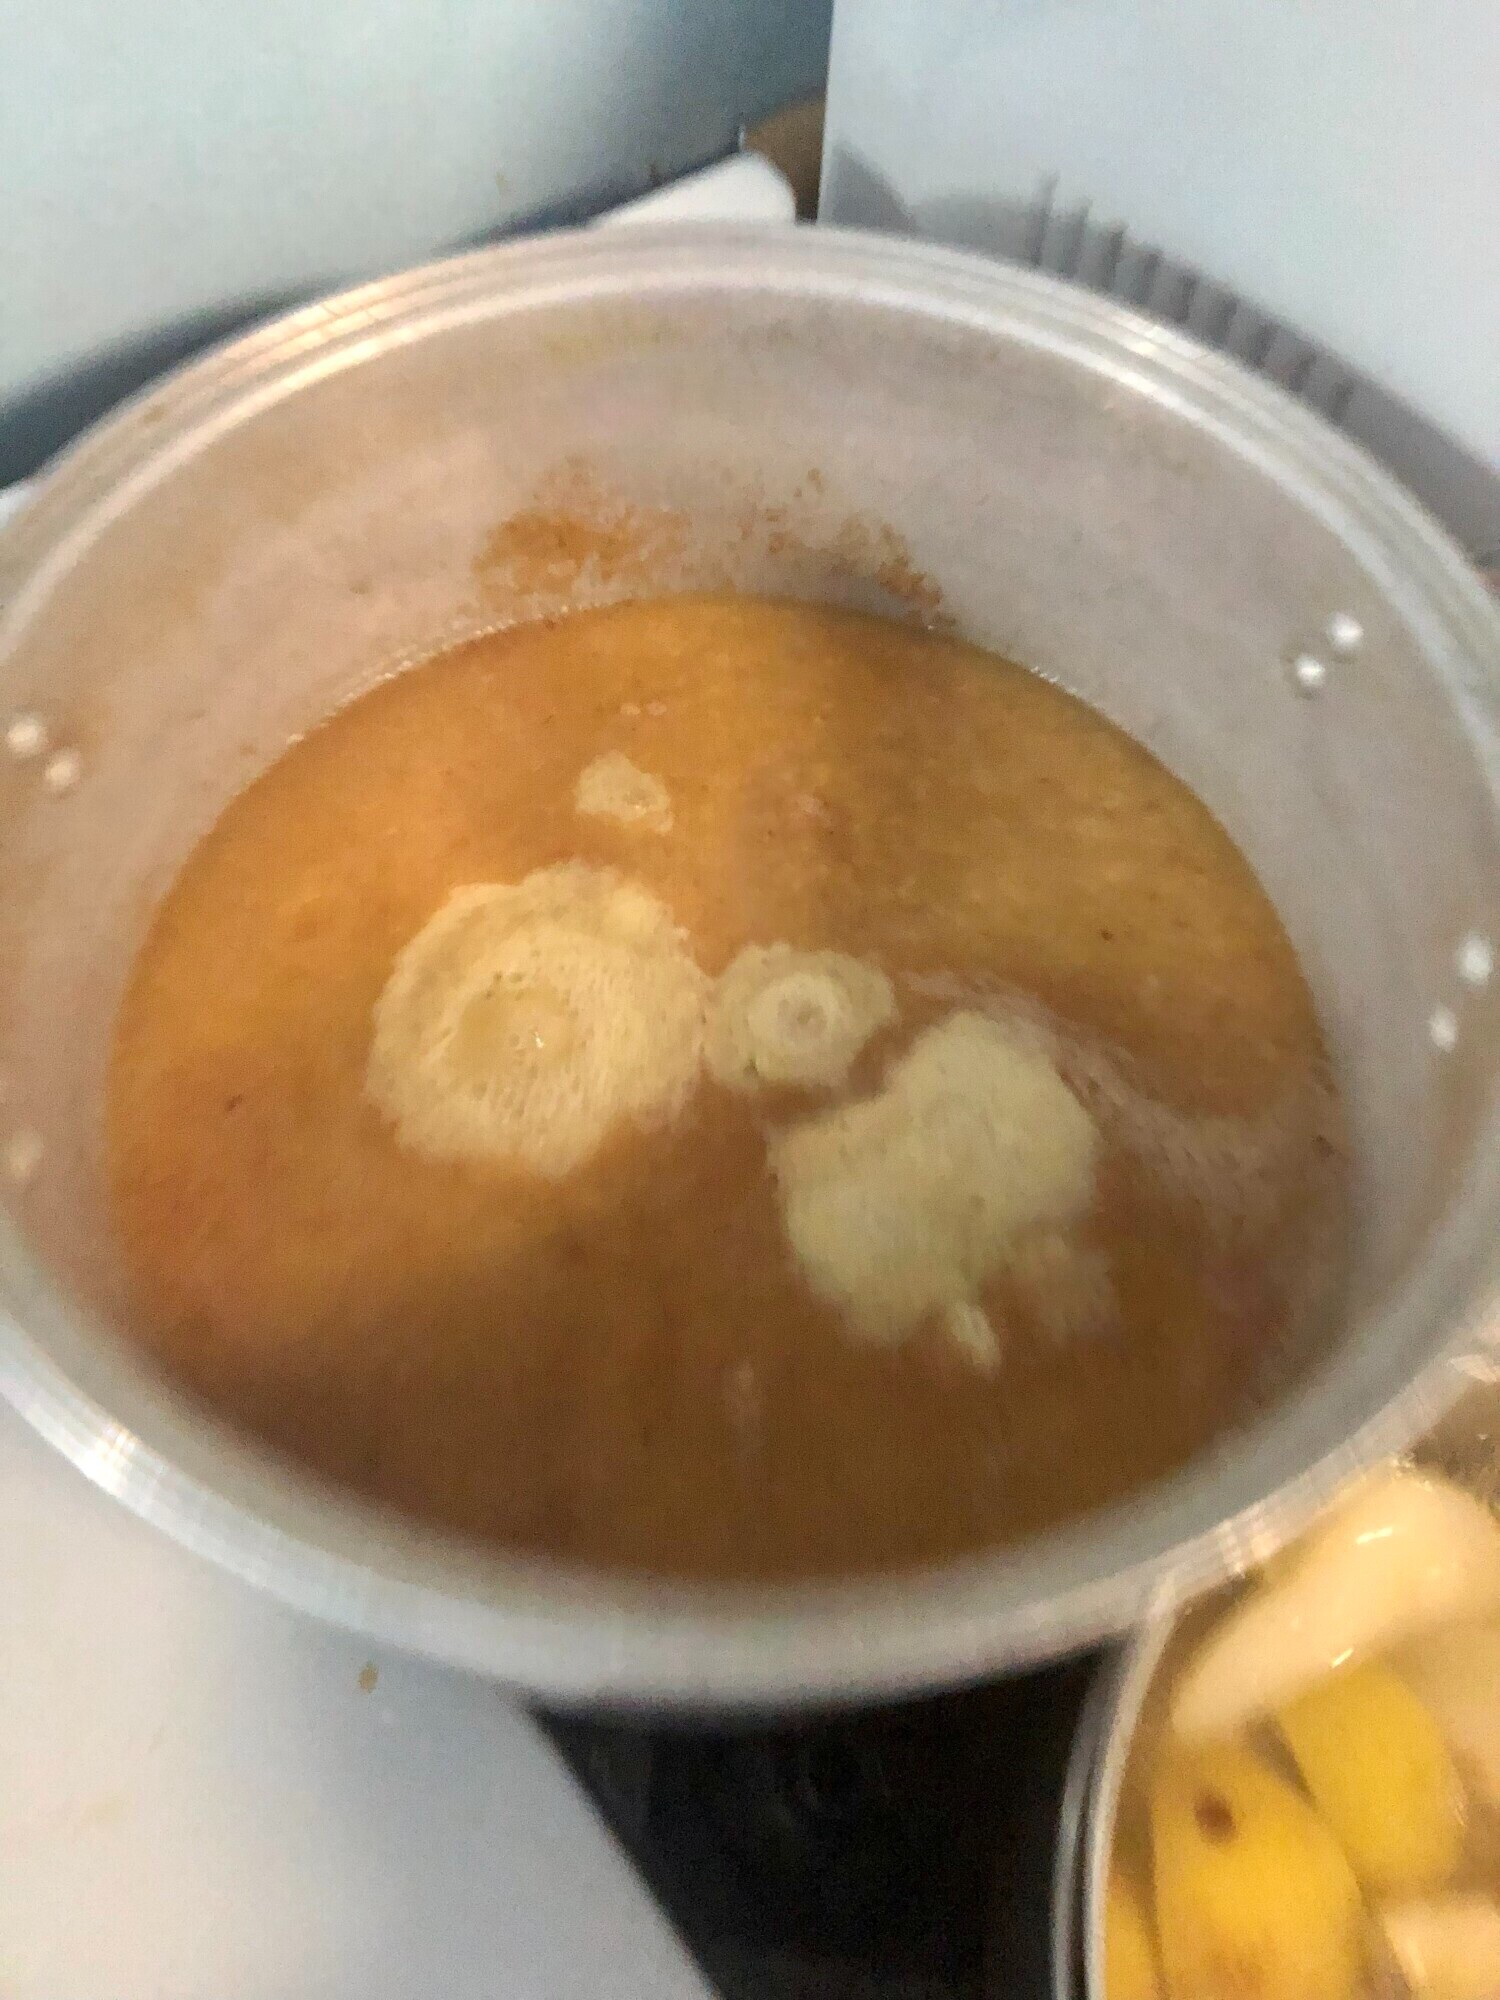
Step 5: Cook Down the Sauce.
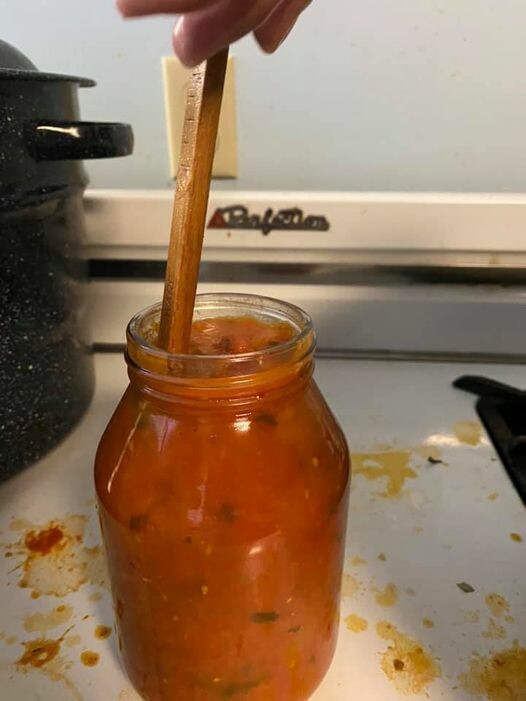
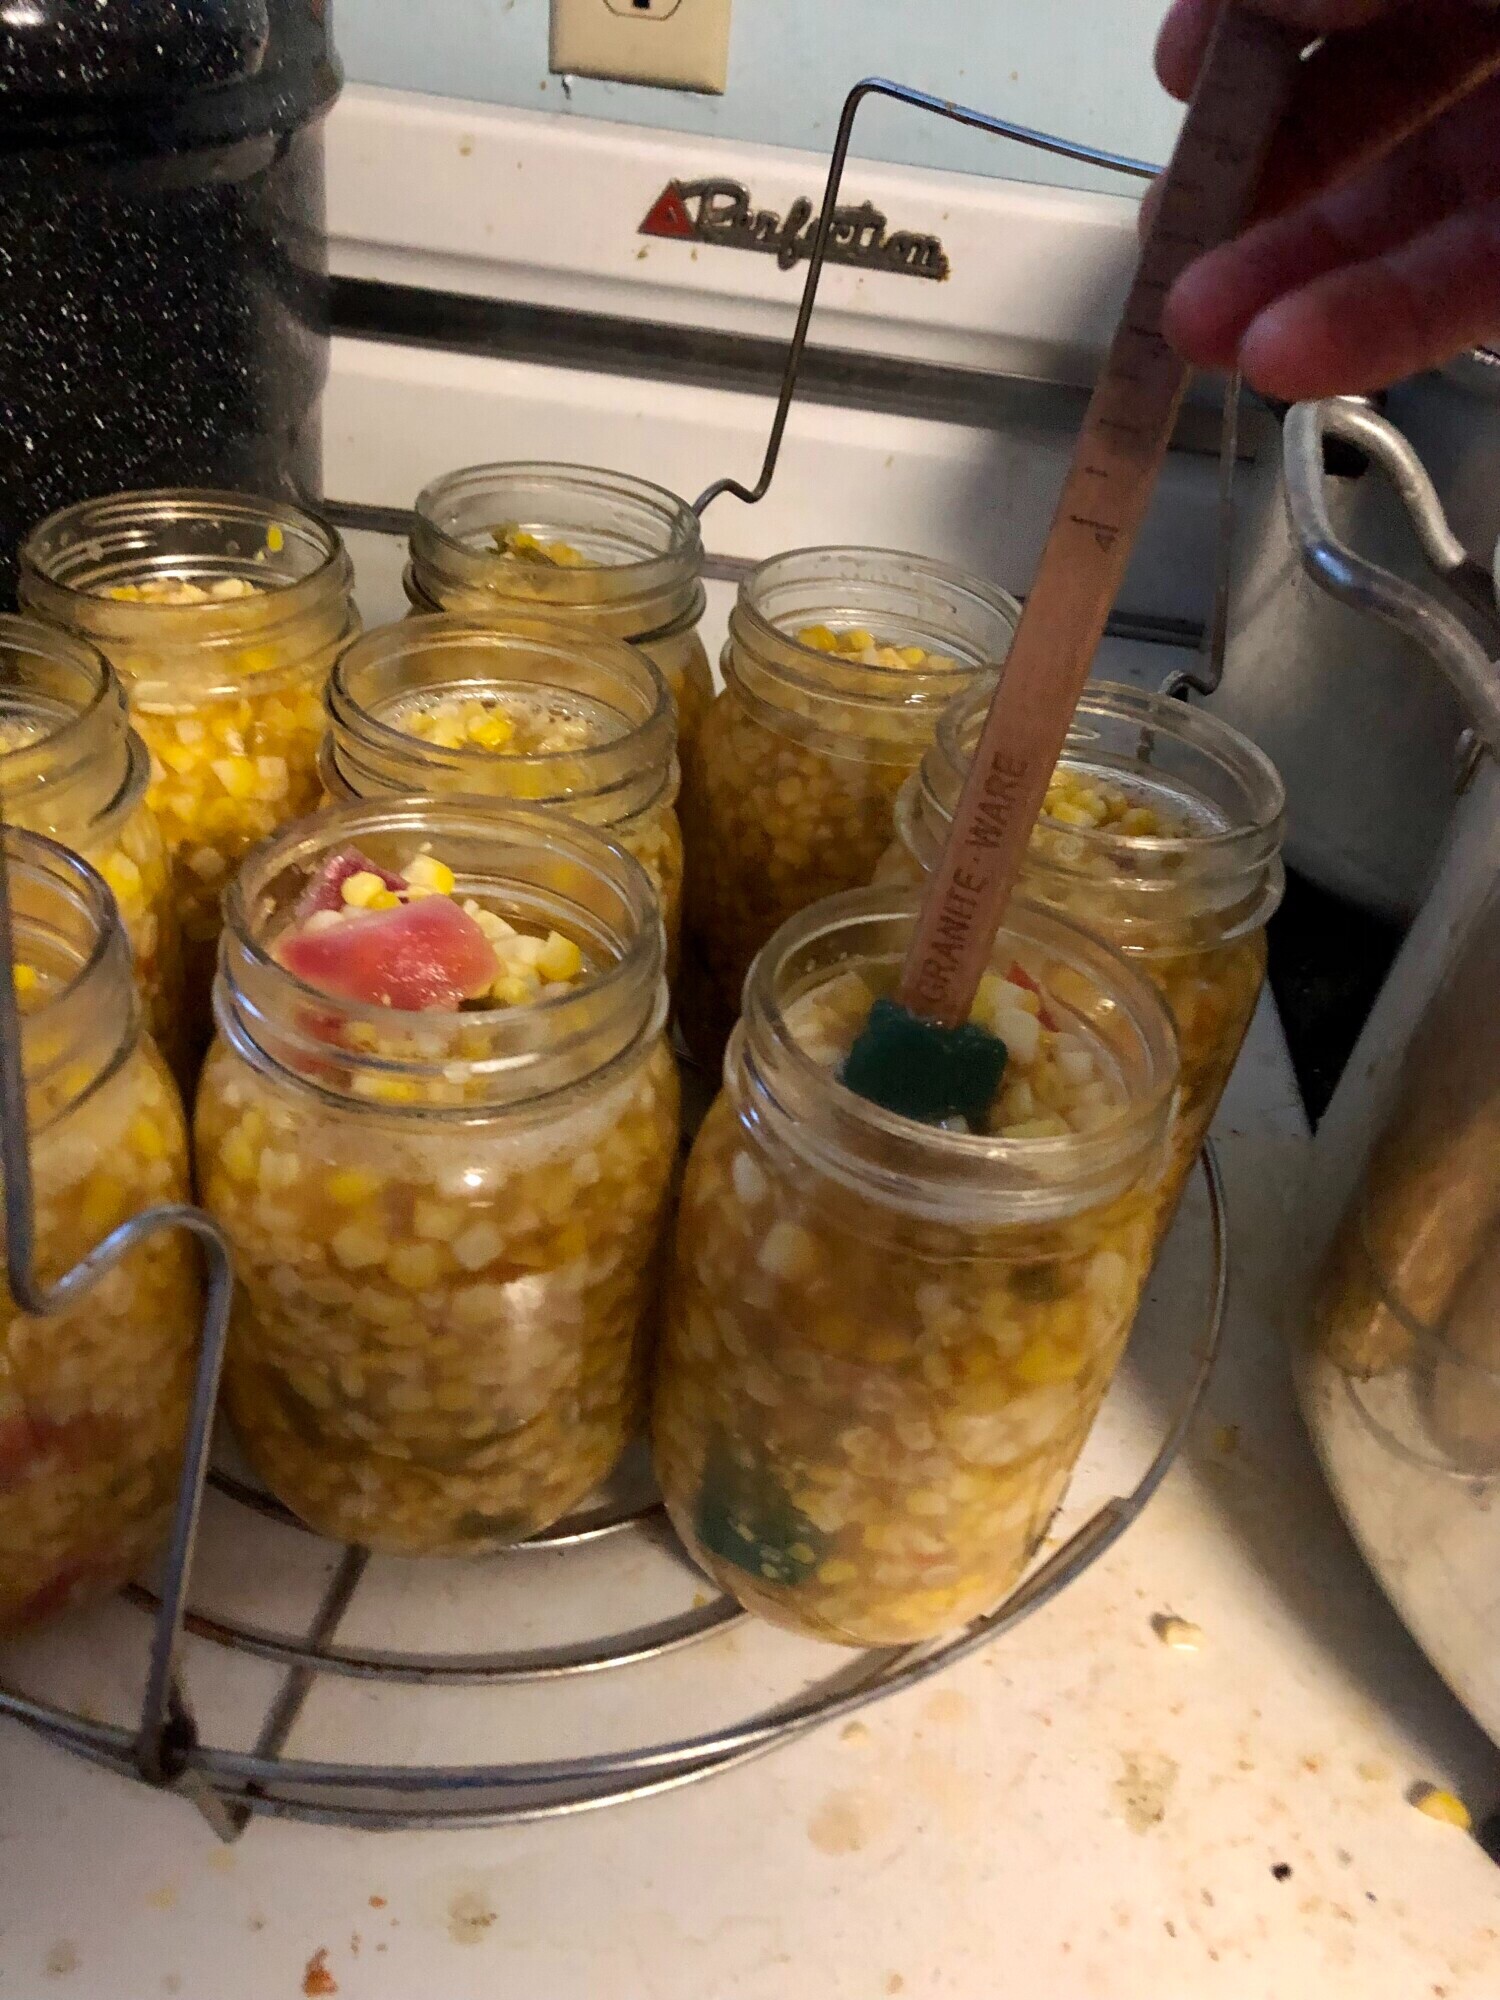
Step 7: De-bubble the Jars
If you have any questions or need more tips, feel free to reach out. And if you're looking for high-quality, reusable canning lids, check out Tattler Reusable Canning Lids for some great options.
Happy canning, and enjoy your pear sauce!
Join the FREE Community
Wanting a community to lean into? Join the FREE Courageous + Purposeful Mommas group! This community is for the Mommas, mommas to be, in the midst of raising, and kids grown, looking for tips on building your family up and providing for them through natural methods. Tips include: gardening, bulk buying, caning,/preserving, livestock, homesteading, and home remedies. Your family is precious, and this group is to help you gain the knowledge and tools to keep your family well and not reliant on outside professionals. Remedies and tips are easy and simple for the busy momma, time is precious after all, including pregnancy, birth, young kids, and illness. Trust your Momma gut again! This community offers the resources + community you need to help get started on your journey and prepare for whatever future you envision.
Click here to get the stories straight to your email:
For more on wellness tips click here:
For more on homesteading on your budget click here:
For more simple DIY updates click here:
This post may contain affiliate links, which means that I may receive a commission if you make a purchase using these links, with NO additional cost to you.
- Freshness: Enjoy the taste of summer all year long.
- Health: Control over ingredients means no unwanted preservatives or additives.
- Cost-Effective: Save money by using what you grow.
- Canning jars
- Canning lids
- Canning rings
- Jar funnel
- Long spatula or knife
- Hot water bath canner
- Large stock pot or roaster
- Sieve or immersion blender
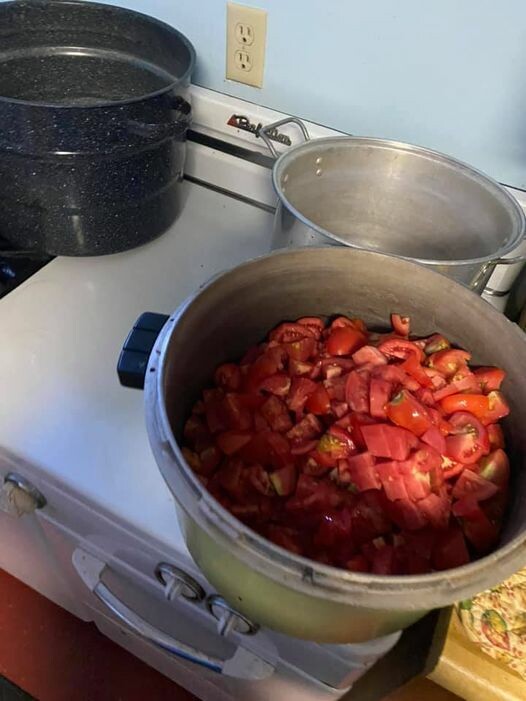
- Tomatoes
- Citric Acid or Lemon Juice
- Harvest Fresh Tomatoes or if you have frozen tomatoes, pull them out of the freezer. This is actually my preferred way as you can drain some of the water off and skip the slicing step.
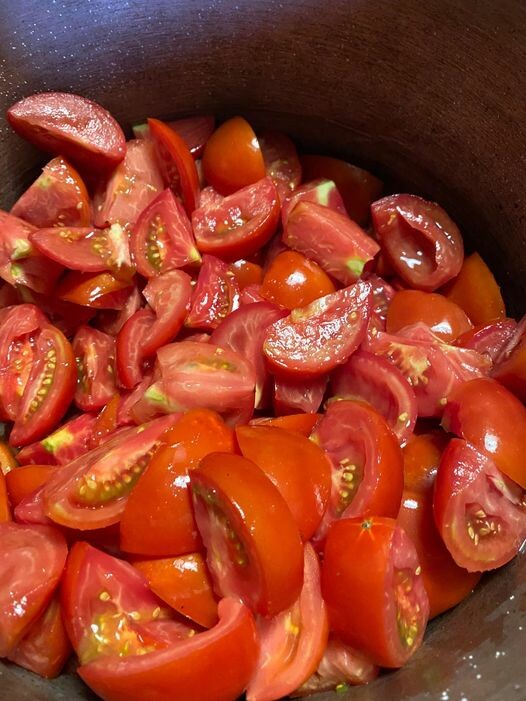
- Slice the Tomatoes into quarters. There's no need to blanch or core them; just toss them into the stock pot.
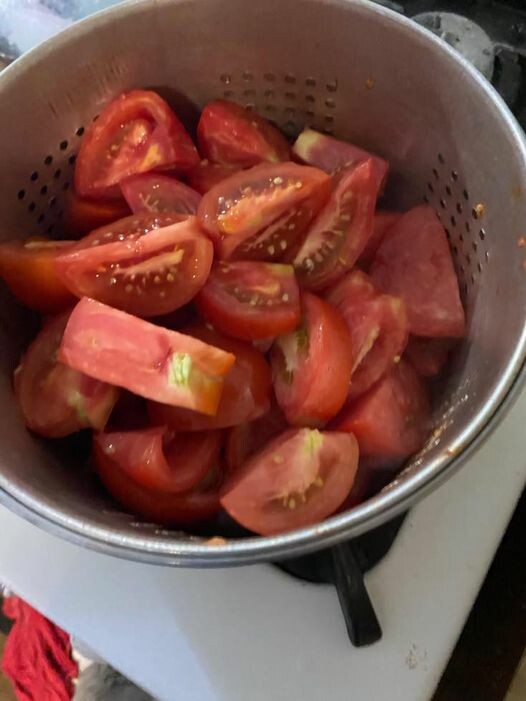
- If the tomatoes are firm, place them in a pot to steam until they soften. Using a strainer can make this easier.
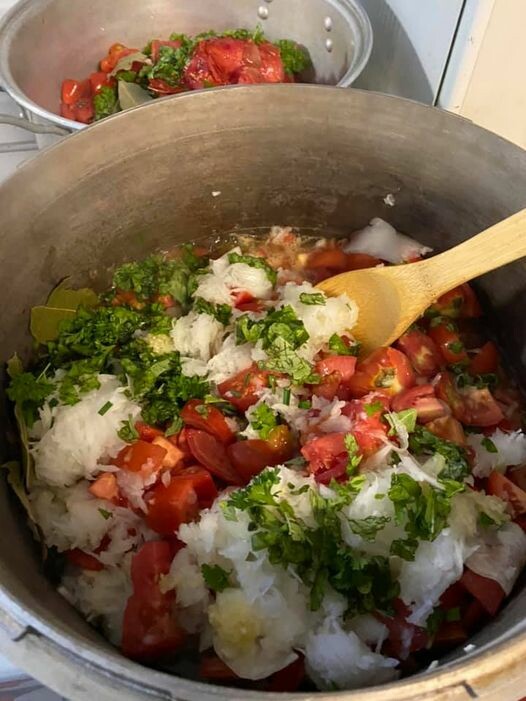
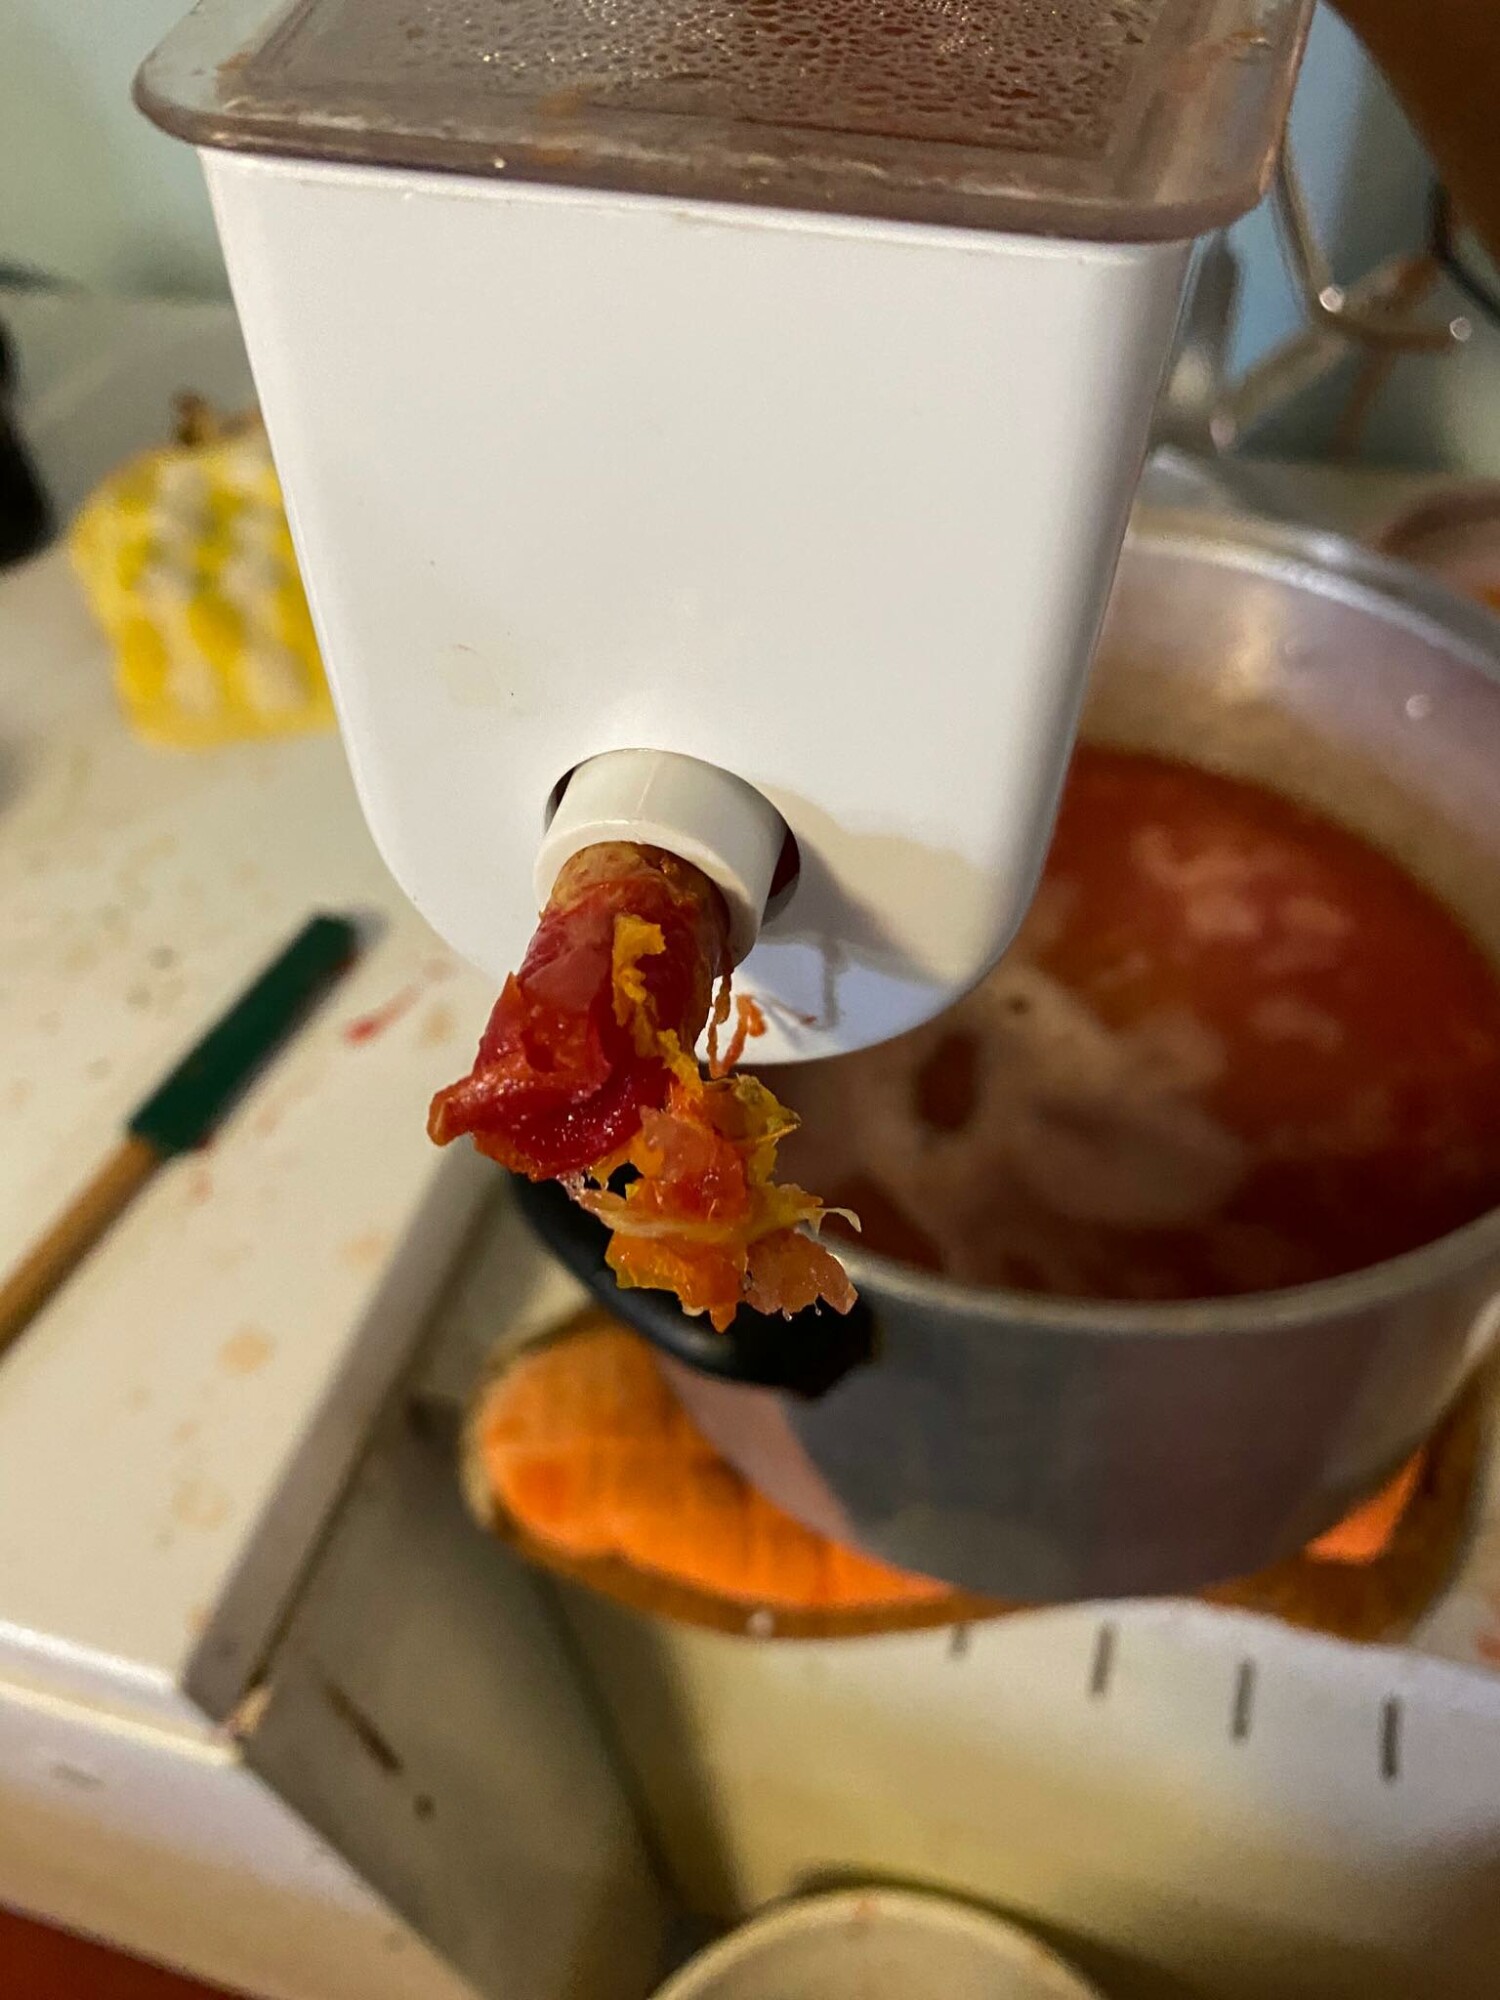
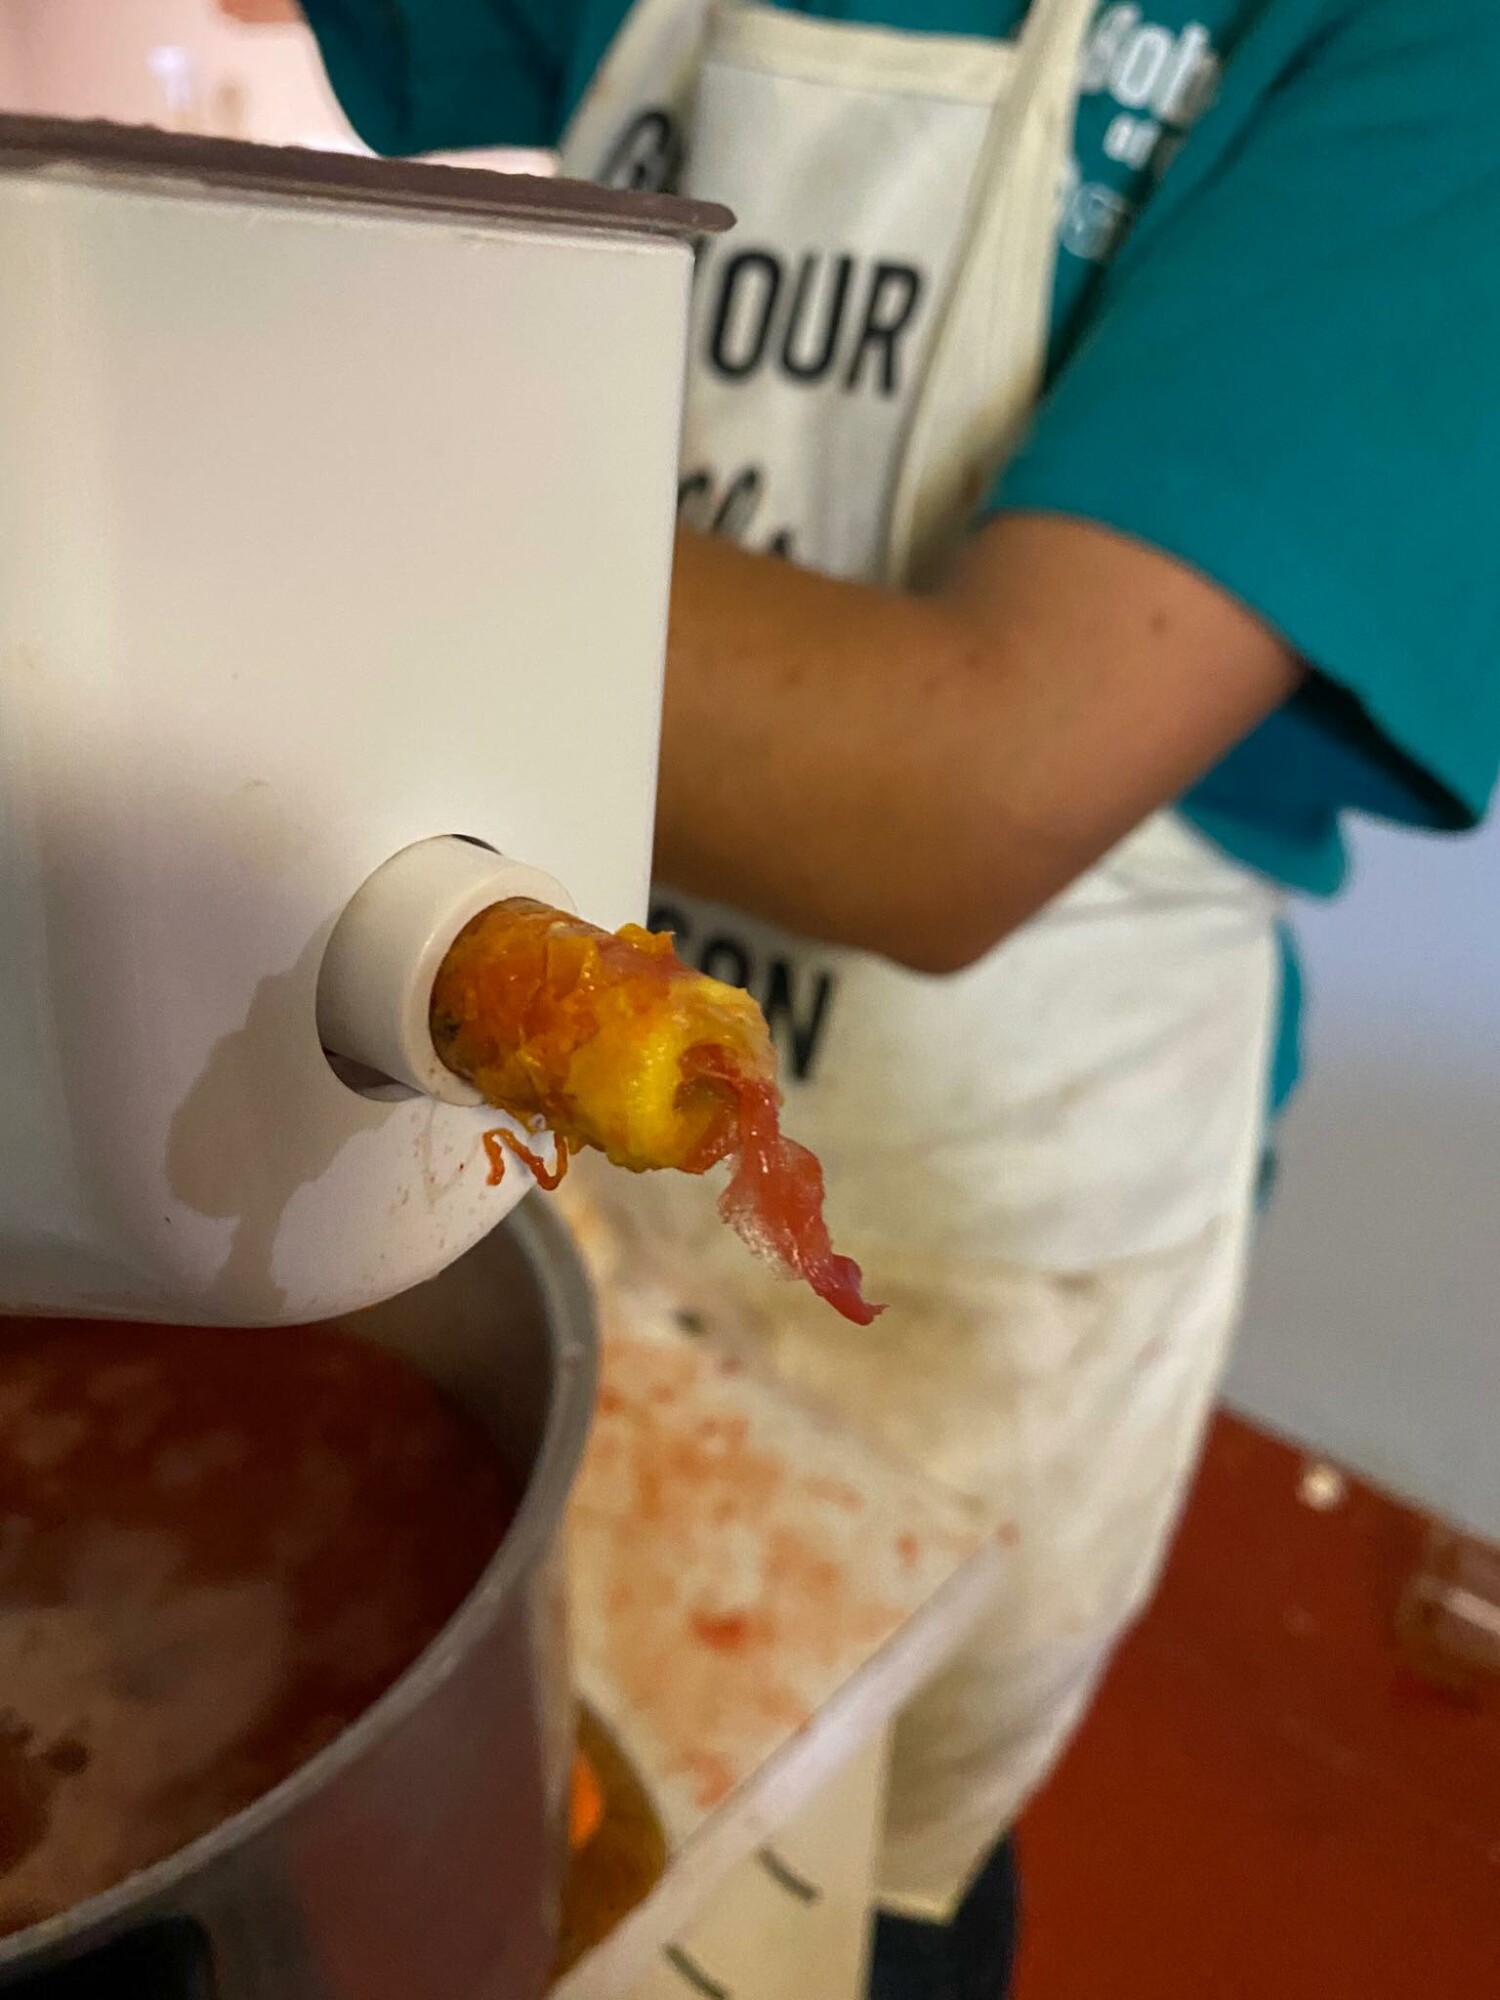
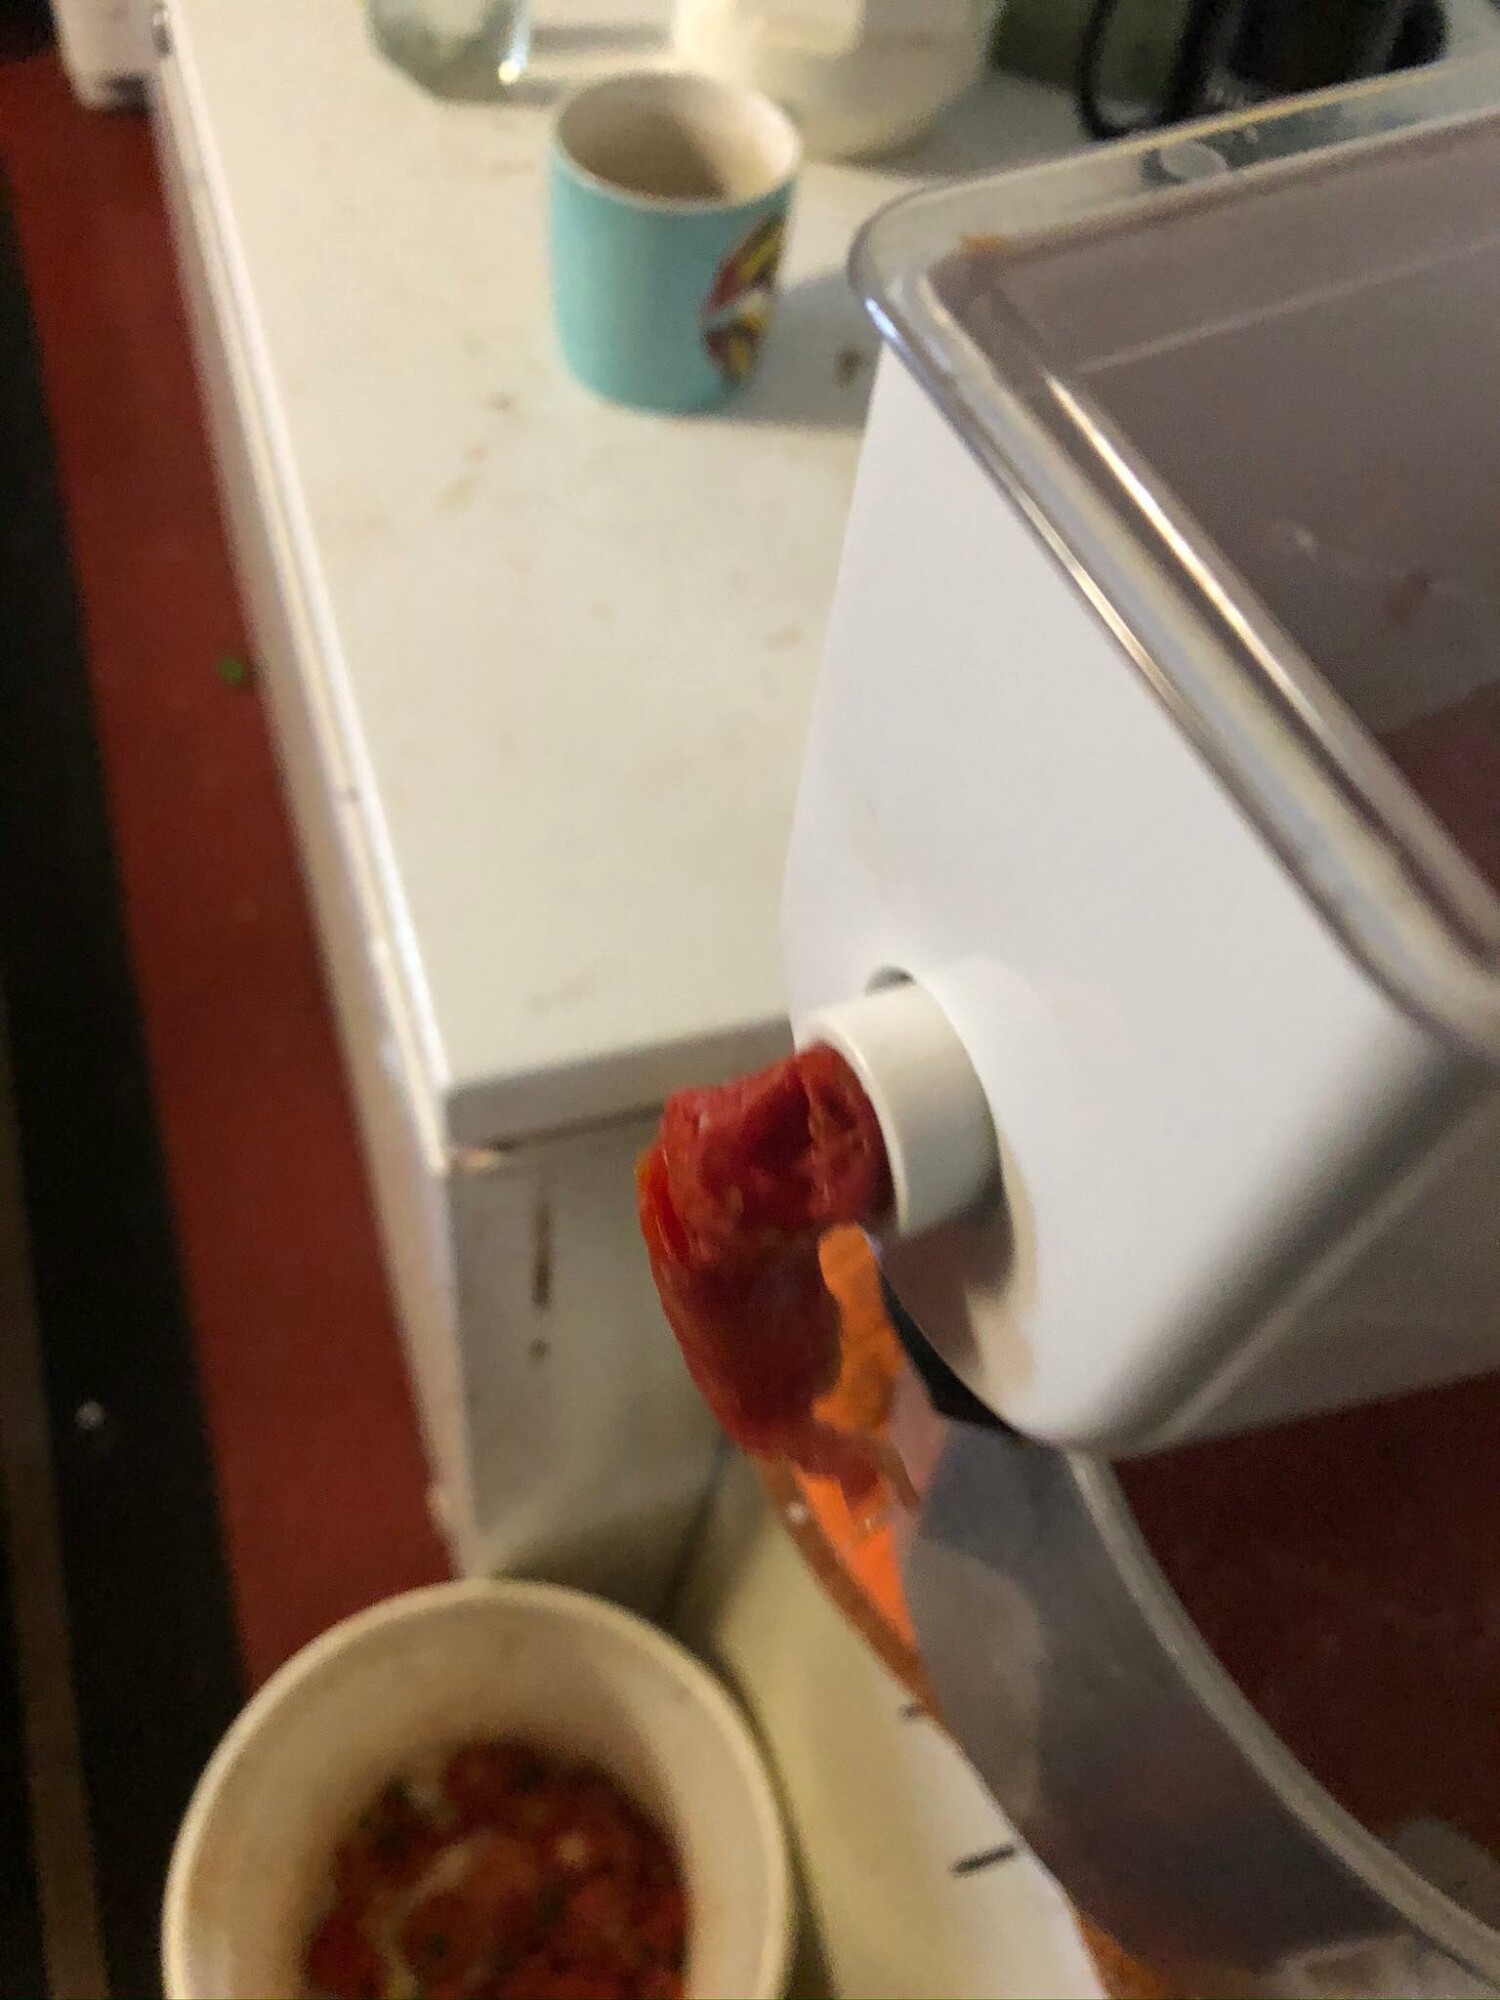
- Run the softened tomatoes through a sieve to separate the juice from the skins and seeds. This will give you a smooth tomato base. Alternatively if you don't care about the skins and seeds, you can use an immersion blender and blend the whole tomatoes. Note you will probably have a few rouge skins if you choose to do this.
- You can dry the sieved skins and seeds down to grind into powder and make tomato paste when needed.
- Pictures 1 & 2 are how the rejects should look. Picture three the tomatoes are a bit firm yet and I’m loosing quite a bit of pulp, not just skin and seed.
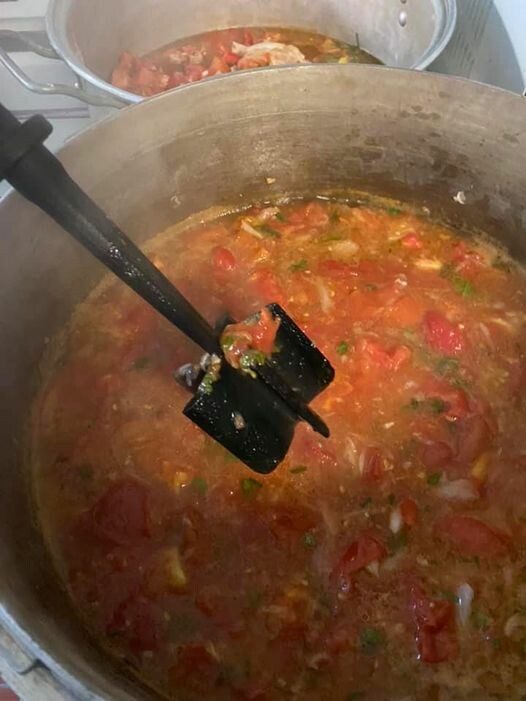
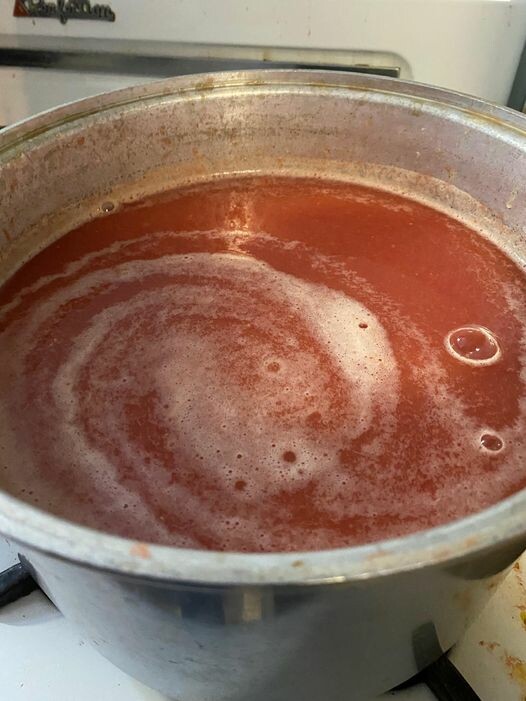
- Allow the tomato juice to cook down to your desired consistency. This could take a while depending on your preference. This is where a crock pot or roaster can come in handy. Using a roaster or crock pot you can walk away and do other things easier. You can also let them cook overnight and can them in the morning.
- Stir occasionally to avoid burning the bottom of the sauce if using a stock pot.
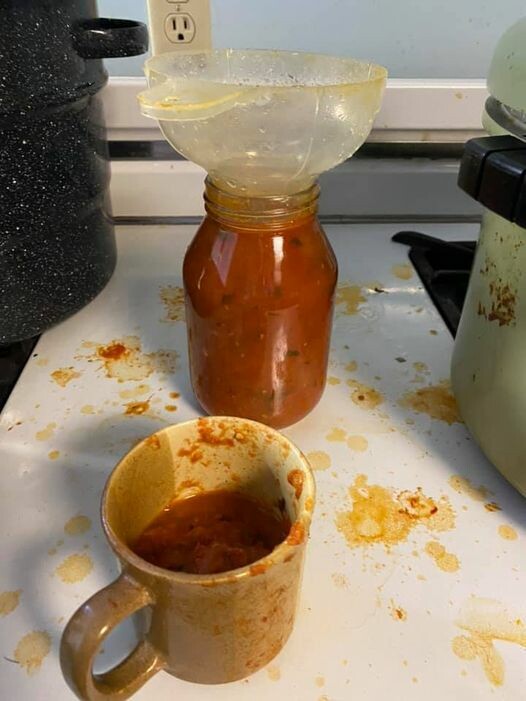
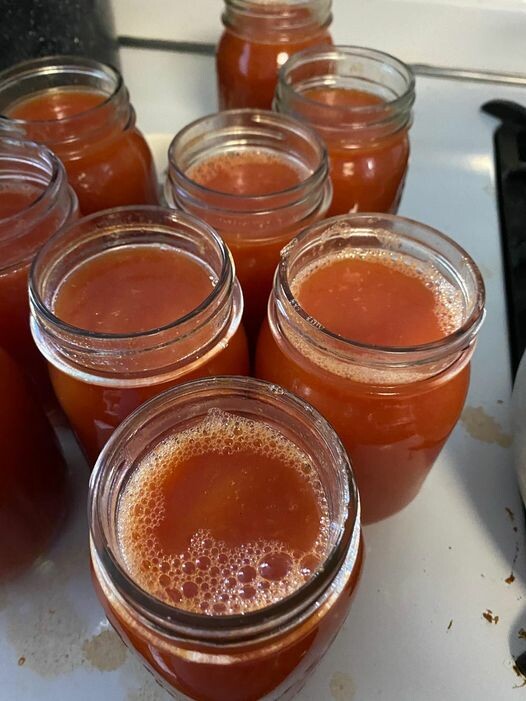
- Fill sterile canning jars with 1/4 teaspoon citric acid or lemon juice per pint of sauce and the hot tomato sauce, leaving about ½ inch of headspace.

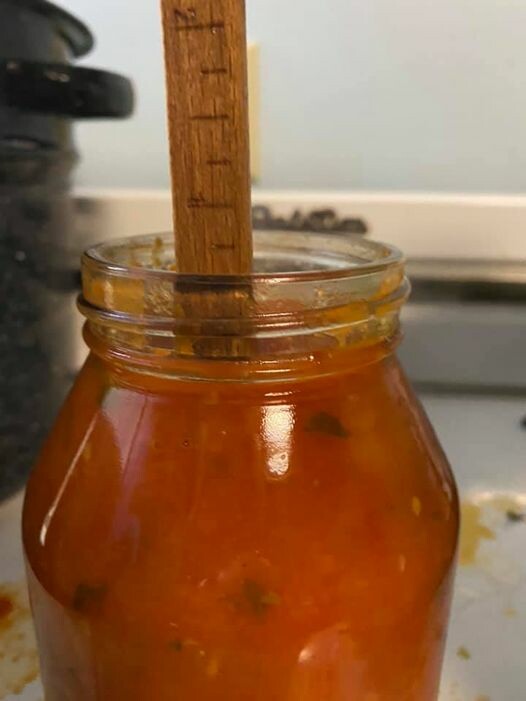
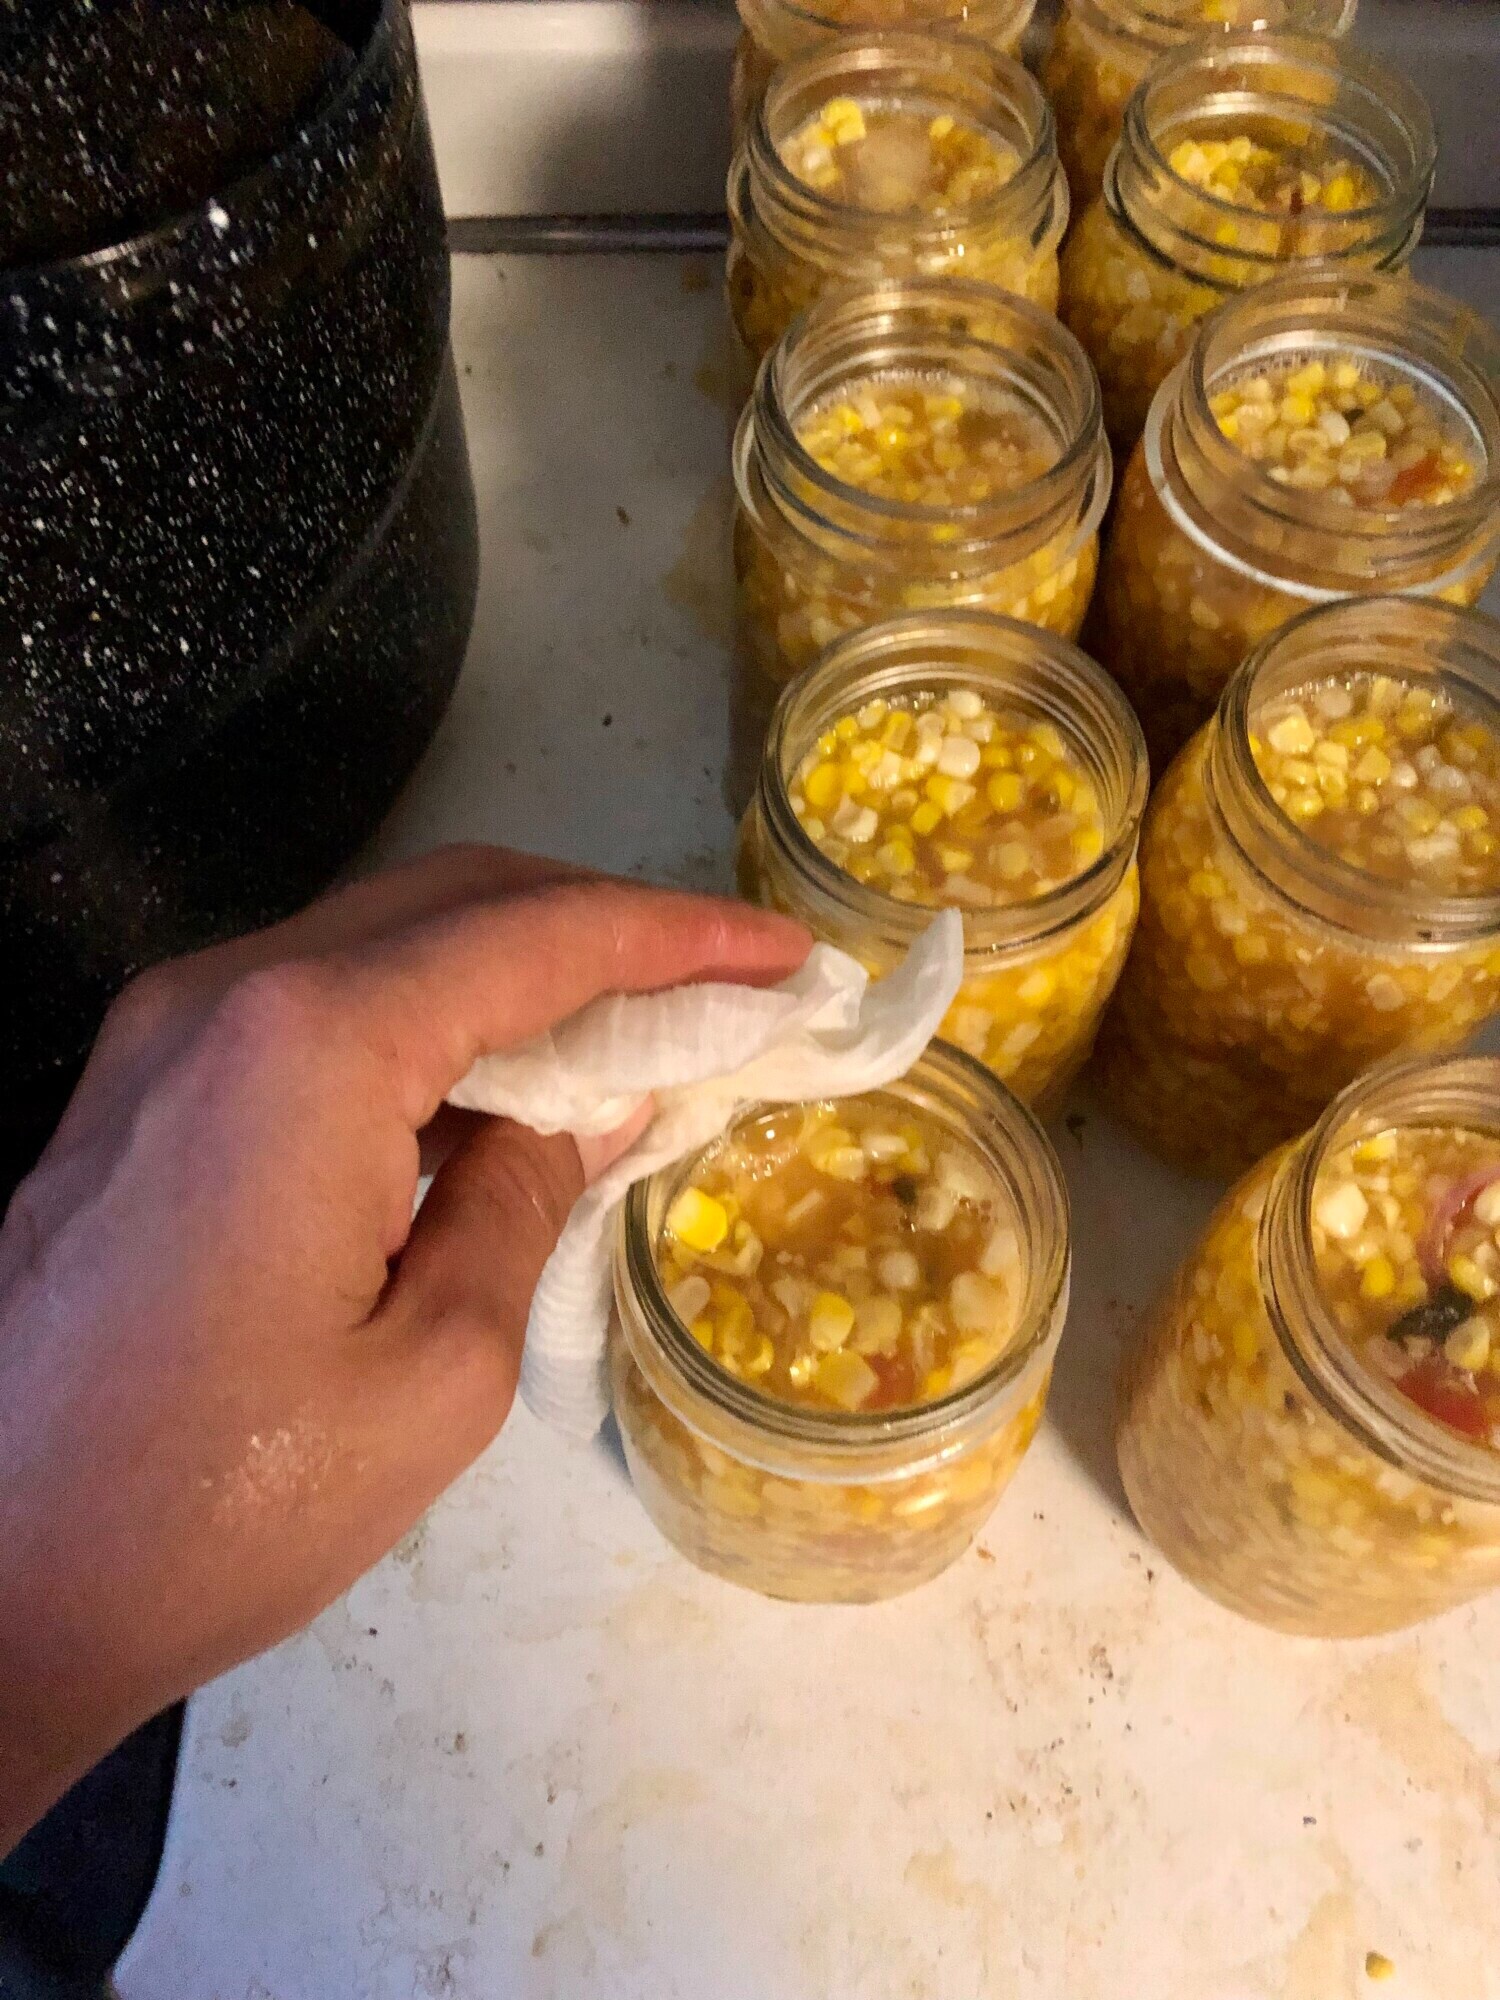
- Use a long spatula or knife to remove air bubbles by running it along the edge of the jar. Wipe the rim clean to ensure a proper seal.
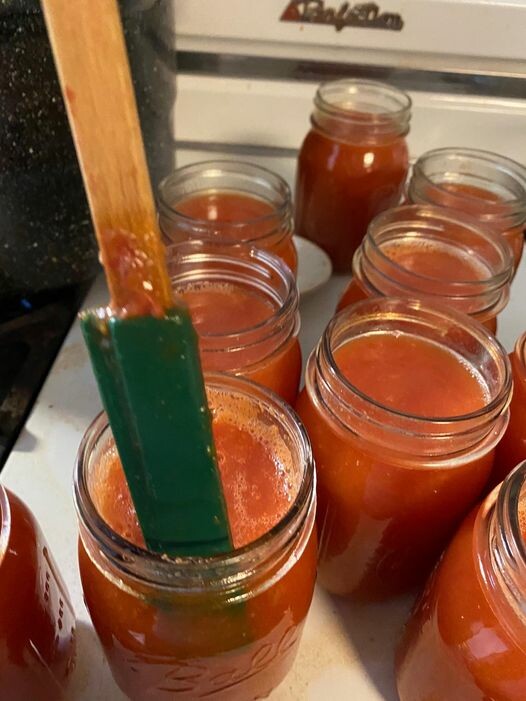
- For one-time-use lids, rinse them in hot water before placing them on the jars and securing them with the rings. Do not over-tighten.
- For reusable lids, follow the manufacturer’s instructions. Tattler reusable canning lids, for example, recommend boiling the seals.
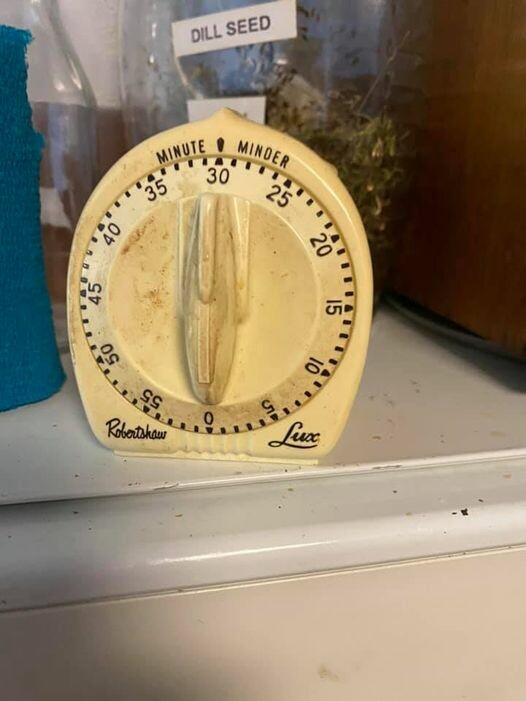
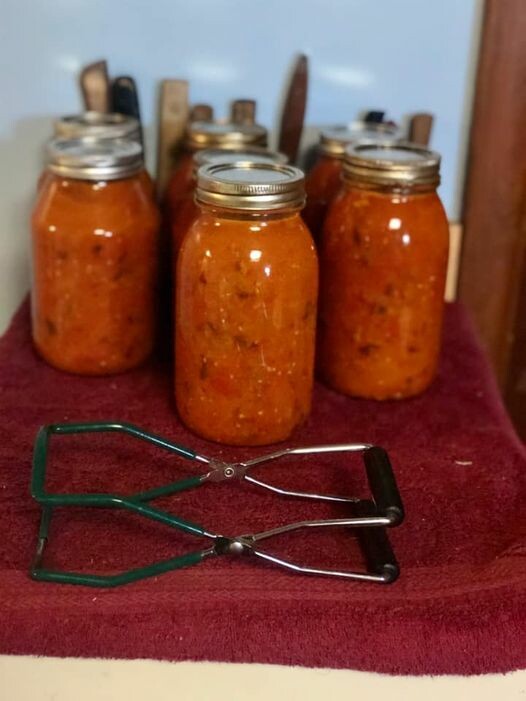
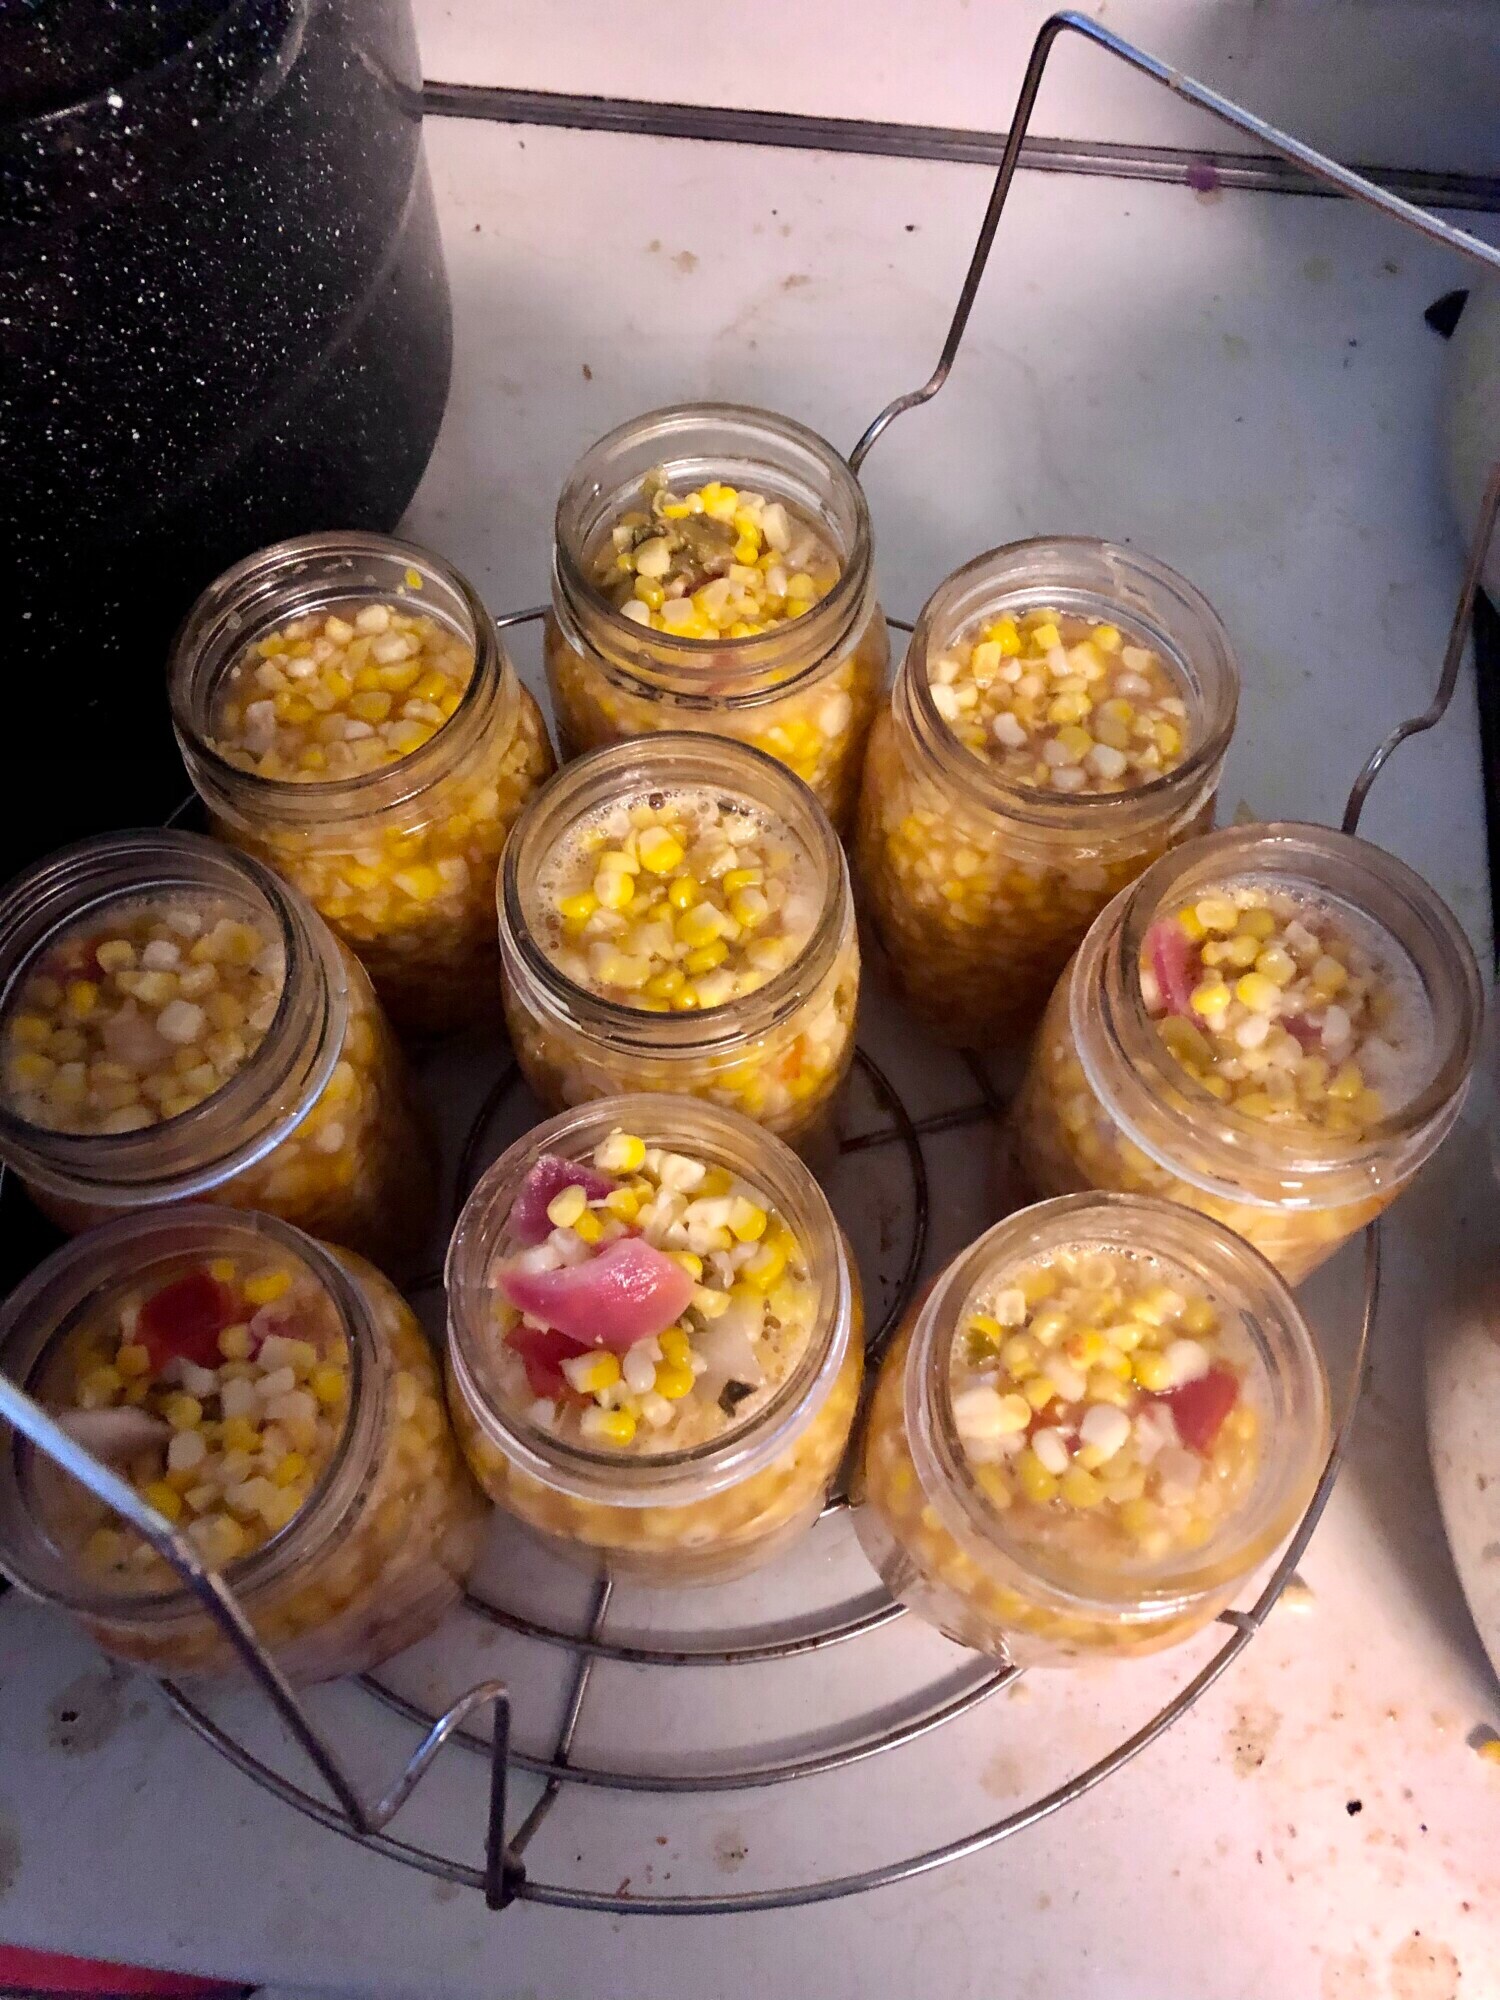
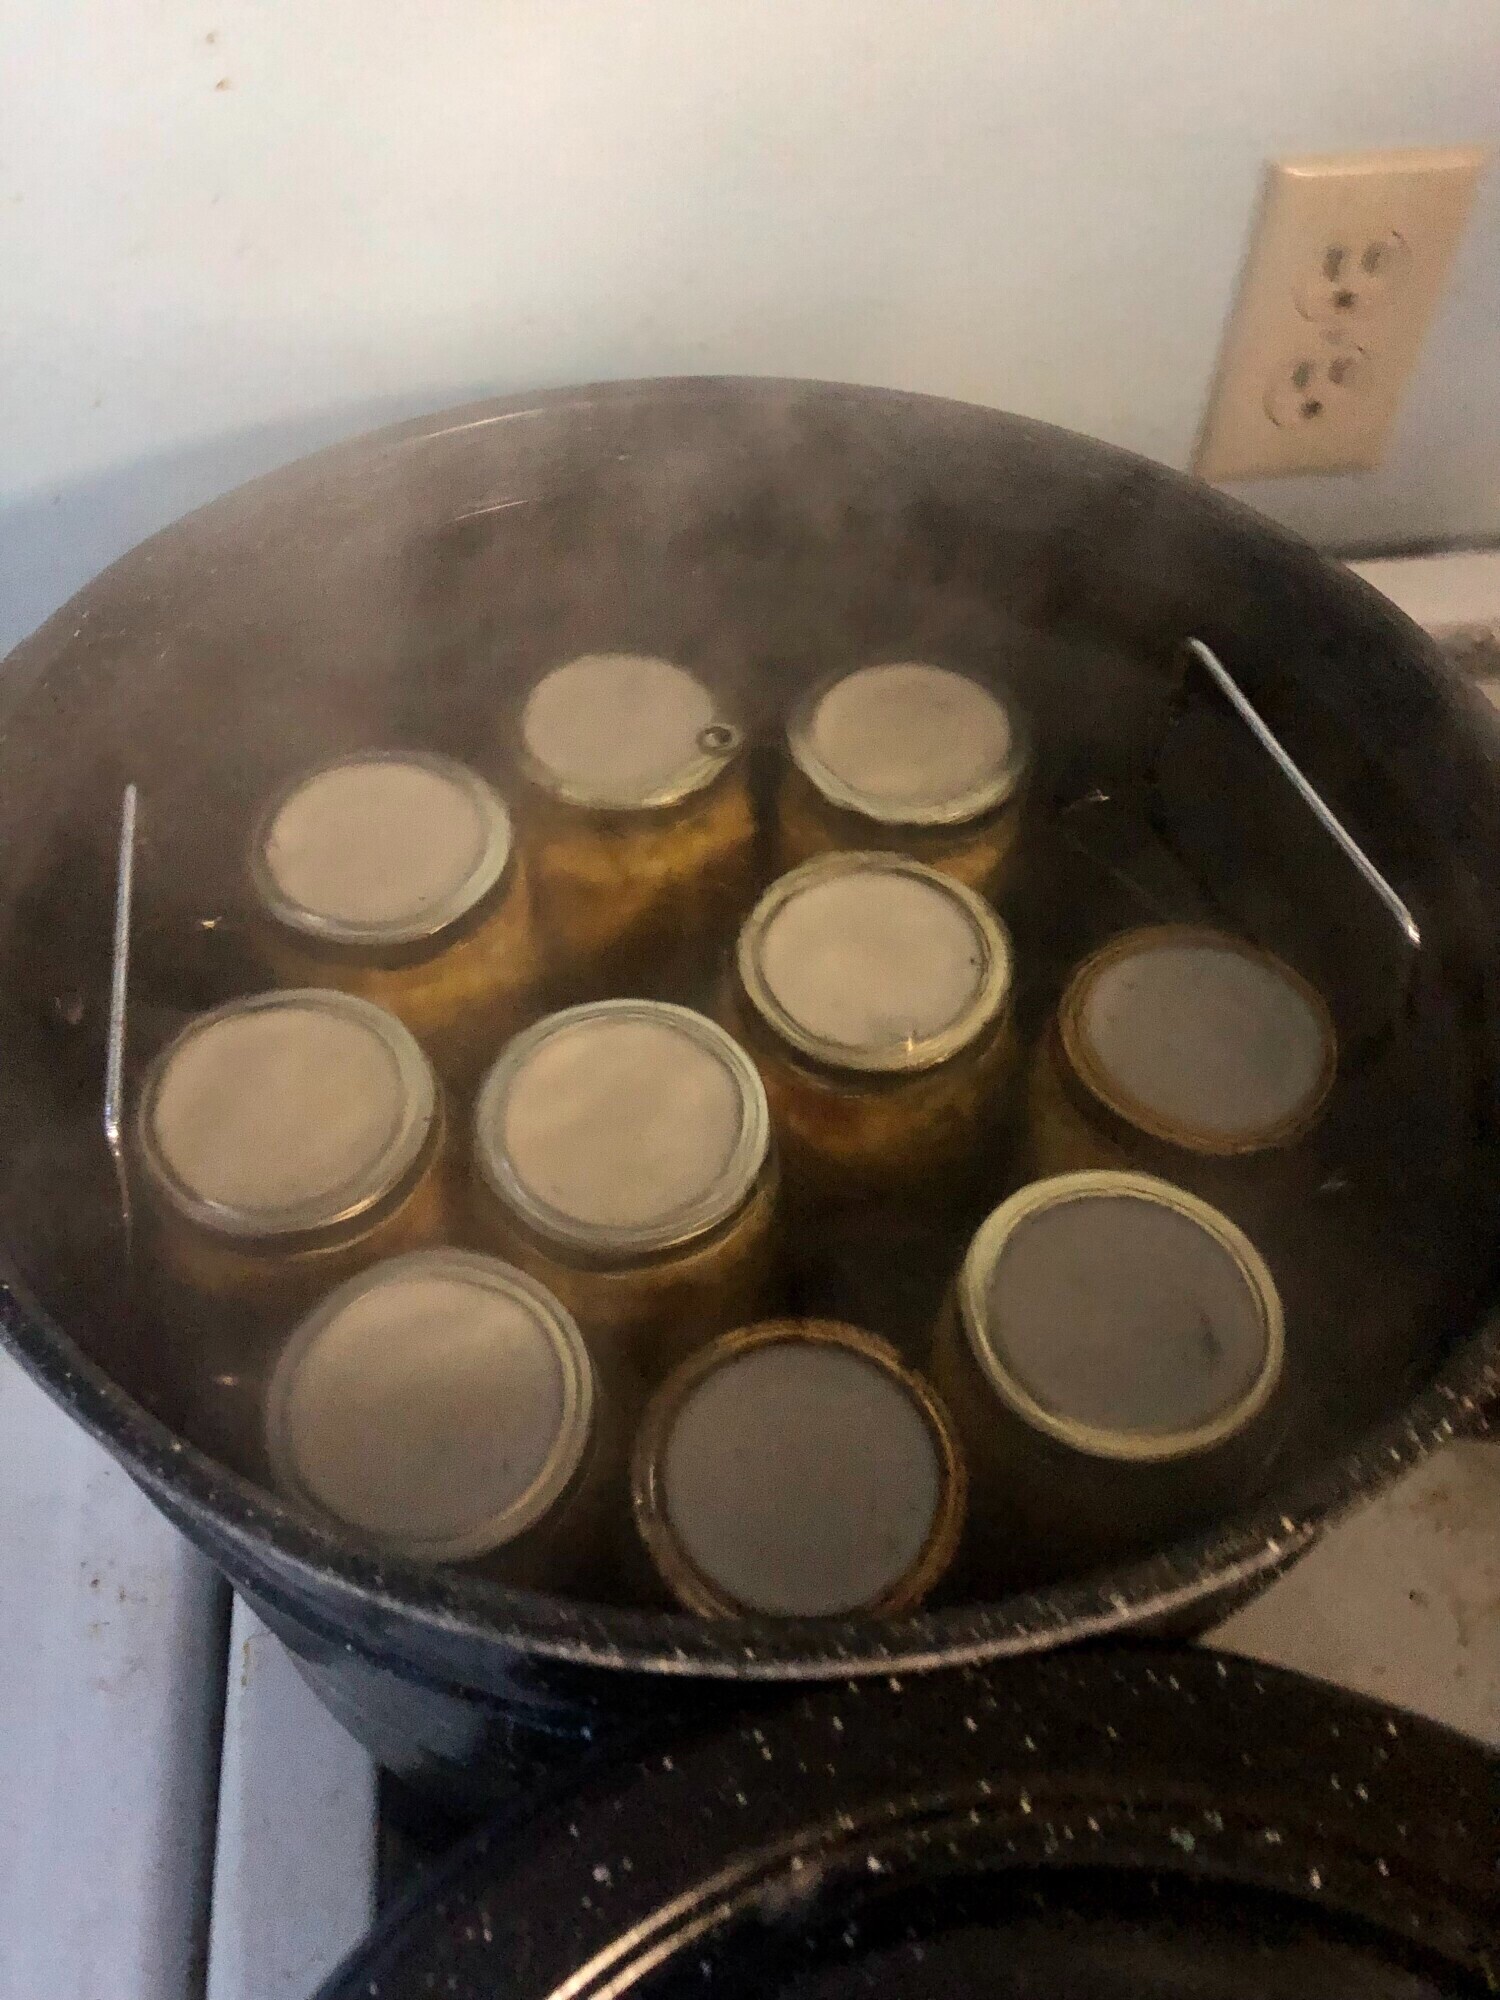
- Place jars in a hot water bath canner. Once the water is boiling, process the jars for 20 minutes.
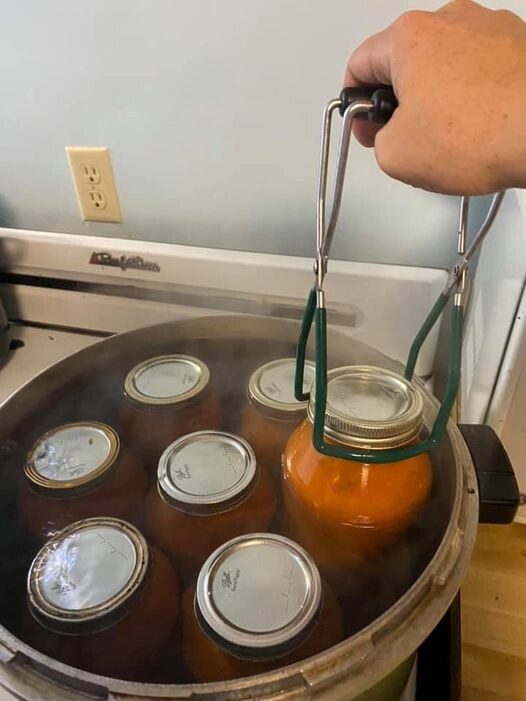
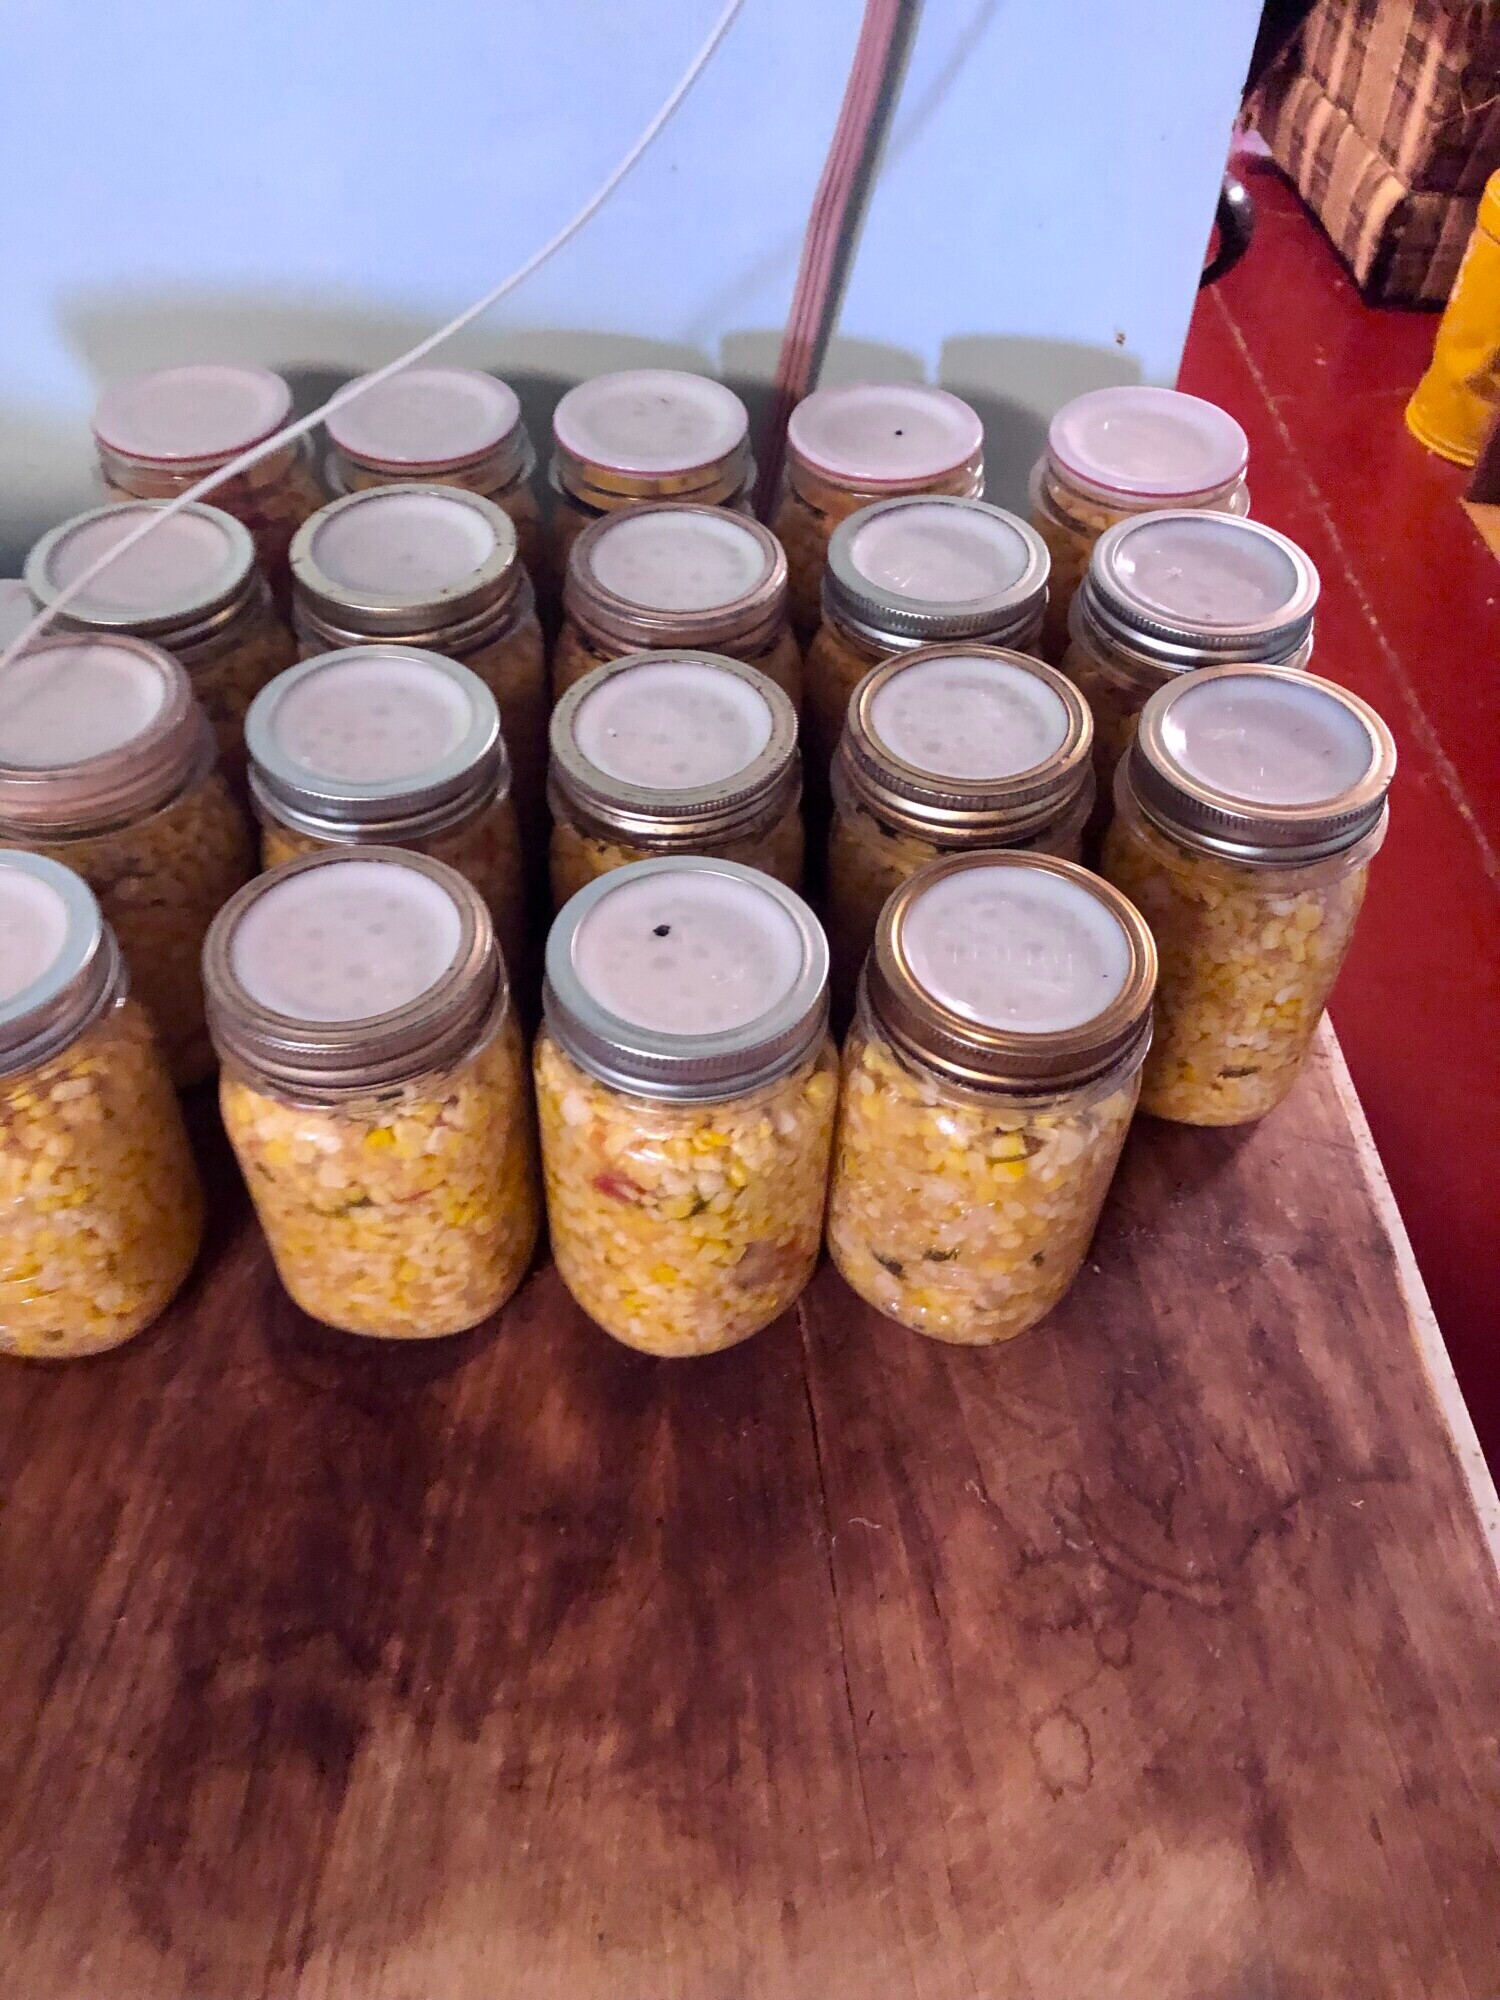
- Remove jars from the canner and allow them to cool overnight. Check the lids to ensure they are sealed.
- For one-time-use lids, the center should be concave and not pop up. For reusable lids, gently lift by the lid to test the seal.
- Use Garden, Ripe Tomatoes to ensure the best flavor.
- Sterilize Jars Properly to prevent contamination.
- Label and Date each jar for easy identification later. You will forget what is in that jar.
- Eco-Friendly: Reduce waste by reusing lids.
- Cost-Effective: Save money in the long run.
- Reliable Seals: Trusted by home canners for their durability.
Join the FREE Community
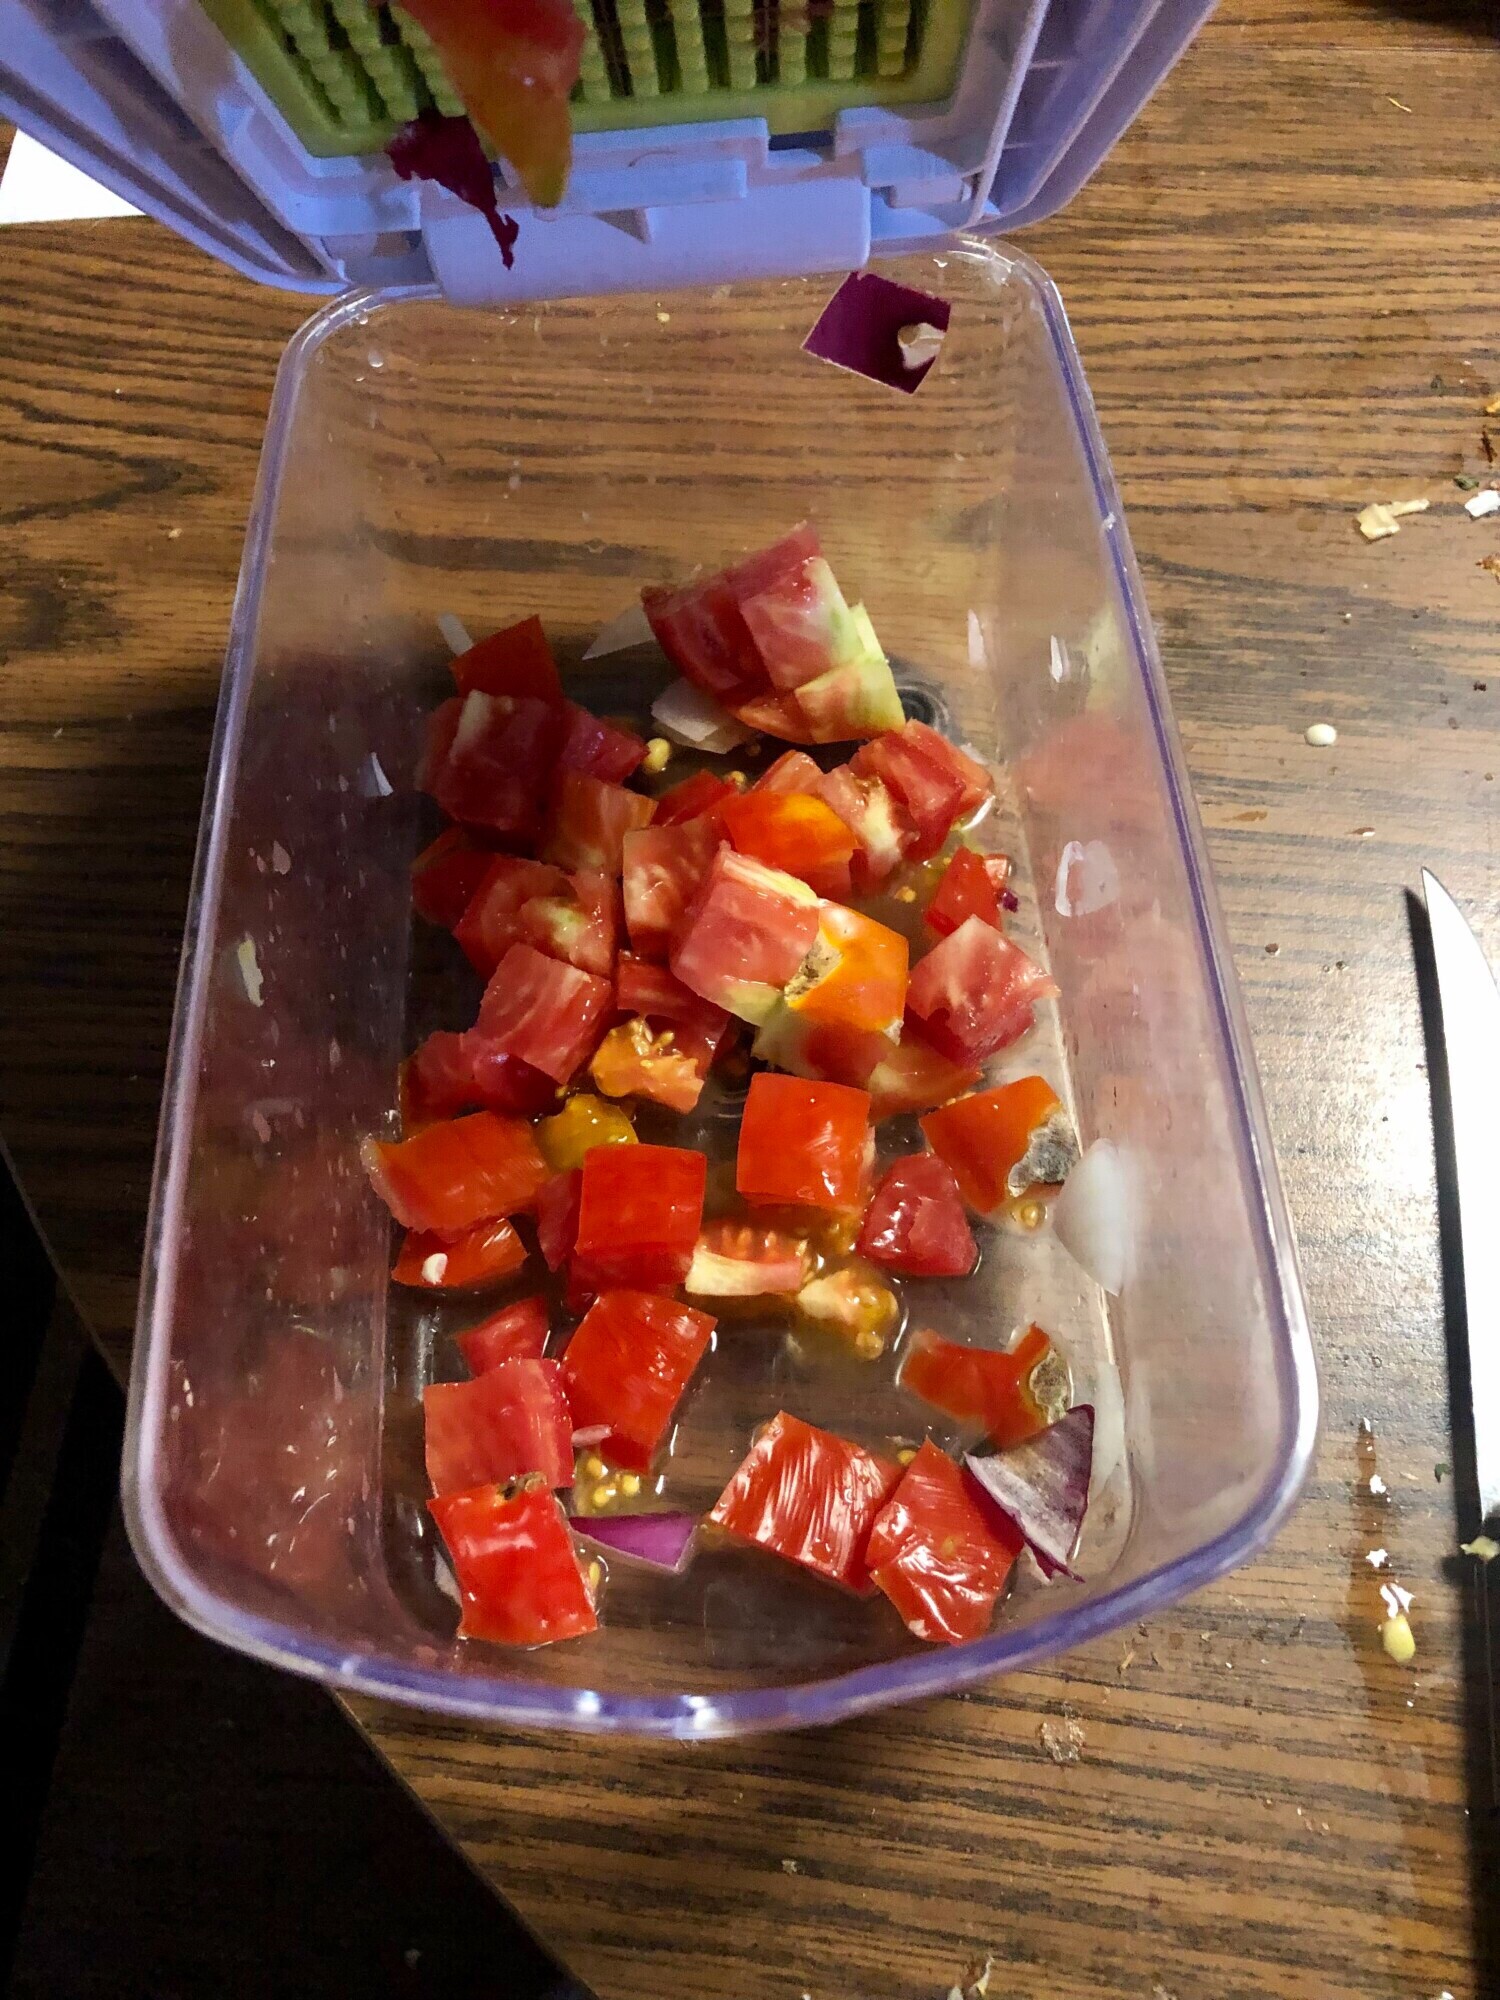
Step 2. Chop 2 pounds (approximately 2 large tomatoes) and add to the stock pot. I like to use this handy dicer I found or a food processor to make the work faster.
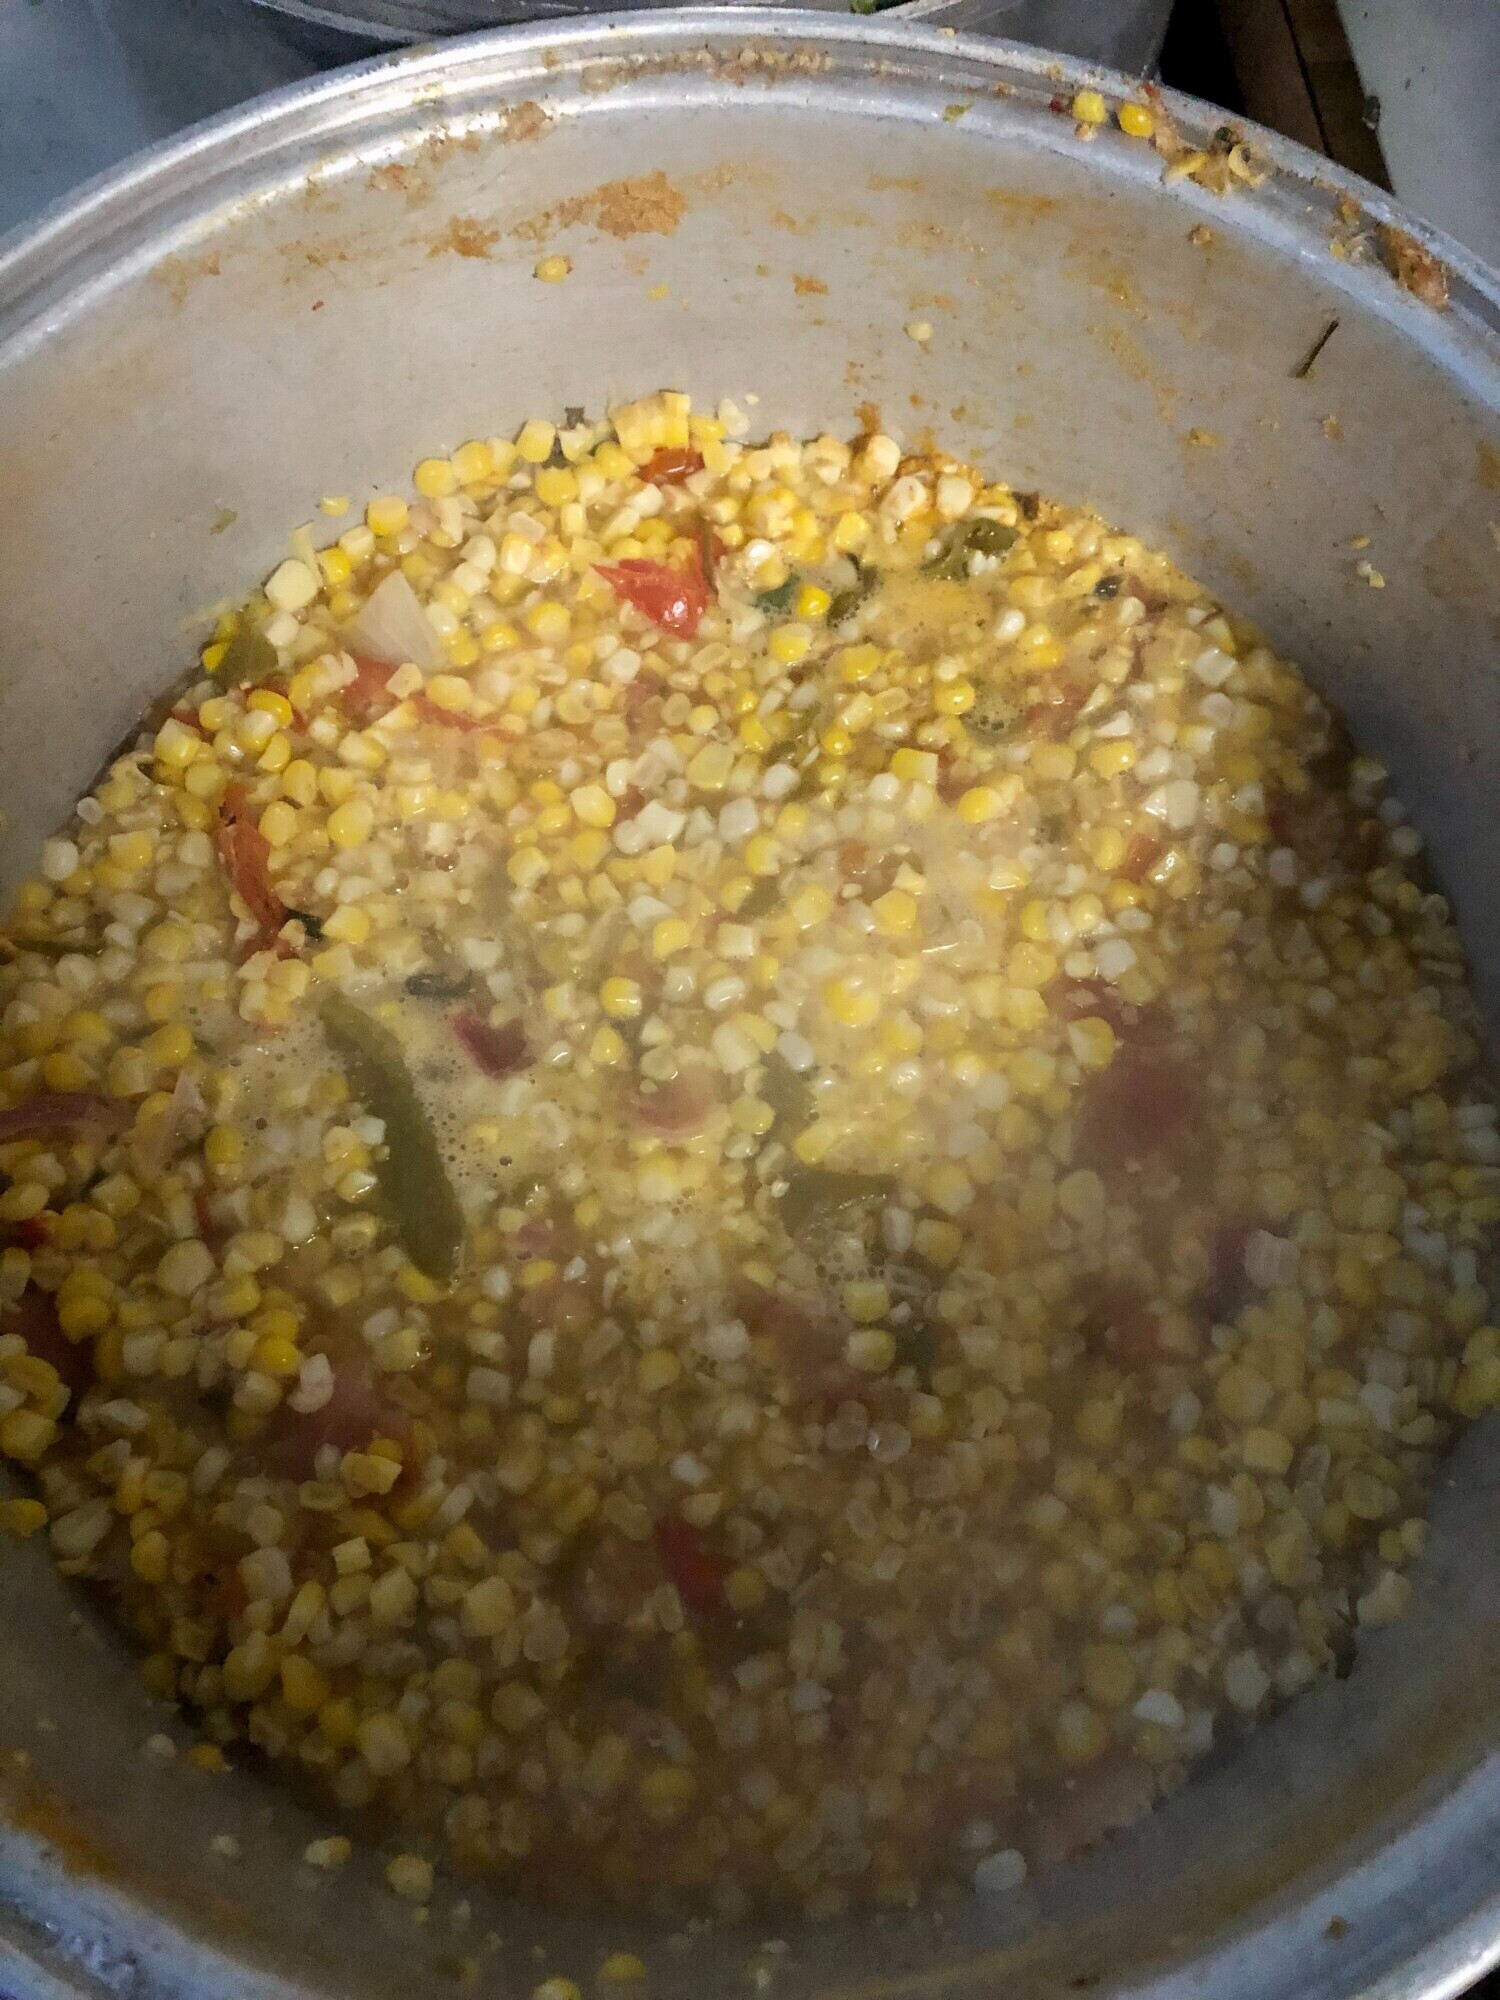
Step 5. Bring the stock pot to boil then simmer for 15 minutes.
Wanting a community to lean into? Join the FREE Courageous + Purposeful Mommas group! This community is for the Mommas, mommas to be, in the midst of raising, and kids grown, looking for tips on building your family up and providing for them through natural methods. Tips include: gardening, bulk buying, caning,/preserving, livestock, homesteading, and home remedies. Your family is precious, and this group is to help you gain the knowledge and tools to keep your family well and not reliant on outside professionals. Remedies and tips are easy and simple for the busy momma, time is precious after all, including pregnancy, birth, young kids, and illness. Trust your Momma gut again! This community offers the resources + community you need to help get started on your journey and prepare for whatever future you envision.
Click here to get the stories straight to your email:
For more on wellness tips click here:
For more on homesteading on your budget click here:
For more simple DIY updates click here: